Search This Blog!


Email

Scribble Artist Interview with Diana Beltran Herrera!

Scribble Town (ST): Watching and being with animals in their natural habitat is a privilege, especially with the growth of cities and shrinking of forests. Wings in flight is like magic in motion. When I first saw these paper sculptures by Diana Beltran Herrera I felt a fluttery draft come from the flapping wings stopped in time! To recreate life so realistically one must have a unique relationship with it.

Diana, we are all excited to know more about you!

Diana Beltran Herrera (DBH): I am from Colombia. I was a very curious girl since I remember, always trying to discover nature. My dad often took me to my grandma’s farm where I had contact with nature. I remember it made me very happy and it was peaceful, full of joy and astonishing. I guess since that, I am interested in what nature means to me, to us as humans, and also I am trying to understand how this relation started and how it is now a days.

ST: You move and travel quite a bit. What brought you from place to place?  Where are you now and what are you up to these days?

DBH: I have been traveling from one place to another, not as many as I wish but I hope I can discover more in the years that come. It has been a nice coincidence to find myself in such beautiful places in Europe, America, and see a variety and types of nature. How things are so different from one place to another or maybe how things are so similar. How nature manifests itself in such different forms and shapes and how it adapts and evolve. I am now living in south west England admiring this lovely cold and windy environment. I am studying a MA in fine arts at UWE. I am questioning myself and trying to find answers.

ST: Congratulations on getting into the Pictoplasma conference!  What will you be creating for the event?  Any sneak peaks of what to expect?

DBH: I am thinking of an installation. I have in mind a group of pelicans or maybe some fighting cocks. I have had a desire for a long time now to make a couple of pelicans probably standing on some locks. I think it will be interesting to show a bit of what I have archived throughout the years. I think this is the opportunity I was waiting for.

ST: This is your moment!  You have worked very hard for it.  When I look at ALL the animals, pictures, shapes, and collages you have created, I can see it is a result of a very passionate, imaginative, and playful person.  How do you come up with your themes for your series of paper constructed animals? Did you start out by making birds?  They all vary so much and are so lifelike!

DBH: I did start to explore paper in a tridimensional way. After that I worked a bit with sculpture and wood. I think one day my experiences just mixed up with what I had learned and I came up with some bodies of animals. And then I found the bird shape that I have been working for some 2 years now. It has been a long process of observation and hard work. Now I am happy with my latest works because they look very realistic. I am very visual so I work hard to get things done in the best way.

ST: As I was looking through your artworks I found myself really drawn to your Estudio del impacto de un movimiento en el espacio.  They are so vibrant and colorful.  You really are playing with space!


DBH: This was my early work that I had the opportunity to exhibit in Colombia. It was a study about how things form and move, and how in this movement things transform and mutate. It was an abstract work that allowed me to explore things in a basic way. This was also the beginning of the use of paper.

ST: What tools do you need for your practice?  Any special paper or techniques we should know about?

DBH: It is basically a blade, scissors, paper and glue. Everything comes from cutting and placing elements over structures that I do also in paper. That is called a tridimensional collage.

ST: Where do you find yourself feeling really inspired to create?  Is there something you do to get you into the mood to create?  When you were making the Birds of Florida would you go bird watching to see them in action?

DBH: I have been always very inspired. I remember spending hours when I was a child drawing, or making plasticine or clay figures. This is a part of me that I have done ever since I was young. I wake up to this everyday, it is like a need for me. I don’t have much of a plan really, but I sit with what I find on my table or in my studio, and I play to create compositions, to match colors, or shapes, to draw lines.

In January 2013, I went to Florida and took my camera with me, I started to follow all this animals and particular birds and takes photos of them. After I came back I received an invitation to create a group of works and I was very happy because I knew about these birds.

ST: When you were a kid did you always go to the zoo or the forest?   Have the native animals of Colombia made an impact on you?

DBH: I think it has been extremely important my background. Colombia is very diverse country and we as kids grow finding animals everywhere. I remember about going to the zoo a couple of times, but this animals never seem happy to me. I’d much rather to see the animals in the wild, it was a big surprise. I remember a lot woodpeckers and parrots. My mom allowed us to have all kind of domestic pets, I even had a cow, so yes, I have a strong connection with nature cause it was a part of me.

ST: That says it all! Your childhood friends were animals of every kind :)

DBH: I have a son who is 6 years old, his name is Simon. Since Simon was born I found motivation to teach him how to relate with nature. We found a nice way to admire and to respect. In my opinion this is something we need to teach children a lot because they need to grow strong for the future. Simon used to pick flowers, but one day when I took him out and showed him that there were lots of insects that benefit from these flowers he learned to respect them. Since then he draws everything he wants to have or everything he likes. We found in art a way to own things and collect without making any significant damage.

ST: Diana, you have taught us so much about how we can respect nature more. We must take care of each other for future generations to see the beauty on Earth! Thank you for sharing with us. Please keep us posted on your upcoming exhibitions and creations. To see more of Diana’s work, please go to her website at http://dianabeltranherrera.com. 


Print
Posted by , on January 13th, 2014 at 12:33 am. 1 Comment

Category: adults,Design,Featured,Scribble Artist Interviews,Uncategorized Labels: birds, , Colombia, Diana Beltran Herrera, ,


Kid-Friendly Mocktail Bar

Perhaps the most quintessential tradition of New Year’s Eve is the champagne toast, but what about everybody who doesn’t participate in a sip of bubbly? Whether you’re under age or prefer to abstain, you deserve a fun and fancy drink to toast with at midnight. That’s why we love a good mocktail—or cocktail without alcohol. With a well-stocked mocktail bar, you can mix and match ingredients to create tasty kid-friendly drinks.


Image via Eat Drink Pretty


In fact, we think all these fun possibilities are even more delicious and interesting that traditional bubbly. With a few basic ingredients, you can make so many combinations. Use your creativity to whip up some yummy drinks that’ll have all your guests saying, “Champagne who?”


To create well-balanced mixed drinks, you need a few key components—mainly something bubbly and something sweet. Of course, you don’t need carbonation, but it is New Years, after all. Customize any ingredients you want to make your bar more sophisticated (cucumber, black currant, fresh herbs) or childproof (orange slices, fruit punch, crazy straws). Here are the key components to creating a fabulous mocktail bar:


- A bubbly base: Ginger ale, sparkling cider, Sprite or Sierra Mist, seltzer—these clear sodas are the perfect vehicles to add a little spritz to your glass. Pick your favorite or have a few kinds available.


- Juice: Orange, cranberry, pineapple, lemonade, peach nectar… these fruity liquids add sweetness and pack the flavor punch for your mixed drink. Stock as many as you like, but a good base is usually three different options.


- Fresh fruit: Whether it’s muddled or used for garnish, fresh fruit is delicious and gives your glass a festive touch. Doesn’t it just feel fancier? Berries and citrus are usually best—raspberries, blackberries, lemons, and limes, etc—but feel free to try any other favorites.


*Another fun tip: Try freezing berries to create a tasty alternative to ice. They’ll keep drinks chilled without watering them down and look prettier, too!


- Fresh Herbs: This is optional, and perhaps for the more adventurous, but some fresh herbs can really bring your mocktails to the next level. Mint, thyme, basil, and rosemary all add deep and complex flavors to an otherwise simple drink. If you’re looking to ease your way in to adding a little green to your glass, try starting with mint.


Image via The Kitchn


These kid-friendly bar basics will ensure tons of fun drink creations. Let the little ones play mixologists and come up with their own delicious concoctions. Keep in mind you can always tailor this to your friends’ and family’s preferences. If you’d like some recipes on hand, here are a few great suggestions:


Rosemary Citrus Spritzer from The Kitchn


Rudolph’s Nose from NCADD


Cranberry Kiss from Eat Drink Pretty


Strawberry Crush from La Fuji Mama


Alcohol content certainly doesn’t have the market cornered on festivity. Upgrade your cup of soda or juice this year and make a fancy drink worthy of starting the New Year with. Cheers!


Print
Posted by , on December 31st, 2013 at 3:28 pm. No Comments

Category: adults,food art,holiday,kids Labels: , drinks, , , , , , mocktails,


Scribble Picks Pablo Picasso!

Pablo Picasso was born on October 25, 1881 in Málaga, Spain. He was the first child of Don Jose Ruiz y Blasco and Maria Picasso y Lopez. Perhaps it was because Pablo’s father was an art teacher, but from an early age he showed an interest in drawing. He was so much into art that his mother said his first words were “piz, piz”, which is short for “lapiz”, the Spanish word for pencil.

When he was nine, Picasso finished his first painting, Le picador, which shows a man on a horse at a bullfight. At first he painted very realistically, but then he started to experiment with new ways of drawing, painting, and showing his emotions.  Picasso was never that interested in regular school, but excelled in art school.  When he was 13, he was admitted to the School of Fine Arts in Barcelona, Spain and at 16, Picasso’s father and uncle decided to send him to Madrid’s Royal Academy of San Fernando.  Not surprisingly, this was Spain’s top art school!  That came to an end because Pablo was a person that needed to be free from instruction from his professors and confines of the classroom.

In 1912, Picasso began to paste paper and pieces of oilcloth to his paintings and then paint either on them or around them.  These where his first collages.  This technique is called synthetic cubism, which grew out of analytical cubism.  Synthetic cubism is a more decorative, colorful style of art.  Picasso and his friend George Braque together created and developed this genre of cubism.  Below is an example of Picasso’s work in this style.  How does Picasso play with the strong shapes and colors?  Where are the shadows?

Still Life with Mandolin and Guitar by Pablo Picasso, 1924 (oil on canvas)

Still Life with Mandolin and Guitar by Pablo Picasso, 1924 (oil on canvas)

“I paint objects as I think them, not as I see them.”
-Pablo Picasso

Picasso’s very famous work titled Three Musicians is a large painting measuring more than 2 meters wide and high.  It now lives at  the New York Museum of Modern Art.  Three Musicians is part of series painted while he was with his family in Fontaineblueau, France in the summer of 1921.

Do you think Three Musicians is painted in the style of Synthetic Cubism?

Three Musicians by Pablo Picasso, 1921

Three Musicians by Pablo Picasso, 1921

Yes, it is!  You can see that because it gives the appearance of cut paper.  What are some other reasons that makes it cubist?

“In Cubism, the subject of the artwork is transformed into a sequence of planes, lines, and arcs. Cubism has been described as an intellectual style because the artists analyzed the shapes of their subjects and reinvented them on the canvas. The viewer must reconstruct the subject and space of the work by comparing the different shapes and forms to determine what each one represents. Through this process, the viewer participates with the artist in making the artwork make sense.

Picasso paints three musicians made of flat, brightly colored, abstract shapes in a shallow, boxlike room. On the left is a clarinet player, in the middle a guitar player, and on the right a singer holding sheets of music. They are dressed as familiar figures: Pierrot, wearing a blue and white suit; Harlequinn, in an orange and yellow diamond-pattered costume; and, at right, a friar in a black robe.”  For more information, please have a look at http://www.pablopicasso.org/three-musicians.jsp

Now you try!  Go ahead and download the coloring sheet below and Scribble your own Three Musicians.  Go wild with color!

“All children are artists. The problem is how to remain an artist once he grows up.”
-Pablo Picasso

Three Musicians by Pablo Picasso

Three Musicians by Pablo Picasso


Print
Posted by , on December 30th, 2013 at 4:22 am. No Comments

Category: adults,Arts & Crafts,Design,Scribble Picks,Uncategorized Labels: , , , , Pablo Picasso, , , Synthetic Cubism


Scribble Artist Interview with Valerie C. White!

Scribble Town (ST): Looking at Valerie C. White’s textile images remind me of a journey or a diary entry because they all seem to tell a story with much history, no matter which way you look them.  Let’s see what adventures she has been on.  Valerie, where are from and what are you up to these days?

Sara and Bird by Valerie White, 2012

Sara and Bird by Valerie C. White, 2012

Valerie White (VW): I grew up in Somerset, New Jersey, and graduated from Franklin High School in 1969.  Our home was located in a rural section of Northern New Jersey.  Many days I could be found outdoors playing with clay. I discovered a natural clay deposit at our front mailbox I would try and fashion functional objects and later bake them in my Moms oven… It was then that I knew I was drawn to making Art.

These days I can be found playing in my studio with the same excitement and curiosity I had as a youngster, playing with clay.  I am currently working a piece to celebrate the life of Nelson Mandela. My dream is to see the work hang in South Africa at the end of July 2014.

ST: You felt that you were drawn to Art and you didn’t deny that feeling.  That’s wonderful!  When did you start sewing and quilting? How did you discover this medium and was there somebody that encouraged you?

Bernheim Forest, Fall 2011 by Valerie White

Bernheim Forest, Fall 2011 by Valerie C. White

VW: My Mother sewed beautiful couture garments, I was not interested in making clothing but it was her careful attention to detail and good craftsmanship that made a lasting impression. I try never to settle for less than my best even it means redoing it.

I started quilting about 20 years ago; I made mostly traditional work using patterns from other quilter’s.  Along the way to more serious and expressive work, I did crewel embroidery and fabric printing. I have always loved the feel of pulling thread through a needle this tactile experience fuels my approach to working with fabric.

Portrait of Valerie C. White, Quilt Artist & Educator

Portrait of Valerie C. White, Quilt Artist & Educator

As far as encouragement my family has always given me positive feedback regarding my work; their support sustains me when I’m feeling doubtful about my efforts.

ST: So you come from a family of makers, dreamers, and precise handcrafters.  Working with one’s hands really does give a different sense of building and constructing art.  Please tell us more about your multi-media approach to art making.  How does this approach support the message you are trying to get across with your images?

VW: My approach to the work now includes learning everything I can about a subject before I begin to design the piece; I begin each project drawing in my sketchbook before I touch the first piece of fabric. It’s there that I work out design issues and get a sense of what the finished piece will look like, although that sometimes changes. I find in making Art it’s the serendipity and the unpredictable outcomes that often produce the most interesting work.

Daucus carota Sweet Baby carrots by Valerie White, 2010

Daucus carota Sweet Baby carrots by Valerie C. White, 2010

My work is can best be described as series of layers; I begin very simply and continue to add color or remove color, adding texture to create a more complex cloth.  For me the texture added with stitch is what adds elegance.

ST: Yes, the more you bring into the mix, the more unpredictable outcomes there will be!  That’s so exciting!  Earth and nature allow for that and from what I can see on your website, http://www.valeriecwhite.com, I get the sense that these topics are a source of inspiration for you.  Your colors are so real and your shapes are very organic.

How Deep Do Your Roots Grow by Valerie C. White

How Deep Do Your Roots Grow by Valerie C. White

It seems that you practice other forms of art by the huge range of workshops you offer.  The sky is the limit for you!  When is your next workshop and how can we get involved?

VW: My course offerings are targeted towards surface design and my classes fill quickly. My next class is Using Paint sticks on fabric, February 8, 2014 in Parker Colorado. The class is posted on my website.

My other favorite form of Art expression is knitting, I love the feel of the yarn and the endless colors available.

ST: What kind of music do you like? Is there something you are listening to at the moment while you make art?

VW: I do like to listen to music when I work, and I like all kinds of music from Miles Davis to Barbara Streisand. But what I find interesting is when I’m very, engaged in working I want silence…I find the music gets in my way when I’m concentrating.  If the work calls for me to cut or measure then I need for the room to be quiet.

ST: Creativity is all around.  It comes through our ears, eyes, and all of our other senses :) Any final creative tips for our Scribblers?

VW: I would like to encourage both parents and students to find a medium to express creativity. Pick a night once a week or month and make it craft night for the family… Everyone can participate what better way to engage in good conversation and fun for the whole family.

ST: Thanks for sharing with us!  We hope to make art with you one day soon.

 Radish Row by Valerie C. White, 2009.

Radish Row by Valerie C. White, 2009.


Print
Posted by , on December 23rd, 2013 at 2:48 am. 1 Comment

Category: adults,Arts & Crafts,Design,Featured,Scribble Artist Interviews,Uncategorized Labels: Colorado, knitting, patchwork, textile, Valerie White


Gingerbread Real Estate

Did you know gingerbread houses became popular in Germany during the 1800s after Hansel and Gretel was published? That’s pretty spectacular considering that in the fairytale, the beautifully edible house is used to lure two abandoned children into a witch’s trap. One wouldn’t think that makes a great selling point for creating confectionery cottages, but it seemed to really catch on and become a Christmas tradition. After all, that witch was on to something—she knew Hansel and Gretel couldn’t resist an enchanting gingerbread house… how could we expect anyone else to?


 Sweet and Simple Gingerbread House

Image via Shopgirl


This tasty craft comes in an array of sizes, shapes, and levels of difficulty. For those who need a bit of a head start, there are kits available to help create the basic structure. Others love starting from scratch and baking their own gingerbread. Some people take gingerbread houses so seriously that they create life-size structures or participate in competitions. Whatever your approach, this is definitely a fun and delicious activity to try on your own or with the whole family.


 Pretzel Log Cabins

Image via Worth Pinning


 Rice Crispy Cottages

Image via Land O Lakes


And don’t feel limited to gingerbread! Some folks have started branching out and using other delicious treats to build their homes’ foundations. Try pretzel rods to create the effect of wooden logs. Or use rice crispy treats to suggest stones or stucco. These houses can be as elaborate or simple as you want. Don’t underestimate the beauty of simple gingerbread and white frosting. For those who like a little more opulence, grab colorful candies and make a full-on edible estate! Piped icing, nuts, cereal, and candy canes also make excellent decorating supplies.


 Gingerbread Mansion

Image via Cake Central


What gingerbread house approach is your favorite? Clean and simple, cozy and colorful, or grand and luxurious?


Print
Posted by , on December 21st, 2013 at 10:52 pm. No Comments

Category: adults,Arts & Crafts,food art,holiday,kids Labels: , , , gingerbread, gingerbread houses, , ,


Scribble Artist Interview with Alonsa Guevara!

Scribble Town (ST): Painter Alonsa Guevara shares with Scribble Town how her images are realized and constructed!
ad
Alonsa Guevara (AG): I am a Chilean artist, born in Rancagua in 1986. I am a lover of light, colors, and shapes. I started oil painting when I was 12 years old, but I have been drawing since I can remember. My paintings are in between two worlds; Fantastical and Believable, always full of details and brightness that supports my obsession with details, realism and mimesis.
New Kitten Oil on canvas 24 x 72 inch

New Kitten Oil on canvas 24 x 72 inch by Alonsa Guevara

ST: You have a lot going on right now! Where are you and what are you up to these days?
ad
AG:
I just returned from a trip to Chile. I always try to visit my family, friends and talented students that I used to teach when we had a studio there. But now I am back, finishing the 3rd semester of the MFA Program at the New York Academy of Art. I am preparing my paper research and making the last modifications to my paintings for them to be shown to the critique committee of my school. Here are a couple of
pictures from a workshop I did with kids.  I taught them my paper technique last year in Greenwich, CT.


3 Most beautiful girls, final work of the kids with a little of my hand

3 Most beautiful girls, final work of the kids with a little help from my hand

 
ST: Andi, aka Chief Scribbler, met you at The Metropolitan Museum of Art in NYC as you were painting away.  What were you painting?  Is this something you often do?  Your copy looks like the real deal!
ad
Alonsa Guevara painting at The Metropolitan Museum of Art in NYC

Alonsa Guevara painting at The Metropolitan Museum of Art in NYC

AG: I was painting “Madame Jacques–Louis Leblanc” which is a painting by Jean–Auguste–Dominique Ingres. I will be there, at the MET, a few more Thursdays between noon and 3:00 pm in Gallery 801 finishing it. This is my second copy at the MET, the first one was “Bashi-Bazouk” by Jean-Léon Gérôme, that is in the Gallery 805. Both paintings will be displayed in the New York Academy of Art at the end of December.
ad

ST: How do you come up with your themes for your series of paintings? They all vary so much!  From Self-portraits and Mythology to Landscapes.  Do you choose your medium according to the topic?
ad
AG: Painting is what I most love to do, so anything I could paint would make me happy. However female archetypes and stereotypes always call my attention, so I use advertising codes and allude to mythological characters. The purpose is to generate a reflection about the role of women used to sell a product and turn it into an imperative character in the painting. I work with different materials depending of the topic and how I want the work to look, from oil painting, to acrylic, color pencil, hot glue, magazine papers, wire, wax, card board, tape and more.
 
ST: You name and you use it.  I think it’s a sign that you have the ability to be creative with any material and medium- a true artist!  As I was looking through your artworks I found myself really drawn to your Paper Women / Mujeres de Papel paintings.  Please tell us a bit about this series; idea, materials, size.


Pointing Them - Oil on canvas - 40 x 30 inch- 2013

Pointing Them – Oil on canvas – 40 x 30 inch- 2013

AG: I am currently working with the stereotypes that mark women’s life. I am using a lot of images of thin elite models that were cut off from a magazine, wrinkled and then I create a maquette with either paper images, toys or other elements, which works as my own still-life model. I use this model to paint from life and change the scale to a bigger world in my paintings (usually the paintings are not smaller than 30 x 40 inches).

Speening wheel-oil on canvas-49 diameter-2013

Speening wheel-oil on canvas-49 diameter-2013

ST: Where do you find yourself feeling really inspired to create?  Is there something you do to get yourself in the mood to paint?

AG: No, not really. I think real artist are always inspired and ready to work. Of course if I am in my studio by myself it would be easier to concentrate, but I think sometimes we need to create art out of our comfort area so then we can challenge ourselves. Besides, we are real people, we make some bad art sometimes and that is ok, we are here to learn. Painting at the MET in front of hundreds of people, has helped me make that fear disappear. 


Round Mirror - Oil on wood panel - 11 x 20 inch- 2012

Round Mirror – Oil on wood panel – 11 x 20 inch- 2012

ST: I see what you mean because in a way you are performing at the Met. Well, we do wear our different hats depending on the situation and environment. Who are some artists that you like? Any art exhibitions that we should check out right now?

AG: I like a variety of artists. Now I am getting more familiar with American ones, so I would recommend to see Julie Heffernan exhibition at the P.P.O.W gallery, also Will Cotton at Pace Prints, and if you have more time you should go check out the Philadelphia Museum of Art. I just went there the last month and is magnificent! They have a lot of activities for kids.
 
ST: The family program at those museums are wonderful! Any last minute artistic tips for Scribblers?

AG: I think we have to encourage kids from very little to create new things. Creating opens their imagination, creativity and soul. To express their ideas will help them to communicate with the world and with themselves. I, as an artist that one day was a kid and as a teacher, believe that parents must be patient and must make the time to join their kids in artistic adventures.
ad
If someone is interested see on live, having painting lessons or ask me for a commissioned paintings, please do not hesitate in emailing me at:


ST:
Patience and passion is a recipe for a creative life!  Thank you Alonsa for being with us in Scribble Town!

Green

Green by Alonsa Guevara


Print
Posted by , on December 9th, 2013 at 3:18 pm. No Comments

Category: adults,Arts & Crafts,Featured,Scribble Artist Interviews,Uncategorized Labels: Alonsa Guevara, Chile, Oil Painting,


Snow Times Two

Winter may not technically arrive until December 21st, but once November ends, it seems that everybody begins embracing the holiday season. One of the biggest and most recognizable symbols of winter is undoubtedly snow. Now, no matter where you live or what the weather is like, you can bring a little snowfall inside your home with two different, fun decorating techniques.


For both of these tutorials, you’ll need a sewing needle and thread or fishing wire. The first technique also requires white paper and scissors. For the second, you’ll need cotton balls and glue (optional).

 Paper Snowflakes

Image via Paper & Stitch


The first technique is a classic with a twist. Paper snowflakes have been around forever, but usually you see them taped to windows. For a crafty update, try turning those paper flakes into a curtain of snow by hanging them in strands. First thing’s first: grab some white paper and cut out circles in different sizes. Trace things like plates, bowls, and cups for variation.  Then fold each circle and cut shapes to create snowflakes. You’ll need a lot of snowflakes, so feel free to get the whole family involved! Once you have your snowflakes, take a needle and thread and sew them together in strands; just a few stitches per flake will do it. Try varying the sizes for a more haphazard look. Once each strand is the length of your window, hang it from a curtain rod (or tape it to the head of the window) until the window’s width is covered. The resulting effect: falling snowflakes. Gorgeous, right?

 Cotton Ball SnowflakesImage via


Next up—a real oldie, but a goodie:  the cotton ball technique! This uses the same concept as above, but requires zero scissor work. Cut a piece of thread the length of your window and knot one end and thread the other. Separate your cotton balls into different sizes; puff some up so they look bigger, break others into equal parts and roll them so they’re smaller. String the cotton balls onto your thread, alternating the sizes for a natural look. Underneath each ball as it’s threaded, either make a knot or dab a tiny bit of glue so it stays in place. Be sure to leave space between each cotton ball so it resembles falling snow. Once one thread is full, hang it up, start your next thread, and repeat until the width of the window is covered. Again, the whole family can get in on the fun and the decorating will go that much faster!


Both of these delightful DIYs bring a little winter magic inside your home. Which technique are you excited to try?


Print
Posted by , on December 5th, 2013 at 12:05 am. No Comments

Category: adults,Arts & Crafts,Design,holiday,kids,Paper Art Labels: cotton balls, , , , , holiday decoration, , , paper snowflakes, snow, snowflakes, , winter crafts, winter wonderland


Scribble Picks Leonardo da Vinci!

Leonardo da Vinci, “Self-portrait”, 1512 (?)

Leonardo da Vinci, “Self-portrait”, 1512 (?)

Leonardo da Vinci, born in 1452, came from the small village of Vinci in Italy has given the world many of the inventions that we still use today.  When his father Piero saw signs of artistic genius in his son he sent him to study with the artist Verrocchio in Florence, a city in the Tuscany region of Italy.  In addition to art he also learned sculpture and engineering. Soon he surpassed the artistic abilities of his teacher. At the young age of 20 he was accepted into the painters’ guild in Florence. In his lifetime, Leonardo has shown to be a painter, a musician, a sculptor, an architect, and a scientific investigator.

Leonardo used a painting technique called sfumato, which he described as “without lines or borders”.  This technique allows the subject of the painting to be blended into the background so that it becomes one with the background.  For example, if two objects were side by side, Leonardo would blur the line between them. We can see sfumato used in the Mona Lisa. Do you see it too?  Imagine how you think Mona Lisa would look if he hadn’t of used the sfumato technique.

Leonardo Da Vinci, "Mona Lisa", 1503–1517

Leonardo da Vinci, “Mona Lisa”, 1503–1517

Leonardo also kept a diary of all his sketches and thoughts.  He was a true observer and researched those observations with topics such as human anatomy.  Way beyond his time, Leonardo had ideas for inventions that would not be developed for hundreds of years.  To name a few, he had an idea for a flying machine, a propeller, and for weapons of war.  To fit his contribution of an architect, he designed and built bridges, canals and locks to carry water and move ships.

The possibilities are endless and it seems that Leonardo was hungry for an even bigger challenge.  Perhaps he had dreams of flying so he designed and constructed a helicopter.  Unfortunately, the helicopter wouldn’t take off and the glider he built injured one of his pupils who was trying to fly it.  Not wanting anymore disasters he quit trying to build the flying machines he was designing.  Nonetheless, it is believed that Leonardo is the one who initiated this great invention and look at what can be flown in the air these days!

A design for a flying machine, (c. 1488) Institut de France, Paris

A design for a flying machine, (c. 1488) Institut de France, Paris

Did you know that Leonard was ambidextrous, meaning he could write with both his right and left hands?  I wonder what he was trying to achieve when he wrote his notes backwards with his left hand.  Well, it sure is obvious that Leonardo had a playful approach to life.  Perhaps we can try and do the same.  Scribblers, let’s learn from Leonardo and don’t forget to dream, experiment, and play with our thoughts and idea because if we don’t try we will know know.

Let’s start with Mona Lisa! Go ahead and download Scribble Town’s Mona Lisa (below).  You can color her in or try the sfumato technique.  If anything else comes to mind, just go for it!  We’d love to see your own Mona Lisa so please email a picture of your artwork to .  You are on your way to becoming a great inventor and artist!

Scribble your own Mona Lisa

Scribble your own Mona Lisa

For more fun facts about Leonardo da Vinci please go to:
http://www.da-vinci-inventions.com/
http://www.monalisamania.com/kidsmain.htm
http://www.sciencekids.co.nz/sciencefacts/scientists/leonardodavinci.html


Print
Posted by , on December 2nd, 2013 at 1:50 pm. No Comments

Category: adults,Arts & Crafts,Design,Featured,kids,Scribble Picks,Uncategorized Labels: Florence, Flying Machines, Helicopter, Inventions, Italy, Leonardo Da Vinci, Mona Lisa


Bottle Cap Pies

If Thanksgiving had an official dessert, it would definitely be pie. Pumpkin, apple, pecan, and so on… most Thanksgiving dessert courses involve more than one option. As you work on finishing up those leftovers, pay homage to this humble hero of the dessert table with this fun bottle cap pie craft. These pint-size pies are easy to make, versatile to display, and best of all… zero calories!


Bottle Cap Pies Image via


To get started, you have a few different options with materials to use. No matter what, you’ll need bottle caps to serve as the pie tins. As far as filling, you can use polymer clay, beads, felt, paint, glue, or anything else you think will work! Just as there’s an infinite variety of pies, you have many choices in how to create these mini versions.


Felt and Bottle Cap Pies Image Whimsy Love


Start by creating your crust. Press down tan colored clay or glue in felt, then trim the edges. Teeny tiny beads work perfectly as a berry filling (blue for blueberry, red for cherry, etc). If you don’t have beads, you can roll out your own with clay. Using clay is also great if you want to customize shapes for peaches or pecans. For a more solid filling, such as custard or pumpkin pie, use one larger piece of clay. Finally, add some lattice detailing by cutting very thin strips of felt, or again using clay, and any other details you’d like, such as whipped cream or a garnish.


Clay and Bottle Cap Pies Image via


There are a ton of possibilities, so have fun creating your own crafty recipes. These little desserts make adorable magnets, ornaments, or napkin ring decorations (just glue on magnets, rings, or ribbon to the backs), perfect dollhouse accessories, or just a sweet adornment anywhere you choose!


What was your favorite pie or dessert at this year’s Thanksgiving? What’s your all-time favorite?


Print
Posted by , on November 30th, 2013 at 7:28 pm. No Comments

Category: adults,Arts & Crafts,holiday,kids Labels: , , bottle caps, Clay, , holiday dessert, , pie, polymer clay, ,


Scribble Artist Interview with Stephanie Chambers!

Stephanie Chambers is a 2003 graduate of the Rhode Island School of Design. She lives in New York, where she is originally from and works out of a studio space in Brooklyn. Her work has been shown at galleries in New York, San Francisco, Providence, Canada, Finland, Taiwan and Germany.

Bear by Sephanie Chambers

Bear by Sephanie Chambers

Scribble Town (ST): Stephanie, your new body of work, Emerging from Darkness, is so beautiful!  Your theme with animals continue, but this series have a sense of ‘light at the end of the tunnel’ for me.

If I Stay Still I'll be Ok by Stephanie Chambers

If I Stay Still I’ll be Ok by Stephanie Chambers

Stephanie Chambers (SC): The body of work is about emerging from darkness and trying to always look toward the light. I used woodland animals in the forest at night to showcase this.

ST: How does this series connect to your other themes such as Overgrown and your Bird series.  What is something in your artwork that you are trying to figure out?

SC: I work with animals a lot as symbols in a narrative setting. I think a lot about how dense a forest is or how much life is in the ocean. I live in New York City, so I experience a different kind of saturation with people, cars and buildings. The paintings are how I imagine nature would look through an urban lens.

Caterpillar by Stephanie Chambers

Caterpillar by Stephanie Chambers

ST: Urban lens explains a lot! Where you were living in Finland isn’t urban at all and especially for a city person such as yourself.  What was it like living in Finland for you?  Did you go to the forest to observe the birds and then paint them for your Finland Birds series?  I see the influence of Finnish patterns and textiles in your paintings.

SC: I loved living in Finland! It was such a beautiful place. I was in the country next to a lake and beautiful birch woods at the Arteles Creative Center. Every day I rode a bicycle in a new direction looking for birds. I photographed them and also sat and observed them. The textiles were inspired from trips to vintage shops there.

ST: The country is lined with second-hand markets, which are like windows into somebody’s attic full of treasures. Did Finnish culture have an effect on your creations as well? How was this process different than your New York Birds series?

Elephant Commission by Stephanie Chambers

Elephant Commission by Stephanie Chambers

SC: The culture of Finland and Scandinavia is so visually considered. People think of it as sparse sometimes, but each piece is deeply considered. Being in that culture made me think more about my intentions in what elements I include in a painting. The NY Birds series was inspired from a love of birds in NY, but since I grew up with those birds it was hard for me to see the uniqueness of the NY landscape until I studied birds elsewhere.

ST: What other kind of artwork and mediums do you like to do and use?

SC: I love to make patterns and any kind of flying animal. My favorite mediums are pencils, wax/oil and acrylic paint.

ST: How did your creativity start to grow?  As a kid were you making art too?

SC: My parents were so supportive of me making art. My mom is an artist, so we always had time lots of time to paint and draw. I used to make my own superheroes and comic books. I also drew a newspaper daily and left it outside my parents, sister and brother’s bedroom doors, wrapped in a rubberband each morning.

Triangle Crab by Stephanie Chambers

Triangle Crab by Stephanie Chambers

ST: It’s so wonderful to have a family that nurtures your imagination to grow. In your case, you probably were as encouraging to your Mom as she was to your creativity.  What is something you’ve recently seen or heard that has triggered a splash of inspiration?

SC: The autumn in NY has been so beautiful this year. I went upstate to the Hudson Valley recently and felt so inspired by all of the color in nature. The city seemed so gray when I returned.

ST: Concrete just can’t compare to living leaves.  What are you up to now?  What is a day like with Stephanie Chambers like?

SC: Right now I’m getting ready for a solo show in Taipei, Taiwan at the Sonnentor Art Space next Spring. I’m finalizing the concept for the show and trying to find inspiration outdoors. I draw and paint every day and I just finished a series of Winter birds for Buy Some Damn Art, which launches on Tuesday.

ST: Please keep us posted on your show!  Lastly, any advice for our Scribblers?

SC: Tips would be to remember to always have fun with what you’re making. Art should be something to enjoy doing!

ST: Thank you for taking the time to share with us, Stephanie.  Scribblers have a look at http://stephaniechambers.com to view more of Stephanie Chambers’ artwork.

Two Foxes by Stephanie Chambers

Two Foxes by Stephanie Chambers

Twin Crabs by Stephanie Chambers

Twin Crabs by Stephanie Chambers


Print
Posted by , on November 24th, 2013 at 10:43 pm. 1 Comment

Category: adults,Arts & Crafts,Design,Featured,Scribble Artist Interviews,Uncategorized Labels: animals, Paintings, , Stephanie Chambers


Thanksgivikkah Menorah

As you’ve probably heard, this year’s first night of Hanukkah falls right on Thanksgiving. This is an incredibly rare overlap in the Hebrew and Gregorian calendar that will only happen once in a lifetime. In fact, double holiday has unofficially been dubbed Thanksgivikkuh!


For those celebrating both holidays, it can be a lot to prepare for at once. As you get ready for Thanksgiving next week, don’t forget about Hanukkah!


To start things off, why not try making a recycled cardboard menorah?

 Cardboard MenorahImage via Chiro Mommy


You’ll need eight toilet paper tubes and one paper towel tube, paint, glue, decorating materials (stickers, glitter, whatever you want), and yellow tissue paper.


First, paint all of your cardboard tubes. Keep in mind that the taller one will serve as the shamash in the middle (if it’s a little too tall, trim it with scissors). You can paint them traditional Hanukkah colors (blue and white), Thanksgiving colors (brown, red, orange, yellow), a combination, or any colors you desire! Once the paint is dry, attach the tubes together with glue. Glue four tubes on one side of the shamash (paper towel roll) and four on the other. Finally, add decorations to your menorah!

  Wrapped Cardboard Menorah

Image via Making Friends

(Great alternative to paint: cover the tubes in wrapping paper or magazine pages.)


On the first night of Hanukkah, or the only night of Thanksgivikkah, display your creation proudly and use yellow tissue paper to create flames for the shamash and first candle. Add a tissue paper flame to a new candle each night of the Festival of Lights.


 Recycled Menorah

Image via Dim Sum, Bagels, and Crawfish


Are you excited for Thanksgiving and Hanukkah to overlap? What fun ways can you think of to commemorate this unique occurrence?


Print


Scribble Artist Interview with Pamela Smart!

Scribble Town (ST): With us today on the Scribble Blog is Pamela Smart, creator of the Color Me coloring books.  They have been so popular that a fourth edition in the series is soon to be out!  Pamela, where are you and what are you up to these days?  I’m sure very busy with your Color Me #4.


Color Me Your Way by Pamela Smart

Color Me Your Way by Pamela Smart

Pamela Smart (PS): I live in Caldwell, Idaho outside Boise.  I am originally from the Hollywood area of California.  I have started Color Me #4 and my goal is to have it available by the beginning of summer.

ST: Great! The new book will be in time for us to take Color Me #4 on our summer holidays.  How do you come up with your themes for each book? Where do you find yourself feeling really inspired to create?


Colored by a 6 year old boy

Colored by a 6 year old boy

PS:  The themes for each book are spontaneous with many suggestions from the fans on Facebook.  I do make a list of basic ideas and choose as I go.  I know God is with me and I am inspired by His creation.  Ideas pop in my head as I go.  You might call them elaborate doodles!

ST:
Inspiration is everywhere!  And it’s obvious that you breath creativity, but what encouraged you to make these books more public and accessible to everybody?

PS:  I prayed for an idea to help my husband out.  His work slowed down in construction due to the condition of the economy. I originally was going to make an ABC book with completed drawings colored in.  I used to sell completed colored works and black and white like the ones you see in the coloring books in my late teens and early 20′s in shows and on the beach in Santa Barbara.  When I started the book, I realized a coloring book would be even more fun for people to join in and complete the artwork their way!

ST:
Giving somebody the freedom to create with their own personal touch is such a beautiful gift.  What has been your favorite part about this project?  I think for me, it’s seeing how everybody fills the pages in their own unique way.  I even surprise myself!

Color Me My Way fans

Color Me My Way fans

PS: My favorite part in this adventure is finding out how the books help people and seeing them enjoy the coloring in their own way.  has been filled with shares and interaction from all ages bridging the gap that electronics and games have produced.  I have received all kinds of letters of thanks for bringing families together at the table and the therapy it provides for all kinds of conditions from Alzheimers to cancer to depression and anxiety and more.

ST:
You are very much appreciated and it shows :)   Before your Color Me Your Way project, what other kind of creativity did you do?  Any favorite tools you like to use when making art?

PS:
 I love drawing detail with very fine technical pens and I love to bead necklaces and bracelets which I have sold in the past.  My favorite is drawing with pen and ink of which a high school art teacher introduced me to.

Smart Black by Pamela Smart. "The cat is one of my pictures I drew a long time ago. I draw surrealism and realism as well."

Smart Black by Pamela Smart. “The cat is one of my pictures I drew a long time ago. I draw surrealism and realism as well.”

ST: Wow I feel like I can touch your cat and feel how soft it’s fur is. Who are some artists that you like?

PS:
I have always loved MC Escher.  I like some of Dali’s work and the great old painters of the past like Renoir and Monet.  Escher was so creative with the metamorphic ideas of things turning into things.  I love that!  Dali had many paintings with hidden pictures and optical illusions.  More fun for sure!  I do like surrealism.  Even my old Highlight magazines were fun when there were hidden pictures to find.

Colorful Peacock

Colorful Peacock

ST: Hidden pictures is such a great exercise because it makes you see things differently. Any tips for our Scribblers?

PS:
One of the things I like to pass on to the audience is discover the talents within and don’t be critical of yourself.  Enjoy what you do and know that we are all different like a fingerprint.  I know these coloring books have been a vehicle to bring that out.  We can have similar ideas, but not exactly the same.  Art is a way to express that more easily, but I believe in whatever you do, you have a gift that is different and unique to bring more color to whatever it is! :)

ST: Thank you so much Pamela for being with us! To see more of Pamela’s artwork and to get your own Color Me Your Way books please go to http://www.colormeyourway.com. Color it Your way!

Dinosaur was colored by an 11 yr. old boy

Dinosaur was colored by an 11 yr. old boy


Print
Posted by , on November 18th, 2013 at 1:25 pm. No Comments

Category: adults,Arts & Crafts,Design,Featured,Scribble Artist Interviews,Uncategorized Labels: Color Me, Color Me Your Way, Coloring Books, Pamela Smart


Turkey Take 2!

Let’s keep the Thanksgiving momentum going with another fun turkey craft! If you missed yesterday’s variation, take a look here. Today’s turkey gets a beautiful, natural twist by using dried autumn leaves. It’s the perfect way to celebrate both the holiday and the season!


You’ll need leaves (dried and flattened), cardboard or brown cardstock, glue, and crayons. If you’d like to make some substitutions (synthetic leaves, googly eyes, construction paper, markers), go right ahead!

Leaf Turkey Image via Baby Center

 There are several ways you can approach this project, depending on your desired final product, so feel free to put your own stamp on it. Cut out a brown cardboard or cardstock circle for the turkey’s body. Then cut out a smaller circle to use as the head and glue it to the body. If you’re mounting this to a piece of paper, glue the body to your paper and leave a little space unglued at the top for leaves. Start arranging your leaves by sliding then behind the turkey’s body (in the unglued space) and gluing them down.

  Leaf TurkeyImage via My Creative Stirrings

 If you’d prefer to leave your turkey freestanding, just glue the leaves to the back of its body. Finally, add some facial features to your turkey’s head—cut out leaves to make a beak and waddle and use crayon or marker to draw its eyes.

 Leaf TurkeyImage via

 So cute, right? And it not only celebrates Thanksgiving, but really honors this beautiful time of year. Make sure to hang your turkey somewhere special as Thanksgiving approaches! What other Thanksgiving crafts are you looking forward to trying?


Print
Posted by , on November 15th, 2013 at 12:15 am. No Comments

Category: Arts & Crafts,holiday,kids,Paper Art Labels: , , , , , , , leaves, ,


Teamwork Turkey

Thanksgiving is coming up in just about two weeks. Are you looking forward to it? This holiday combines a few of my favorite things—food, appreciating the little (and big) things, and family. That last one is particularly special because it’s probably what I’m most thankful for. That makes Thanksgiving the perfect time to try a craft that involves the whole family!


A traced-hand turkey craft is simple, colorful, and can include everyone! You’ll need scissors, glue, and either construction paper or cardstock in pretty fall colors (red, orange, yellow, green, brown, and dark brown).


Start by tracing each family member’s hand on a different colored piece of paper. You can use members of your household, or if you have relatives over, include them too! Grandparents, aunts, uncles, cousins… the more the merrier! Cut each handprint out and arrange them as feathers. You can do this by color or size—one option is to order them largest to smallest so you can see each hand.


For the body, cut out a brown circle; for the neck and head, you can cut out a bowling pin shape, or skip the neck and just cut another circle for the head if you’d prefer. Once everything is glued in order (head onto body, body onto feathers), you can add facial details—cut out a paper beak and waddle and use a marker or pen to create eyes.


Paper Hand TurkeyImage via Pounds 4 Pennies


  Paper Hand TurkeysImage via Mom to 2 Posh Lil Divas


 Rainbow Paper Hand TurkeyImage via Happy Home Fairy


And there is your teamwork turkey! Display it as is or mount it to a piece of paper and frame it. What a great way for the whole family to start celebrating Thanksgiving! What are you planning for the holiday?


Print
Posted by , on November 13th, 2013 at 11:25 pm. 1 Comment

Category: adults,Arts & Crafts,holiday,kids,Paper Art Labels: , crafts for the family, family craft, , , , , ,


Scribble Artist Interview with Sarah Rosado!

Girl with Her Eyes Closed by Sarah Rosado

Girl with Her Eyes Closed by Sarah Rosado

Scribble Town (ST): Look closer and you’ll see an unconventional yet familiar material we see everywhere. Yup! Sarah Rosado makes art from dirt. I think that should spark intrigue immediately. At least it did for me!

Sarah Rosado (SR): I’m Sarah Rosado, a New York based illustrator and photographer. I love anything that has to do with Art and am always challenging myself in creating different styles of art form. I love variety and as such you will find a reflection of that in my art work, from fashion illustrations to thought provoking photographic images.

ST: I have never seen dirt used in such a way!  How did you come up with this idea? How has it developed to what it is now?  I’m sure it’s been quite the adventure!

SR: I wanted to do something different, something challenging. I had seen other artists do art with food and other objects but I had never seen art with dirt. That’s where the idea came from. I have close to 100 pieces and yes, it has been an adventure.

ST: I like your usage of mixed materials such as the hair in the Long-Haired Horse and the bubble in Bubble Gum Girl.  How do you come up with the subject for your pictures?  You’ve documented them in such a seamless way.

Long Haired Horse by Sarah Rosado

Long Haired Horse by Sarah Rosado

SR: The subject of my work could be something that I have seen in the park, street or internet that interests me enough to create something about it.  However, most of my work is an inspiration of my own feelings and thoughts. The process involves tossing a pile of dirt on the table and carefully shaping it into the selected object.  I then add real life accessories for realism.  Once done the piece is documented by taking a photo of it.  Although it seems easy it takes a lot of practice and having the artistic skill to draw is helpful in maximizing the output of the image.

ST: Real life accessories to natural materials makes for a great combination! What other kind of artwork do you do or tools do you use?

SR: Mainly my work involves photography, illustrations, graphic arts and cartoons.  I use several programs such as Paint-shop, Makeup Pilot and other software.

Up Up and Away by Sarah Rosado

Up Up and Away by Sarah Rosado

ST: I wonder how your creativity started to grow?  I can imagine you playing in the sandbox making pictures in the sand. As a kid were you making art too?

SR: As early as five years I began to show an interest in Art.  I remember doodling all kinds of shapes, sketches and drawings on anything I got my hands on. My grade school teacher was one of the first ones to notice that I had potential so she enlisted me in an Art contest and I won 2nd place. Also, my beloved uncle, an artist himself and a big inspiration to me spent a lot of time advising and offering tips and techniques on improving my drawings.

ST: You can’t escape making art because you were born to make it! What is something you’ve recently seen or heard that has triggered a splash of inspiration?

King Kong Empire State Building by Sarah Rosado

King Kong Empire State Building by Sarah Rosado

SR: The other day I came across the work of a mom, Queenie Liao, who creates amazing scenes around her sleeping child. I was taken aback by her work. It’s very creative.  She may have been one to trigger a splash of inspiration for my next project however, it would be, of course, completely different.

ST: We don’t have to look too far because inspiration is usually right in front of us. What are you up to now? What’s your day like?

SR: Currently, I’m in the early stages of creating a new project.  Hopefully, it would be as successful as my “Dirty Little Secrets” series.  A regular day with me would probably be spent going to the park, shopping, maybe a movie or just staying home cooking and watching my favorite shows and browsing the internet.

ST: Your day sound so playful and creative! Any tips for Scribblers?

SR: To the parents and teachers I would say to be on the lookout.  It is at an early age that a child begins to show an interest or a potential to become more than just a scribbler. If that is found I advise that they encourage, support and assist them every step of the way.

ST: And we’ll be on the look out for more great art from you, Sarah! Thanks so much for sharing with us. Scribblers, check out Sarah Rosado’s artwork at www.sr-artwork.com.

Eagle Spreading His Wing by Sarah Rosado

Eagle Spreading His Wing by Sarah Rosado


Print
Posted by , on November 11th, 2013 at 1:19 pm. No Comments

Category: adults,Arts & Crafts,Design,Featured,Scribble Artist Interviews,Uncategorized Labels: Dirt, Dirty Little Secrets, , , photography, Sarah Rosado


Colored Pencil Jewelry

Colored pencils aren’t just for drawing anymore! In fact, they make some pretty adorable jewelry. Showcase your love of art and color with these fun colored pencil pieces. Usually, colored pencils are used to create something pretty, but here the pencils get to take center stage. By cutting them into beads, you can make bright and unique necklaces, bracelets, brooches, and earrings.


To make the beads, you will need some basic tools: a junior hacksaw, fine sandpaper, a drill and small drill bit. Then of course you’ll need colored pencils and thread. For specific directions and necessary materials, check out Kate’s fabulous tutorial on Design Mom.


Grown-ups will definitely need to help prepare the beads (there’s a bit of sawing, sanding, and drilling involved), but kids will love stringing the beads and creating their own jewelry. It’s also a great way to play with color; pick a specific scheme, build a pattern, or make a rainbow!

 Colored Pencil Jewelry

Image (and tutorial) via Design Mom

 Colored Pencil Jewelry

Images via Etsy  one and two


This would make a great activity for a birthday party, class project, or just a rainy day.  It would also be a perfect homemade gift (the holidays are right around the corner… hint, hint). Artists, art enthusiasts, crafters, teachers, and kids would all appreciate this simple, yet impressive jewelry!


What other art inspired jewelry would you create?


Print
Posted by , on November 6th, 2013 at 1:09 am. No Comments

Category: adults,Arts & Crafts,classroom,kids Labels: , , , colored pencils, , ,


Scribble Artist Interview with Francisco Bustamante!

Scribble Town (ST): To quote Joanna Greenhill, “Francisco Bustamante is both the subject and object of his work.” He pulls you in with his colors, lines, and unspeakable movement found in his works. The intrigue has been initiated and we are so lucky to have Francisco with us to talk with him more about him and his artwork.  Francisco, you work with a number of materials like oils, gold leaf, stoneware, etc. How do you choose which medium to use?  Is there one in particular that you feel most comfortable with?

Francisco Bustamente

Francisco Bustamente


Francisco Bustamente (FB):
Throughout the years that I have been working in art, my main medium has been oil paint. I feel very comfortable with this medium since has made me grow as an artist the last 20 years. Still, I have always been working in other mediums as well, and lately, thanks to close friend from Chile who works in ceramics I discovered stoneware. And that has been a big and nice surprise since in this case I am actually building forms with my hands.

Francisco Bustamente

Francisco Bustamente

ST: Your paintings are often gilded with gold. The shininess and vibrant colors brings an air of decadence and respect. What is your fascination with using gold leaf?  I wonder what it represents for you.

FB: I was born in Lima, Peru and in Peru gold leaf is present in many things. To start with, Peru was the territory of the Inca’s civilization, which among other things used gold in many ceremonial activities. They considered the Sun as their God, and the work with gold was one of their sacred materials. Later, with the arrival of Spanish people, they continued using gold in their religious activities (Catholic Church). These are some of the reasons which I think moved me to work with this material.

Francisco Bustamente

Francisco Bustamente

ST: Knowing the relation of gold to your personal history now makes the paintings even more meaningful! What are you currently working on?  You seem to be a very symbolic person. How have the themes of your artwork evolved?

FB: At the moment I am preparing an exhibition for Washington DC. and in mid-November I will show paintings at the Pinta Art Fair NY, which will take place in 82 Mercer street from Nov 15th to Nov 17th.

I am currently trying to achieve in paintings the idea of working with light and shadows and how each one relates to the other. My work has evolved throughout the years influenced by family reasons from one side, like for example the death of my parents at some point and how to translate those emotions into an actual body of work…..which by the way is very helpful. Nowadays my main concern is to get into the depth of the act of painting.  It is some kind of a personal fight, a good fight, that keeps me engaged with work.

ST: Art is a wonderful way to process conflict, joy and all the emotions that happen in between and beyond. On your website, when I look at your works, it is almost like I am reading your diary. Your artwork is obviously so personal. When and how did your creativity start to grow?

FB: Ever since I can remember as a child I was always drawing and painting with crayons or enjoying looking at nature. I guess I was a rather shy and silent kid, mainly because my head was somewhere else, sort of dreaming…….as many children, I guess.

Francisco Bustamente

Francisco Bustamente

I would always look forward to art classes in school, whereas on the other hand, I would suffer a lot whenever math or geometry were around :) ……I was never good at it. In my family there are only lawyers so I did not know that I could actually give all my time to art. I started studying architecture for one year, but still, it was far from what I wanted. Fortunately my parents support my idea of getting into art school. From then on, I was all smiles.

ST: You just did what you had to do! And that was to make art. Who are some inspirational artists for you?

FB: I completely admire the work of the Spanish artists Diego Velazques and Jose de Rivera for their amazing talent in the use of light and shadow in their paintings. On the other hand I love the work of Lucien Freud and Francis Bacon for the powerful results in their paintings. Finally I cannot avoid mentioning Rothko. His paintings are as well so powerful, and the sizes he uses make the viewer get deep into his paintings.

Francisco Bustamente

Francisco Bustamente

ST: Those artists also are interested in your currents themes so I can really see the connection. What is an exercise or activity you do when you start making art in your studio?

FB: The first feeling I have when I am in front of a white canvas is being absolutely terrified. I don’t understand how I am going to be able to get the idea I have in my head into an actual painting. Fortunately, something strange and magical happens and work later happens. The first part of the actual work is to cover the canvas with gold leaf, which basically is the light that has already arrived to the canvas. only then I start the process of oil paint.

ST: I love how your work is built off of light! It reminds me that light carries all colors of the rainbow. Any other advice for our Scribblers?

FB: My tip or advice to anyone who is involved in the work of art, no matter what medium they are using is: JUST DO IT!  Do not let insecurities get into you or your work. There is no failure here, just the fun of creating and if at some point you feel there are errors, think twice, because errors can lead you to a deeper and freerer result in your art piece.

ST: Thank you Francisco! We can’t wait to see more of your artwork and have fun at your upcoming art exhibitions!

Francisco Bustamente

Francisco Bustamente


Print
Posted by , on November 3rd, 2013 at 10:44 pm. 1 Comment

Category: adults,Design,Featured,Scribble Artist Interviews,Uncategorized Labels: Francisco Bustamente, Gold Leaf, Lima, Paintings, Peru


Spooky Pretzels

One of my favorite snack foods has got to be the pretzel. It’s crunchy and salty, it’s tasty on its own, and it pairs well with both sweet and savory ingredients. You can dip it in chocolate or cheese and both will be delicious (just not at the same time… unless you’re really adventurous).


Sometimes it’s fun to pick a favorite snack and then create variations on a theme with it. Here are a few different ideas for bringing Halloween flair to some yummy pretzel treats.


These pumpkin pretzels from Make Bake Celebrate are too cute for words! Chocolate-covered and dipped in sprinkles, they’re the perfect salty-sweet combination. Add leaves and stems with some piped chocolate for added detail.

 Chocolate Pumpkin Pretzels

Photo via Make Bake Celebrate


You can never have enough chocolate covered pretzels! For a fun variation on the same flavors, you must try these Frankenstein pretzels! Grab pretzel rods, green melting chocolate, black gel icing, chocolate kisses, and shredded coconut. With some simple assembly, you can make the perfect creepy cuties to compliment your bright pumpkin pretzels.

 Chocolate Pretzel Frankensteins

Photo via Simply Designing with Ashley


Finally, let’s finish up with a savory pretzel dish. With some pretzel sticks, string cheese, and chives for garnish, you can create the most adorable witches’ brooms. Cut up the string cheese to act as bristles, stick in a pretzel to be the handle, and tie on a chive if you like (you can skip this last part if you’re not a chive fan).

 Pretzel and Cheese Brooms

Photo via


Yum! These make perfect Halloween treats, but are also great festive snacks for any time—be it in the classroom, after school, or for a sleepover.


Which of these variations is your favorite? Do you have any other spooky snack ideas?


Print


Scribble Artist Interview with David Devries!

Scribble Town (ST): David Devries describes himself as a, “Dad, husband, illustrator, teacher—not much of a fine artist. Though I do gallery shows I am at heart an illustrator.” After you read this Scribble interview with David, you’ll know he’s a a great artist and a lot more than that! Plus he’s got great stories to match!

David Devries, The Monster Engine master!

David Devries, The Monster Engine master!

David Devries (DD): I once did a show and my work didn’t fit the space so I offered to redo it smaller.  The shocked gallery owners said they would never ask me to alter my art— but that is what illustrators do. What’s the job? What are the parameters? When do you need it by? In terms of personal philosophy I bend the rules when I can, break them when necessary—it is why I love kids—they are all outlaws at heart.

For my commercial work, I specialize in high impact, high drama images. I also publish a book called The Monster Engine that answers the question, “What would a child’s drawing look like if painted by a professional illustrator?” The results are startling transformations of flat childlike imagery into fully painted illustrations. This technique came from my illustration work, primarily in the entertainment field– specifically the comic book, advertising and video game markets. Some of my clients include Dreamworks SKG, Lucasfilm, Universal Studios, Sega, The 3DO company, Seed Studio, ASCAP, Tor Books and Marvel and DC Comics among others. Currently, I teach at FIT and Syracuse University as well as lecturing nationwide on The Monster Engine and my illustrations.

In addition to being well versed in traditional paintings skills I’m also an accomplished Photoshop artist and was featured in Best Practice: The Pros on Adobe Photoshop by Toni Toland from Del Mar Learning (Copyright 2007).

ST: David, the list goes on!  I think it’s wonderful that you are truly collaborating with children in the creative process of these Monster Engine artworks. In what capacity can individuals and schools get involved?

Blue Boy by David Devries

Blue Boy by David Devries

DD: There are two ways.  One—I can come to your school and either do a presentation or a workshop.  Presentations are defined here and workshops are either a 3-day or 10 week class of guided storytelling and drawing lessons designed to pique the imagination and bolster burgeoning artistic skills.

The other way doesn’t involve my presence at your school.  An an elementary school art teacher can team up with a junior or senior high school art teacher to produce collaborative art between schools.  Below are two examples.


4th Graders Use Funny Movie Maker Pro to Bring Objects to Life: An Approach Explored by Many Artists (Part 2) from Suzanne Tiedemann on Vimeo.

I only ask that the teachers, if inspired by my project, please give me credit for the inspiration in their descriptions and press releases.  Also a link to my site would be very much appreciated.  I have worked a long time to build this brand and any credit helps support all that sacrifice and hard work.


B.A. Kindergarten and XRoads So. Middle School Monster Engine Project from Suzanne Tiedemann on Vimeo.

ST: How did The Monster Engine begin?  I’m sure it’s been quite the adventure!

DD: It has been an adventure.  The idea came to me about 15 years ago and has gone on to big places—recently it was covered on CBS news this morning.

From my website…”It began at the Jersey Shore in 1998, where my niece Jessica often filled my sketchbook with doodles. While I stared at them, I wondered if color, texture and shading could be applied for a 3D effect. As a painter, I made cartoons look three dimensional every day for the likes of Marvel and DC comics, so why couldn’t I apply those same techniques to a kid’s drawing? That was it… no research, no years of toil, just the curiosity of seeing Jessica’s drawings come to life.”

Minot Beaver by David Devries

Minot Beaver by David Devries

ST: I wonder how it has developed to what it is now.

DD: After my niece had inspired me with her drawing in my sketchpad I thought that it would be cool to explore this idea but I just kind of forgot about it. A few months later, I was teaching at a comic book art school. The problem I faced there was that the students didn’t appreciate abstract expressionism. I explained that abstract art is needed especially in comic book work to visualize unseen worlds–places and creatures that can’t be referenced with a photograph. They didn’t care and said they still hated abstract expressionism. That’s when it hit me. If I could render a kids drawing–really detail it–then maybe they would see that abstract painting is useful.  After all, when I do a Monster Engine painting, I am rendering it with abstract thinking and planning. It worked—some of them got the lesson. After that, I wanted to see how a series would work so I did a few Monster Engine paintings of superheroes as Christmas gifts for my nieces and nephews. The series looked great and then the book idea hatched.

Purple Monkey by David Devries

Purple Monkey by David Devries

I chose monsters because I love them and so do kids. That was in 1998 and it took 6 more years to paint all the art,  do the interviews, photograph the kids and design the book. I self published a beautiful 48 page hardcover with a dust jacket in 2005 and it became an Internet hit. During the first month of his web site’s launch, the site got 17 million hits and was linked to over 12,000 blogs. A month later I was flown to Japan and appeared on Nippon TV, where I showed his work to an astonished audience.

The Monster Engine by David Devries

The Monster Engine by David Devries

The website is internationally known with book buyers from all over the world since it opened in 2005. The Monster Engine has also been featured in many magazines and newspapers including Rue Morgue magazine alongside Lemony Snicket and Clive Barker.  In 2006 The Monster Engine was given an honorable mention for “Outstanding Book of the Year” at the Independent Publishers Book Awards in the category of “Most Original Concept.” I’ve been approached numerous times for TV show possibilities and but nothing has gone the distance yet.

ST: Wow! You’ve really accomplished so much! Aside from illustrating, what other kind of artwork do you do?  I have a feeling your talent goes beyond the pencil.

DD: I do concept art for games, advertising work, comic book covers and, teaching. Go to www.davedevries.com to see some stuff.

Some history:

In 2011 I finished up an expansive project called BlueShift, which is an eco-thriller, high-octane adventure – lots of action, lots of global warming. We did two issues of the graphic novel – it’s on MTV Geek I’m proud of that project.

I’m super proud though of winning a National Endowment for the Arts award last spring.  I was flown to Texas on the grant to work with underprivileged kids in Lubbock.  Watch it below or click here.


Out & About Bozeman, Dave DeVries from Lubbock ISD on Vimeo.

In addition, The Monster Engine was featured in its first commercial job.  Microsoft and Windows Phone sponsored a contest to get kids drawings in response to the following questions:

Jessica, age 4: “My Windows Phone can make kitty monsters happy with music! The kitty monster gets real real happy and dances around flowers.”

Jessica, age 4: “My Windows Phone can make kitty monsters happy with music! The kitty monster gets real real happy and dances around flowers.”

“What do you wish your Windows Phone could do? How do you imagine yourself, your family, and others using your phone?” We received tons of amazing artwork from children all around the world, each one a whimsical creation that showed how Windows Phone could help unlock a child’s imagination. It was a blast and was featured on their website—you can see them here.

Lastly, just visiting a lot of schools and doing my Monster presentations—and having a blast doing so. Here’s a video of one of them.

I use both digital and traditional paints.  For painting I use mixed media painting techniques… acrylic, airbrush and colored pencil to make the images you see.

ST: How did your creativity start to grow?  As a kid were you making art too?  If you have any stories or people that were there to encourage you, please share.

DD: I never thought of myself as an artist then. I drew pictures but no more than any other child my age. When I turned six, though, my older brother, Jack, asked me to come into his room. At the time he was the family artist—I thought I could never be as good as him. He told me to lock the door to his room. I did so. He then told me that the only way I could leave his room was if I drew from a photograph.  The idea of trying to draw from a photo was impossible to me—after all he did that–but after much crying and pleading I sat down and drew. After I was finished, the picture was so good that I drew 3 more. So, when Jack finally opened the door to his room I was a changed person—I was an artist.

As for painting—I had to wait till I was 21 years old. I lived in terror of painting till I was almost out of college—can you believe that?

ST: Baby steps…at least you took a chance and got over your fear of painting ;)   Please tell us about My Spooky Heart. I wonder what your son thinks of it now.

My Spooky Heart by David Devries

My Spooky Heart by David Devries

DD: You know I never showed it to him.  It was done for a charity and was sold shortly after his birth.  He never saw the original and I have never shown a picture of it to him. I’m waiting till he’s a bit older to appreciate it. He’s six and I would eventually  love to have a conversation with him about it and that time in our lives.

ST: What are you up to now?  We’d love to know and join you, if possible!

DD: Just school presentations and Monster Engine commissions for now.  Thinking of doing a graphic novel story based upon The Monster Engine—still a ways off but worth the journey.

ST: Go for it!  The time is now!  Any advice for our Scribblers, you’d like to share?

DD: Just always remember that your kid is always right when it comes to their work.  You cannot impose logic upon their creations. This will go a long way to making them confident in their own beliefs and decision-making skills.  No matter what they become as adults, they learn that their ideas have substance in those early years.  Just think about it—in no other school subject do kids have the right to tell a teacher that they are wrong.  Math, Science, English, or History are all quantifiable subjects. If a kid says 2+2 = 3 they are wrong no matter how they justify it.  Art isn’t quantifiable— it teaches them to rely upon their instincts.

–fun to watch–wish I worked this fast.

ST: Thanks David for that!  Please check our www.themonsterengine.com & www.davedevries.com to see more of David Devries one-of-a-kind artwork!


Print


Scribble Artist Interview with Gary Swift!

Gary Swift

Gary Swift

Scribble Town (ST): Gary Swift is an artist that creates, as he says, “From Apps’ to Adshells I never know what I’ll be doing next!” Let’s see what Gary is up to these days.

Gary Swift (GS): I am based in Yorkshire, England from my studio, and with the aid of modern technology, I work with clients all over the world. The internet means timezones are not a concern. Over two decades of supplying illustration work I enjoy it as much today as I ever did.

ST: How did Gary Swift Studios come about?  I can imagine the adventure has been an exciting one!

GS: I began when I left high school at the age of 16, I always wanted to be an illustrator, for as long as I could remember. I started advertising my work from day one, and luckily
things grew and grew, now I work for clients in all locations, from Brazil to Birmingham.

ST: When creating a logo for a company what is your creative process?  How do you come up with or do research for a theme that so succinctly shows what this company or cartoon is about?

Image for iPad by Gary Swift

Image for iPad by Gary Swift

GS: I always begin by listening to the client and understanding their vision for their business, whether they are multi-nationals or start-ups, they are all vital in importance and would receive the same creative effort. I remember illustrating a young Tiger Woods’ childrens book some years ago. The process remains the same for all clients, but obviously some customers are easier to work with than others ;)

ST: When and how did you get started animating and illustrating?  Do you make other kinds of art too?

GS: As a teenager I drew all kinds of things, from realistic cars for Porsche to wildlife paintings, but when I set up the business officially, I concentrated on the style that I am now known for. Your style is your brand and crucial to the effectiveness of your company. It makes you stand out. Animation just came about as clients requested it, and software became more accessible to one-man studios like mine. Today clients are requesting apps and interactive platform games. What I realized very early a this style had so many uses.

Elephant Move by Gary Swift

Elephant Move by Gary Swift

ST: Where do you find yourself feeling really inspired to create?  Your pictures make me smile!  For example, I really like your picture Elephant Move (above) and A is for Alligator (below). How did those ideas come about?

A is for Alligator by Gary Swift

A is for Alligator by Gary Swift

GS: That’s very kind of you to say that. I have ideas coming out of my ears, and luckily they are still developing after over 20 years, when people ask “where do ideas come from?” to be honest I can’t answer accurately, as I pick up inspiration from things in daily life, TV and reading. Inspiration comes in many forms!

ST: What are your favorite tools or medium you like to create with?

GS: I draw everyday and love the sketch ideas with pencil, then pen the linework when I am happy, and more importantly when the client approves the work, I color the work digitally like 98% illustrators today.

ST: When you get an idea for an animation or an illustration in your head how do you develop it?  Are there tips you can give us on how to make our ideas and images grow?  And what about when you work with a client- how does the developing process differ?

Super Uncle by Gary Swift

Super Uncle by Gary Swift

GS: To develop an idea, you have to satisfy yourself first and not worry about others liking it until you fine tune the concept. Some ideas are better than others, but always carry out your concept to its completion, you never know one day you may re-visit the idea/artwork? When working with clients you are often trying to fulfill their imagination or answer their brief. All clients are different and have different requirements, the important thing is to deliver the solution they want and to deliver on time.

ST: Who are some artists and authors that you like?  Why do you like them?

GS: I like too many artists to mention really, I am constantly seeing fresh images I love and new artists I admire. I do not really take note of too many authors if I am honest. I am a visual person and I am ‘drawn’ in by the illustration always. Eric Carle’s The Very Hungry Caterpillar book comes to mind of one of my very earliest memories of a children’s book.

ST: Thanks Gary for taking the time to be with us on Scribble Town! Scribblers, go check out more of Gary’s artwork at http://garyswift.com.

Bunny Bunito by Gary Swift

Bunny Bunito by Gary Swift


Print


Pumpkins & Crayons

Pumpkin decorating doesn’t have to be dangerous or super messy (think knives, pumpkin guts, spray paint, etc). You can create unique, vibrant pumpkins with a few simple materials and some creativity.


When it comes to pumpkins and crayons, Alexa of The Swell Life really nailed it with two great decorating DIYs. Fun and colorful, both projects feature white pumpkins and a box of crayons. No carving necessary!


First off, how could we resist this DIY called the “Crayon Scribble Pumpkin”? All you’ll need to create your own are bright crayons and a white pumpkin (white displays color so much better)! This is perfect for kids of any age since there are no sharp tools or mess involved. Just grab your pumpkin and start coloring! Create a random colorful design, draw a face or picture, or work on an interesting pattern—there’s no limit to what you can do!


 Crayon Colored Pumpkin

Photo via The Swell Life


For a fun twist with the same tools, grab some glue and a hairdryer for this next version. Take your crayons and this time, remove the wrappers and break them in half (you won’t need a whole crayon for this). Glue them around the top of your pumpkin (again, white shows the colors better) and apply heat with a hairdryer set on high. There could be some crayon runoff, so you’ll want to lay down a garbage bag or tarp under your pumpkin.


 Melted Crayon Pumpkin

Photo via The Swell Life


You can customize your color palette—try orange and yellow for a candy corn theme, or purple and black for Halloween. For a really creepy version, try melting all red crayons—it’ll look amazing and dramatic for a haunted porch.


And that’s it! Two main materials, two great projects. Don’t forget to check out The Swell Life for tons more great pumpkin decorating projects. What fun ways do you like to decorate pumpkins? How would you customize these versions with crayons?


Print


Creepy Cuties

It’s just not Halloween until there are some sweet treats around! Save the wrapped candy for trick-or-treaters and add a little homemade flair for October festivities.


These spooky sweet treats are sure to be a hit!  All featuring marshmallows, they’re easy to make and more cute than creepy. With a few bags of marshmallows and some other simple ingredients, you can create your own rice krispies jack-o-lantern, chocolate and marshmallow witch, and marshmallow ghost.


These fun snacks provide the perfect balance of spooky and sweet—they’re festive without being scary—great for younger kids. Plus, since they mostly just require assembly, little ones can help you in the kitchen. They make perfect classroom snacks, Halloween party favors, or just festive desserts. For specific ingredient lists and directions, check out the source links.


Use the marshmallow as a binder for these deliciously sweet pumpkin rice krispies treats.

 Pumpkin Rice Krispies TreatsPhoto via Food Family Finds


No baking or cooking required! Just gather ingredients and assemble these spooktacular witches.

  Marshmallow & Chocolate Witches

Photo via Taste of Home


Keep things extra simple with these creepy-cute ghosts. All you need are marshmallows and an edible food pen (consider gel icing as a substitute).

 Marshmallow Ghosts

Photo via Cook Play Explore


What are your favorite Halloween treats to make?


Print
Posted by , on October 16th, 2013 at 11:55 pm. No Comments

Category: food art,holiday,kids Labels: , , , , , , ,


Scribble Artist Interview with Kevin Whitlark!

The Twelve Cows of Christmas

The Twelve Cows of Christmas

Scribble Town (ST): Kevin Whitlark’s energy for creative is unbelievable! It seems as if he was born to draw. In 1989, Kevin started his own greeting card company, “On A Lark Greetings, Inc.” His career has soared and continues in many great directions, all that involve the sharing of funny, witty, and cute illustrations. Kevin, where are you and what are you up to these days?

Kevin Whitlark (KW): In Atlanta, Georgia. Working on some children’s books for Kindle (and other devices with a Kindle app) and hard copy. Also working on new greeting cards and puzzle designs. A lot of this is for 2014. We have a Christmas book coming out next week for Kindle–> The Twelve Cows of Christmas.

ST: Yay for The Twelve Cows of Christmas on Kindle! Please let us know more about One Hundred And One and all the products you create.

KW: One Hundred and One is expanding more than ever in 2014. Currently the concept is seen on jigsaw puzzles (sold by major retailers), prints, scrubs, fabrics/cotton. We are hoping to license and manufacture several new products and publish a major book incorporating the One Hundred and One concept and art.

ST: Sounds like things are on the up and up already for 2014 :) How do you come up with your themes for each book?

KW: With my six kids in the house and coming from a large family myself (I am the youngest of fourteen), inspiration abounds.  The hundreds of children’s books I have read to my kids motivates and inspires me also.  I have a vivid and overactive imagination naturally, so plugging these things into it makes for a very effective creative formula.

Kevin Whitlark's Family

Kevin Whitlark’s Family

Cleaning my studio, cutting clean paper, sharpening pencils, mixing water colors….Go out and visit book stores, read children’s books…GOING FOR A WALK. (Exercise)

Step Two 100 Cats by Kevin Whitlark

Step Two 100 Cats by Kevin Whitlark

I also love to visit my kid’s school and I read my books, but more importantly I draw on the big boards for the kids and they react immediately. Usually I will visit the schools for holidays…so for example…I created a book right in front of the kids…this is 3rd grade…”Thanksgiving Revolt”…  The fun is the live action, immediate response and the contribution from the kids!!

Kevin Whitlark with Anna's class

Kevin Whitlark with Anna’s class

ST: You have a really big family and I’m sure there’s never a dull moment at home.  Do your kids and wife often inspire your stories and artwork?

KW: BIG Family…  Again, the kids definitely inspire me. I have a book coming out based on a true story with the kids.  I am taking an already amusing (now, not at the time) event and making it larger than life, as usual.  The details are confidential right now, but I’m confident it will be a best seller.

ST: When and how did you get started writing and illustrating books?  What was the first book you made about?  I wonder what is the creative process like with Ryan McLemore, your editor.

KW: I actually started in the greeting card industry. I submitted some designs to a major publisher and was rejected. I decided to start my own company. A year later I had accounts all over the country and was eventually approached by Andrews McMeel Publishing, Owners of Universal Press Syndicate. They were the largest publishers of humor in the world at the time. Farside was their monster line and it paved the way. I established a very large line with AMP.

A page from the book, 'Hip & Helen Peg the Egg'

A page from the book, ‘Hip & Helen Peg the Egg’

I think in print they sold like 80 million On a Lark  greeting cards from their licensing came. And the art from the cards themselves jumped on other products.

Hip and Helen Peg the Egg by Kevin Whitlark and Ryan LeMark

Hip and Helen Peg the Egg by Kevin Whitlark and Ryan McLemore

Today my greeting cards are Published by American Greetings, Papyrus, Recycled paper Greetings, Inc. and Sellers Publishing.

Children’s books didn’t come until much later and really started with Scholastics. AMP published four humor books of mine. The Red Cat Society books were funny parodies on the Red Hat Society here in US.

I did the twelve Cats of Christmas and The Twelve Dogs of Christmas for Scholastic, and now we are publishing the Twelve Cows of Christmas ourselves. Ryan McLemore and I publish the Kindle version and hard back for book stores. Scholastic distributes directly to the schools.

Ryan wrote the book, Hip & Helen Peg the Egg, with me. We did all the layout formatting, etc…Kindle version and is selling on line!!!

ST: That just shows you that rejection can get you to places you never could’ve imagined. Your story is very encouraging! When you get an idea for a story or a picture in your head how do you develop it?  Are there tips you can give us on how to make our ideas and images grow?

Farm House Kids Basket by Kevin Whitlark

Farm House Kids Basket by Kevin Whitlark

KW: Getting an idea shouldn’t be limited. Write everything down, scribble everywhere, don’t even think about the actual final printed book. Take your idea and explore it on paper. Then refine it. Layer after layer comes off and sometimes you end up with an entirely different book. But you know that can happen then you should never hold back on an idea.

ST: What are your favorite tools/medium you like to create with?

Puppy Love by Kevin Whitlark

Puppy Love by Kevin Whitlark

KW: I like to sketch with pencil. I also will just scribble with pens…concepting, roughing etc… When I actually start a project I have a pretty clear method.

With Water Color paper…Pencil sketch, ink in, clean with eraser, then scan the black line art and file it on my MAC. I then go back to my original black line on watercolor and I paint. Light layers and after drying I add and do what is needed. I then scan this original art 400 DPI and open it in Photo Shop.

I brighten it, then I clean it up. Remove the background paper and take actual art and put in on another layer. I will thin lines, add, smooth etc…POLISH the art, I use air brush and maybe a shadow her and there or a reflection highlight. Because the art is on layers I may want to add tot he art. Say I create a really cool rabbit. I then have him finished and want to put him on a grass hill. I will actually scan a water color green/grass and bring it into that file on a separate layer and there is my grassy hill behind my rabbit, for example.

Once art is finished I save the file as a PDF, TIFF, JPEG for quick references and emailing, and I have a separate flattened file…and of course there will be that original Photoshop file with all of its free layers. You can change and move them for future needs.

Beach Cat Towel by Kevin Whitlark

Beach Cat Towel by Kevin Whitlark

The MAC is like a Stage and I supply all kinds of elements (Archives) water, trees, flowers, bugs, cars, houses etc…All supporting elements. Kindle is a fascinating venue and Ryan is all about Kindle (and is working on animated/interactive app development). He will get a file from me and he can format and move art if need be to conform to this version of the book. He also is a excellent editor and writer. Not so much for me as I write very simple children’s books but he can catch little thing.  He in is own right can be published as a writer. I am actually illustrating a few books he wrote.

ST: Who are some artists and authors that you like?

KW: Artist and authors: There are a lot of them!!! Ill be right back, let me go see. I’m bad with names…There are too many and most of the well known children’s book illustrators and writers are on my list but to name a few outside the box, say Jenya Prosmitsky..great illustrator, Dav Pilkey…easy one, Kevin Henkes, these two are both writer and illustrator… Tim Hutchinson..illustrator…I’m attracted to their clever use of words, puns etc..and I also look at their medium, art…There are a lot of artist that I pull from just because of how well they us their mediums.

I believe that I am just really getting started as a writer and illustrator and I have a million ideas so I am excited that for years to come we will be seeing my books.

ST: I think you’re probably on some Scribbler’s list of favorite authors now too. Thanks so much for sharing with us, Kevin!

Birds by Kevin Whitlark

Birds by Kevin Whitlark


Print


Around the Globe

Happy (almost) Columbus Day, Scribblers! How are you planning to enjoy your long weekend? This holiday marks the anniversary of Christopher Columbus’ arrival to America in 1492. Everyone knows any good explorer always has a few tools on hand and a definite crucial one is a map.


It seems only right to embrace the adventurous spirit of the day with some fun DIY inspirations involving globes and maps! This is a great way to use souvenir maps from past trips or vacations, old atlases, and road maps; or breathe new life into broken or shabby globes with these exciting updates. Have fun exploring these cute and timely crafts on your day off!


Take half a globe and turn it into a unique bowl. Globe Bowl

Photo via Better Homes and Gardens


Spread “peace” on earth with contact paper and spray paint.       Peace on Earth globe

Photo via Endlessly Inspired


Grab some maps and some modpodge and spruce up a piece of furniture with decoupage.

Decoupage Map Dresser

Photo via Shelterness

Decoupage Map ChairPhoto via Roddy & Ginger


Save souvenir maps from vacations and cut them into shapes to display. Try butterflies or hearts.Map Butterflies

Photo via Image Surgery


Are you going to give any of these projects a try? How would you transform your old maps or globes?


Have a great Columbus Day everyone!


Print


Playing with Food

It always seemed like the official party line at mealtime was, “Don’t play with your food!” Well, the times, they are a-changing… A creative movement sweeping across kitchens and social media everywhere lately is food art. By transforming ordinary dishes into extraordinary pictures, many cooks, parents, and artists have been turning each meal into a cultural experience.


With all the beautiful colors and textures found in different kinds of food, it seems quite natural to turn them into art. This makes food preparation an even more creative experience, plus meals become that much more fun to eat!  Bonus: it’s a great way to excite little ones about eating more healthy foods, like fruits and veggies. When the broccoli florets are forming the treetops in a magical forest, it’s a lot tougher to reject them!


You don’t have to be an expert chef to compose clever dishes. Just have fun seeing what picture you can create with what ingredients you have.  It’s more assembly than anything else. You’ll be amazed at what you come up with!


 Food Art by Samantha Lee

Photo via Samantha Lee, Eatzy Bitzy


 Food Art by Idafrosk (Instagram)

Photo by Idafrosk (Instagram), via Handmade Charlotte


 Food Art by bambini_pucillo (Instagram)

Photo by bambini_pucillo (Instagram) via POPSUGAR moms

The gorgeous final products prove that you can be creative just about anywhere. Let the refrigerator be your palette and the plate your canvas!


Have you given food art a try? Would you? Show us your creations!


Print
Posted by , on October 10th, 2013 at 8:54 pm. No Comments

Category: adults,food art,kids Labels: , , , , , , ,


Little Monsters

If you have younger kiddos, you know that Halloween is super fun, but can also mean tempering some of the extra scary stuff. Well, kooky meets spooky with these adorable tissue box monsters! If you want a great Halloween craft for some little ones that’s festive without being frightening, this is the one for you.


 Tissue Box Monster 1

Photo via A Girl and a Glue Gun

You’ll need empty tissue boxes (one per monster), but after that the decorations are up to you! A good decorating base is: some paper (construction, wrapping, computer, any will do), paint, glue, and scissors. For the creatures’ eyes, you can use cut up egg cartons, pom poms, paper, or googly eyes. Feel free to throw some glitter, stickers, feathers, markers, or pipe cleaners in the mix—whatever you have on hand will do.

Tissue Box Monster 2

Photo via Spoonful

Once you have all your materials set up… assemble! The box’s opening (once for tissues) should serve as the monster’s mouth, but how you align it is your call. Start by decorating the box, which serves as the creature’s base. If it needs to dry once it is complete, let it do so before adding eyes, arms, and legs.

Tissue Box Monster 3

Photo via Danielle’s Place

Explore colors, patterns, and shapes—they all add to your monster’s personality. Make it friendly! Or angry!  Be as creative or outrageous as you like. See if you can add fun details like hair, eyebrows or lashes, a tongue, moles, and teeth.


Once these crazy guys and gals are all finished and dry, you can play with them or add them to your Halloween display (or both!). Just Boo-ti-ful!


Print


Scribble Artist Interview with Béatrice Coron!

Big Tent by Béatrice Coron. photos credit to Etienne Frossard

Big Tent by Béatrice Coron. photos credit to Etienne Frossard

Scribble Town (ST): Béatrice Coron is a visual storyteller who creates in the forms of illustration, book arts, fine art and public art. Béatrice describes her work as, “Collecting memories from individuals and communities, I stage narrative allegories in silhouette to create a dialogue with the viewer in playful fantasies.” Wanting to know more, let’s start with, where are you and what are you up to these days?

Béatrice Coron (BC): A lot of different projects, fences in Chicago (http://oakpark.suntimes.com/news/publicarts-OAK-08152013:article), a subway station on the A train in NYC (will be installed 2014-15), artist books, an ebook and of course papercuts for different exhibitions.

ST: Wow! How did you become so well versed in so many different mediums?!  How did these mediums get introduced to you and was there anybody to encourage you in your art practice?  It really amazes me when I look at your portfolio which consists of paper cuts, public art installations, animation, and what else am I missing? I can imagine the adventure has been an exciting one!

BC: Self-taught. See my TED talk:


You cannot make a living on papercuts alone :) I’m always curious to cut my stories with different materials. The base is full and empty shapes, the material and techniques varies.

ST: Amongst them all, what tools and mediums do you find most helpful when building your creations and visions?

BC: Sketching with pencil, cutting with xacto knife

ST: October looks like a busy month for you already with upcoming workshops and lectures.  Please let us know about some of the events.  We’d love to participate, if possible.

BC: The workshop at the Future of Story Telling was really interesting as everybody comes to this conference with an open mind and looking to discovering new fields. It’s a yearly event.


ST: Where or when do you find yourself feeling really inspired to create?  Do you ever listen to music or look at other art to trigger inspiration?  I know that when I look at your work, I want to pick up some paper and cut away!

BC: I listen to podcasts about philosophy, history and current affairs. I also read poetry. Every domain is an inspiration.

ST: You have done some remarkable public art pieces like Postcards from North Carolina and Bronx Literature.  How do you go about creating for that space?  Do you sit in the space for a while and observe the visitors or is there some other way you work with the space?

"Postcards of North Carolina" displays the must-see of the region with Charlotte skyline, the mountains and seascape sceneries, while the trees reference the many historical roots of the region.

“Postcards of North Carolina” displays the must-see of the region with Charlotte skyline, the mountains and seascape sceneries, while the trees reference the many historical roots of the region.

BC: I research the history of the place and study the space. From there I visualize how it feels to arrive in that space and what I would like to see. For example in Charlotte’s airport “Postcards of North Carolina” depict the historical roots of the region.

ST: What or was there a pivotal point in your childhood that got you making art?  Where did you grow up?

BC: I grew up in Lyon, France. I am an only child and was very quiet. I often escaped with my imagination.

Children's Hospital Castle

Children’s Hospital Castle by Béatrice Coron. Photo credit to Etienne Frossard.

ST: Who are some artists and authors that you like?  What draws you to them?

BC: Among many and many artists I admired, I like woodblock prints of Felix Vallotton, I enjoy his black and white’s balance. I also enjoy Japanese prints for their creativity in composition.

ST: Béatrice, what is a good piece of advice for Scribblers?

BC: Just start to cut and enjoy!

ST: Will do! Thanks Béatrice! For more info on Béatrice and her artwork, please go to http://beatricecoron.com.

In the City by Béatrice Coron. Photo credit to Etienne Frossard

In the City by Béatrice Coron. Photo credit to Etienne Frossard.


Print


Magazine Strip Silhouettes

It seems like magazines always find a way to pile up. For some reason, I can never bring myself to just throw them out. Filled with beautiful images, colors, and articles, it feels wrong for them all to end up in the trash. So anytime I can put them to good use with an art project, I jump at the chance! This magazine strip silhouette is a great way to transform your old magazine pages into something creative, personalized, and beautiful!


For your silhouette, you can pick an animal, a person, your home state—whatever you want. Just keep in mind the level of intricacy involved in cutting the strips to fit the shape.


 States Magazine Strip SilhouettesPhoto via Meaningful Details on Etsy


You’ll need some old magazines, scissors, glue, a pencil, an X-acto knife, the shape you want to trace for your silhouette, and something to mount this project on—it can be canvas, cardboard, or poster board.


Start by cutting your magazine strips. Tear out any pages that have a lot of color (or just the colors you’re looking for). Don’t worry if it’s a picture of something weird—you won’t be able to see it once it’s cut up. Cut them into thin, straight strips, roughly the same width (the length can and should vary).


 Elephant Magazine Strip SilhouettePhoto via Apples of Gold Set in Silver


In pencil, trace the silhouette on your canvas. Then, start gluing down your magazine strips inside. You can trim each piece with your X-acto knife as you glue it down, or you can mark them with a pencil and trim them afterwards.


Once your silhouette is all filled in, it’s a good idea to finish it off with a coat or two of mod podge. This will seal down your collage.


 Butterfly Magazine SilhouettePhoto via Designed By BH

And that’s it! Let it dry and hang it up. Colorful, customizable, and recycled—this fun project is great for the eyes and the environment. What are your favorite projects with recycled materials? Any other fun ideas for magazines?


Print
Posted by , on October 3rd, 2013 at 11:38 am. 1 Comment

Category: adults,Arts & Crafts,Paper Art Labels: , , , , ,


Cute Candy Corn

Now that October has arrived, Halloween is on the horizon. That means costume planning, spooky decorations, and of course… candy and treats! Since it’s only the beginning of the month, one way to slowly start gearing up for the holiday is to incorporate things that work for both fall and Halloween.


The perfect solution: a little candy corn décor! This quick and easy craft is perfect for setting the tone for October… plus it has pretty fall colors! Bonus: it’s simple and safe enough for kids to work on, as well.


 Yarn Candy Corn

Photo via Danielle, My Life as I Pin It


You’ll need yarn (white, yellow, and orange), scissors, glue, and a foam cone (in a pinch, you can create your own cone with some poster board and tape).


Start at the bottom with your yellow yarn. Glue the end to the foam (you may also be able to just tuck it in the back… depends on your cone) and start wrapping! Once you’ve gotten about a third of the way up, cut the yarn and glue or tuck in the end. Next up: orange! Repeat the process with your orange yarn, and finally finish up with white to the top. Tada!


 Yarn Candy Corn

Photo via Sarah, Thrifty Décor Chick


These candy cuties add some festive fun to any room without going too overtly “Halloween” too soon. But as the month goes on… look out! More delightfully spooky projects to come.


Print


Scribble Artist Interview with Patrick Gannon!

A Bright and Sunny Day, cut and torn paper art, Patrick Gannon

A Bright and Sunny Day, cut and torn paper art, Patrick Gannon

Scribble Town (ST): Patrick Gannon is a magician when it comes to paper arts and storytelling with images! Maybe he has magical powers elsewhere too! He knows how to play with paper in a way that shapes space and builds a mood for all kinds of places.

Patrick Gannon (PG): Hi, I’m Patrick Gannon.  I’m a cut paper artist, which means that I cut up sheets of really fantastic hand-made papers, then layer them on top of each other to make a picture.  I’m originally from New Jersey in the US, and now I live in Fukuoka, Japan.  I spend most of my time drawing, cutting, gluing, walking along the ocean, hiking up slightly creepy mountains, dreaming up odd creatures in the forest, and collecting tons and tons of paper.

ST: The way you’ve described your day look like this happy creature in your piece on the right, ‘A Bright and Sunny Day.’ Where are you and what are you up to these days?  I’m sure very busy with your The 2014 Cut Paper Art Calendar campaign on Kickstarter.  Please let us know more about the project so that we can support you.

PG: For the past 2 years, I’ve been making my home in Fukuoka, in southern Japan.  Before that, I lived in Tokyo around 5 years, learning as much as I could about hand-made washi and chiyogami papers, and creating as much cut paper artwork as I possibly could.

When I’m not hiking up the nearby mountains or exploring the island of Kyushu, I spend most of my time slicing increasingly intricate cut paper artworks.  The last few years, I’ve been showing my work in galleries, Art Fairs, etc. in Japan and more recently, Korea.

The 2014 Cut Paper Art Calendar is an annual project for me.  It’s a great way to share my work with as large a group of people as possible, and to introduce cut paper artwork to people who might not have the chance to see it in their daily lives.  The campaign (which has already met it’s goal) runs until October 7th this year.  Without the campaign, I wouldn’t be able to publish the calendar – or all the other cool rewards like laser cuts and stickers.

The 2014 Cut Paper Art Calendar - Cover option (people are voting to choose the cover, and this is in the lead)

The 2014 Cut Paper Art Calendar – Cover option (people are voting to choose the cover, and this is in the lead)

ST: I know it’s a hard question, but how would you define your work?  It seems to be a peaceful combination of craft and fine art. It reminds me of traditional paper arts, but with a new twist. I have never seen anything like it before.

PG: Honestly, I try not to define it.  For me, defining it too much creates boundaries, and I’d be in danger of failing to experiment and try new things.  I approach the work as a fine art, I guess, by which I mean I create all of the designs and sketches myself.  I begin with an emotion or a concept in mind, sometimes as simple as a single word.  Somehow, when traveling from my mind to my hand, the ideas become these beings and environments.  Then I let it grow organically from the sketch, to the final drawing to choosing the right papers.  If there is a craft mode, it’s in the final steps of cutting and gluing.  I’ve certainly gotten better over time.  Looking at my clumsy early work can surprise me sometimes.

Until that Day, Rooted I Shall Remain, cut and torn paper art by Patrick Gannon

Until that Day, Rooted I Shall Remain, cut and torn paper art by Patrick Gannon

ST: You seem like a person on a playful path steered by passion. I wonder what what led you to paper arts. Was there somebody that encouraged you?  I like how you use different methods of paper cutting like tearing.

PG: When I was in graduate school studying art (I was a literature major as an undergrad), I wasn’t particularly experienced with paints, or using color at all.  I had really only worked in black-and-white.  I didn’t dislike painting as such, but I found the infinite possible colors I could mix to be stressful.  One of my professors suggested using cut paper – at the time, big blocks of colored paper in abstract shapes – behind my ink drawings.

And it just felt right.

Fierce Nekomata and the Skull of Goemon, cut and torn paper art by Patrick Gannon

Fierce Nekomata and the Skull of Goemon, cut and torn paper art by Patrick Gannon

At the time, I had no idea about the history or traditions of cut paper art.  I just started experimenting and creating a technique and style of my own.  As time went on, I started to discover different paper cut art, from the jazz-inspired American styles to the traditional Chinese and Japanese monochromatic work.  It’s been an eye-opening journey.

ST: When it feels right, it feels right! Where do you find yourself feeling really inspired to create?  How do you find themes for your artwork?

PG: I find myself inspired almost everywhere.  A short train trip can be a great time to sketch.  Ideas pop into my head while I walk or run and listen to music.  Escaping from the city and hiking through the mountains around Fukuoka is a huge source of inspiration to me at the moment.  Most of my work combines these elements, and my themes tend to be a conversation between the conflicting partsof my life; urban and nature, ambiguous relationships (especially parasitic vs. symbiotic relationships), pop culture.  I think it’s important to allow yourself to be amused or fascinated by just about everything.

The Ghost Parade, illuminated cut paper installation by Patrick Gannon

The Ghost Parade, illuminated cut paper installation by Patrick Gannon

ST: Please let us know about some of your cut paper installations such as The Ghost Parade and A Pacific Place of Rest.  Where were these installed and how did you fit the themes with the environment?

PG: Both of these pieces were created for a Yokai (Japanese supernatural… and really weird… creatures and beasts) themed exhibition I held in Tokyo.  The gallery space already looked a bit like the inside of a cave, with warm brown and orange walls and protruding chunks of wood.

The exhibition was also doubling as a Halloween party, and I felt hauntingly playful while designing A Pacific Place of Rest.  It was designed to be a graveyard rising out of the back of a long, black bench against the main gallery wall.  Over it’s length, it transforms from a traditional Japanese style graveyard to an American one (probably from the deep south – before coming back to Japan, I lived in Savannah, Georgia for a little while.  They have some amazing cemeteries).

For a long time, I had been thinking of creating an illuminated cut-paper piece as well.  The Ghost Parade was a way to continue the playful halloween theme while combining it with truly beautiful lighting and layers of shadow.

A Pacific Place of Rest by Patrick Gannon

A Pacific Place of Rest by Patrick Gannon

ST: Savannah does have some amazing cemeteries and ghost stories to match! What forms of art do you include in your mixed media paper cutting paintings? What are some tools you like to use? Do you put your cut paper on wood for a reason?

Through the Pines, cut paper art by Patrick Gannon

Through the Pines, cut paper art by Patrick Gannon

PG: I started to use wood as a backing to my work for the simplest reason of all.  I thought the grain and warmth and depth of color was beautiful, and I wondered it if would go well with the textures and colors of the paper.  Luckily, they suit each other.  Which makes sense, seeing as paper starts out as a type of wood.  I also like the roughness that the wood adds to the finely cut paper.  Life is full of seemingly conflicting feelings coinciding together.  I wanted to reflect that in my work.

Other than wood, washi and chiyogami papers, I don’t use any other media.  I sometimes stain or varnish the wood, but the paper I like to leave as is, without adding any paint or color to it.  I think it’s a fun challenge to find exactly the right combination of colors.  I have some papers which have waited years for me to find the exact right place to use them.

Your Touch, It Does Something to Me, cut paper art by Patrick Gannon

Your Touch, It Does Something to Me, cut paper art by Patrick Gannon

My tools are pretty basic.  A self-healing mat, and NT cutter design knife – it’s similar to an X-acto, but the blade is thinner with less of an angle.  It breaks more often and needs to be changed more, but I’m able to make finer cuts with it. – pencil, eraser, tracing paper, various glues (I’m always trying to find better glue and adhesives).  A computer with design software gets used to put together my sketches and blow them up to the final cutting size.

ST: Patrick, can you give us Scribblers any advice on creativity?

PG: The best advice I can give to anyone dabbing in cut paper art (or any art, actually), is to play.  Play constantly.  Draw without thinking sometimes.  Draw the craziest thing.  Don’t worry if it’s great.  Not everything has to be perfect.  I never use 90% of my sketches.

In each project, I usually come to a point where I’m not sure which color paper to use.  I take out and test all of the colors that I think might work.  Then I grab a few pieces which I’m positive will absolutely not work.  And sometimes they are absolutely the right thing.  The greatest things in life come from play.

Evening Aisatsu, cut and torn paper art by Patrick Gannon

Evening Aisatsu, cut and torn paper art by Patrick Gannon

ST: With that said, let’s play! For more inspiration please check out Patrick’s website, http://www.pgannon.com. You can follow Patrick on Twitter:   and get updates on his Facebook Page:  .  Thanks Patrick and keep us posted on your 2014 Cut Paper Art Calendar!

To Breathe the Pale and Shining Moon, cut and torn paper art by Patrick Gannon

To Breathe the Pale and Shining Moon, cut and torn paper art by Patrick Gannon


Print


Pumpkin Vase

One home decoration that’s in style all year long is the floral arrangement. Though the colors and variations may change depending on the season, fresh plants and flowers are never out of place on the table. This autumn, give your vase a seasonal update by using a pumpkin to hold your blooms.


You’ll need a pumpkin (orange, white, or otherwise… your pick!), a knife to carve, a glass or vase, and of course, your flowers.

 Natural pumpkin vase

photo via Mother-Daughter Press & Gay Bumgarner Images


Start by cutting a round opening on the top of your pumpkin—just large enough for the design you want to arrange, and to fit your glass inside. Gut the pumpkin and remove all the seeds and goop (I believe that is the official, scientific name for it… goop).


 Glass vase inside pumpkin

photo via Flower Duet


Once the inside of your pumpkin is nice and clean, fill your glass or small vase about halfway with water and place it inside the pumpkin. Finally, put your flowers in the glass and arrange as desired.


 White Pumpkin Vase

photo by Roberto Caruso via Chatelaine


Depending on how you carry out this project, the results can range from casually rustic to incredibly chic. Consider which look you want when you’re planning your centerpiece. Feel free to experiment with painting your pumpkin a different color and using various kinds of foliage or color schemes to bring your idea to life. This would make a beautiful Thanksgiving centerpiece or just a lovely addition to your table this fall.


Gold Pumpkin Vase

photo uploaded to Pinterest

What tips or tricks do you like using to give your space or décor a seasonal update?


Print
Posted by , on September 24th, 2013 at 10:18 pm. No Comments

Category: adults,Arts & Crafts,Design,food art,holiday,kids Labels: , decorate the table, , , flower pot, , home decor, , pumpkin glamour, pumpkin home decor craft


Scribble Picks Vincent van Gogh!

The painting titled Starry Night by Vincent van Gogh is at the top of many artistic achievements! Even though Van Gogh sold only one painting in his life, the mark he has made on this world is priceless.  Starry Night is one of the most well known images in modern culture.  How does it speak to you?

Starry Night by Vincent van Gogh

Starry Night by Vincent van Gogh

Abstract from Vincent van Gogh museum:

Energy and inspiration
From early on Vincent van Gogh was fascinated by the mood conjured up by the evening and the night. Van Gogh regarded the evening and night as a time for self-reflection and creativity, particularly for looking back over the day’s events. As such he loved to work during this hours of twilight and darkness, drawing from them energy and inspiration. When he decided in 1880 to become an artist, twilight and the night gained a fixed place in his oeuvre.

Arranged around the themes Landscapes at twilight, Peasant life at evening – ‘Les Paysans chez eux’, The voice of the wheat and Poetry of the night, the exhibition shows how Van Gogh immortalized the twilight and the night on paper and on canvas.

From painterly tradition to modern art
Van Gogh particularly associated the nighttime hours with a feeling of security, solace and the poetic. At the same time he was not immune to night’s darker side, when one can be overwhelmed by feelings of loneliness and despair. But Van Gogh was above all attracted by the landscape at twilight, thereby linking up with a longstanding painterly tradition. Evening and nighttime landscapes have for centuries been a well-loved theme, and were also strongly represented within the Barbizon School that Van Gogh so admired and initially imitated. After a number of years, however, Van Gogh began updating the genre through his striking use of colour and rhythmic brushstrokes. With his distinctive style he blazed the trail for modern art.

Read the rest of the article about Vincent van Gogh here: http://www.vangoghmuseum.nl/vgm/index.jsp?page=150362&lang=en#.  If you can go to Amsterdam to visit it in real life then this is your next best chance.

Now go ahead and scribble your own Starry Night! Print out the image below and color in how you see the night to be with it’s stars shining so brightly.  Send in your drawing and we’ll post it for everybody to see.  Email it to .

Starry Night by Vincent van Gogh

Starry Night by Vincent van Gogh. 1889.


Print
Posted by , on September 22nd, 2013 at 10:42 pm. No Comments

Category: adults,classroom,Featured,Scribble Picks,Uncategorized Labels: Amsterdam, , Starry Night, Vincent Van Gogh


Scribble Artist Interview with Carol Heppner!

Carol Heppner Queen of Cr8tivity

Carol Heppner Queen of Cr8tivity

Scribble Town (ST): Carol Heppner will get your head spinning once you hear about all the amazing things she is up to.  Around every creative corner, there she is!

Carol Heppner (CH): I am co-owner/founder and Editor in Chief of Bella Crafts Quarterly™, a craft magazine that is also available as a free digital download, and I own Carol Heppner LLC, a craft-industry design services company.  I am a designer member of the Craft and Hobby Association (CHA) and serve on the Design Section Council.   I am also on the Editorial-Advisory Board of Scrap and Stamp Arts Magazine, in which I have a column, Art Smarts!™.

I am an author, mixed-media artist, photographer and craft-industry consultant.  My work and photographs have appeared in national art shows, galleries, magazines, books, products, trade show booths and advertisements.

As you can see, there is a lot to keep me busy.

ST: Yes, we can clearly see that!  What are you not up to these days ;) ?  With full speed ahead, what does a typical day with you look like?  Even though you have so many different simultaneous projects going on which one are you putting most of your attention to these days?

CH: Every morning, I begin my day by going out for a walk.  This helps me focus on nature so I can relax.

Did you know that craft designers are mostly working on projects that are six months ahead of the current season?  Sometimes, we work a year in advance.  So, while you are getting ready for Halloween, we are thinking about spring.  Because craft-industry clients are publishers, editors and manufacturers, many times we cannot discuss what we are making because the project is being held for publication by the client.  It’s like a top-secret mission!  It’s the same with our magazine, Bella Crafts Quarterly™.  Our fall issue came out on September 1 and we are now working on our upcoming issues.  All columns and articles are always a secret until we publish them.

When I create a craft project, I then have to write step-by-step instructions and photograph the finished project.   It may sound like a lot of work, but I really enjoy it.

ST: So long as you enjoy it then everything is ok.  How did your ‘Queen of Creativity’ career begin?  Were you always coming up with fun creations, even as a kid?  What is something from your childhood that you used to love to create with?

Jewelry making with Carol Heppner LLC

Jewelry making with Carol Heppner LLC

CH: When I was in second grade, I won a regional drawing contest.  I always loved being creative – it’s just the way my mind works.  The more you create, the more creative you can become.  Crayons were a passion of mine in my early years.  Then, I discovered inks and later moved on to batiks. Maybe it’s really a passion for color!

ST: Your expertise on mediums run the gamut- from air-dried clay to wire!  Perhaps you can share a bit about these and how you learned them.  What was your motivation?

CH: My high-school art teacher told our class that if we wanted to be artists, we had to “eat, drink and sleep art”.  He taught us about many different art mediums and the basics of fine art.  He also taught us not to be afraid to explore and try new mediums.
Although I naturally understand how to work in many different mediums, there are some mediums I wanted to learn more about.  I have taken photography classes and stained glass classes which helps me understand the basics on which I can build my knowledge.

My motivation is simple.  I was born with a natural talent and drive.   Having clients is also a major motivator.  The more you know, the more you can bring to the table when working with a client.

Learn to create paste paper in the summer edition of Bella Crafts Quarterly

Learn to create paste paper in the summer edition of Bella Crafts Quarterly

ST: Who encouraged you to be creative?

CH: My parents always encouraged me to be creative, as well as my art teacher.  But, the friends I had throughout life were also encouraging – and still are.

One of the reasons I joined CHA was to be with other people like myself.  I met so many wonderful craft designers, craft professionals, editors, publishers, manufacturers and the association’s staff.  The four owners of Bella Crafts Quarterly™ are all CHA design members and that is how we met.  If I never joined CHA, I would never own a craft magazine today.

ST: On top it all, you are also an author.  Writing about art is so important for your own sake and for others.  What are your writing outlets?

CH: As a professional craft designer, contributor to national craft magazines and editor of my own magazine, I am writing most of the day.   Many times I am writing craft instructions for my clients, but I also write design-team or other craft-business related handbooks.  I also write style guides for client manufacturers.   These guides determine how other writers, who contribute their written work to my client manufacturers, will write their instructions.

Since I am the lead of the Standards Committee of the Design Section of CHA, I am acting as an editor to produce a Designer Handbook for our section.  This project has been two years in the making and should be published soon.  The handbook is only available to CHA Design Section members.

Studio chair by Carol Heppner LLC

Studio chair by Carol Heppner LLC

You will read about my hobby later on in this interview.  I record my findings in an entertaining, yet factual manner.  This research is compiled into a book, which is then given to family members.

ST: When you develop an idea what is your creative process like?  Do you try things out with all the different kinds of materials and techniques?  What are some favorite tools you like to use when creating?

CH: The type of project I need to create usually dictates how I develop the design.  The majority of the time, I “see” the final project in my mind, as well as the steps I need to take to create the project.  I then just gather the materials and complete the project.

Carol Heppner's Clay Chic - Polymer Clay Necklace

Carol Heppner’s
Clay Chic – Polymer Clay Necklace

Normally, my clients tell me what product they need to be used in a project.  I will talk to them about the different ideas I have and they pick the project just from our conversation.  They never see drawings or graphics of the project before it is completed.  They trust my judgment.

Once or twice, I have had to draw a sketch for a client because they had to discuss it within the company, but that doesn’t happen often.

Because I work alone as a craft designer, I do not discuss my client’s projects with others.  So, I am really working alone with my client.  Now, once the project is published, then I help promote it on my social media platforms.

My favorite tool that I use is not made from plastic or metal.  My favorite tool to use is my imagination.  It is the most important tool when creating artwork for yourself and for others.

ST: What are some other hobbies or interests you like?

CH: You may think that with all that I do that I have no time for hobbies.  But I research my family history.  I have a cousin in Italy who is a historic architect and we have been working on our Lopetrone family history for years.

I was able to trace my Lopetrone branch back to the 1700s and then he was able to trace my branch back to the 1500s to the great grandfather of all Lopetrones.  Once my family branch was connected to my great grandfather, I felt grounded.   It was a wonderful feeling to know the names of everyone that came before me.

Because the Lopetrone family is such a small family, it is easier to trace our history than other family surnames.  Some of us have come together to create a universal Lopetrone Family tree.  All those with the Lopetrone name are cousins.  We have our own Facebook group so we can connect with family who are living around the world.

ST: Wow! That is quite impressive that you have been able to trace your family heritage so far.  How gratifying and special that is! What’s your choice of medium, at the moment?  Hmm, I wonder why.

CH: I have a passion for batiks and photography.   Nowadays, my focus is on jewelry making and accessories because I create those type of projects for Bella Crafts Quarterly™.   I like making things that are useful.

Fabric painting and batik by c Carol Heppner LLC

Fabric painting and batik by Carol Heppner LLC

You didn’t ask, but you may be surprised to learn that I really don’t like using oil paints.  Crazy, right?  I will use them only when I have to use them.  The reason why they are not my favorite is because the way they feel when I am using them.  I cannot feel the resistance of the canvas, which for some reason, isn’t pleasing to me.

ST: It never would have crossed my mind that you don’t like using oil paints!  Carol, you are full of surprises.  What is your studio environment like?

CH: My studio is right across from my bedroom. And, yes.  I do get dressed up when I go to work.  It helps me feel professional. That is important when you are talking to a client.

I have a screen door on my studio so it can be closed but I can still feel as a part of my house.  The studio is filled with products that manufacturers send to me to use.  I have fabric boxes for each client manufacturer.  That way, when I need their product, I know just where to grab it.

The chair at my desk is a fun project that my husband and I did a few years ago.  I wanted something whimsical because I want to smile when I walk into my studio.  He helped cut the wood for the back of the chair.  I purchased the chair at a thrift store and it was in very bad condition.  I painted the chair, changed the back and then upholstered the seat in faux leather.

I have some of my artwork around the room because it gives me a sense of accomplishment.  In fact, I made this doll when I was very young.  She sits in my studio and I can remember the very day I made her.  I didn’t have many craft supplies when I was young, so she was made with a lot of imagination.

Primative doll by Carol Heppner LLC

Primative doll by Carol Heppner LLC

ST: Thank you Carol for sharing so much with the Scribblers!  Just keep on doing what you do!  And we’ll leave the Scribblers with your inspirational creative thoughts.

Carol Heppner’s Creative Thoughts

When most people think of creativity, they think of arts or crafts.  But I have always felt that creativity manifests itself in many different ways.  It’s the way you comb your hair, the way you dress or arrange your room.  It’s the way you teach and the way you inspire others.

The person who is writing code for a computer program is being creative and so is the person who is making dinner tonight.  How much creativity you add to whatever you are doing is up to you.  But remember, creativity is just like anything else.  The more you use it, the better you get at it.

CHA’s foundation has a wonderful program that is reaching out and getting everyone interested in crafting.  Make sure to check their website out at Cre8time.com.  You will be inspired by all the great crafts you find there.  You can also make your mark by uploading some of your work there as well.

Also, our goal at Bella Crafts Quarterly™ is to inspire others to create.  In keeping with our goal, our digital copy of the magazine is free to download.  There are many great projects for crafters and craft-business advice for craft professionals.

Thanks so much for asking me to be part of this Scribble Town interview!

Visit the Scribble Shop to get started on making your own crafts!


Print
Posted by , on September 15th, 2013 at 11:32 pm. No Comments

Category: adults,Arts & Crafts,,Books,Design,Scribble Artist Interviews,Uncategorized Labels: Bella Crafts Quarterly™, Carol Heppner, Clay, , , Cre8time.com, dolls, Hobby,


Scribble Artist Interview with ShaoLan Hseuh!

Shaolan Hsueh, Chineasy, Kickstarter@Robert Leslie 2013

Shaolan Hsueh, Chineasy, Kickstarter@Robert Leslie 2013

Scribble Town (ST): Here with us on the Scribble Blog is ShaoLan Hseuh! ShaoLan’s creativity and energy to build Chineasy is extraordinary.  Let’s hear her story!

ShaoLan Hseuh (SH): Hi, my name is ShaoLan Hseuh and I am an entrepreneur, investor, writer, traveler and dreamer! I am also the creator and founder of Chineasy, a Chinese language methodology that will help you learn to read what many consider to be one of the hardest languages in the world to learn! Chinese!

ST: Where are you and what are you up to these days?  What does a day with ShaoLan look like?

SH: At the moment every living breathing moment is spent either working on Chineasy or with my family. With Chineasy’s Kickstarter campaign now over (having successfully raised nearly £200,000) I am now working on the hard part – fulfilling the delivery of all of the gifts I promised!

A day with me: I am a very early riser (you have to be or there just isn’t enough time in the day!), I am very into exercise and eating well and if I am not weight lifting or drinking chilled green tea then I am either with the members of my Chineasy team of my children – when they aren’t at school of course!

Chineasy Mountain

Chineasy Mountain

ST: What is Chineasy?  How did the idea for this new endeavor begin, which is so different from your past experiences?

SH: The Chinese language has long been considered the most difficult major language to learn, largely on account of the vast number and complexity of its characters. Being a Taiwanese native now living in London, this is a fact I am acutely aware of. When I began to teach my British born children Chinese, I realized just how difficult Chinese characters are for a native English speaker to learn. It was like torture for my kids! So I spent many years looking for a fun and easy way to teach them how to read Chinese. After years of searching, I realized that none of the methods out there were engaging or efficient enough. So I created my own!

Chineasy’s goal is to allow people to learn to read Chinese easily by recognizing characters through simple illustrations, but also to bridge the gap between East and West. As the best way to understand a culture is to start with its language.

Chineasy works on a simple building block principal. When you know a few key base characters (or building blocks) you can start combining them to create more complex words (compounds) which, when combined, allow you to create simple phrases and stories. It’s that easy!

Chineasy Mouth

Chineasy Mouth

ST: From what I have read online, you wear many hats and have accomplished so much across many fields.  Please let us know about this adventure you are on. How did you go from Taiwan to London?

SH: It was a very long adventure and it is one I still haven’t finished! As I child I was raised by two very artistic parents and, like most children, chose to study something as far removed from my parent’s interests as possible! As an MBA student in Taiwan I published a series of best selling software books, which were awarded ‘book of the year’. Using the royalties earned from their sale I founded my first software venture pAsia in 1995, which I grew from a team of 2 to a team of 250 by 2001. After moving to London in 2002, I began investing in and advising young technology companies through Caravel Capital, which I founded whilst studying at the University of Cambridge. Following a sabbatical in which I traveled the world I came back to London and decided to try my hand at something new. Today, I am still highly active in assisting young businesses, but I have also expanded to the mentoring and support of education, arts and culture (I am on the Business Advisory Council of Business School in Oxford University and Development Advisory Board of Victoria and Albert Museum). As a social venture, Chineasy is the culmination of both my entrepreneurial experience and my artistic childhood.

Chineasy Fire

Chineasy Fire

ST: Was there somebody that encouraged you to be creative and business savvy?  Also, how do you collaborate with the designers of Chineasy?

SH: Although everyone could be creative, having right environment is crucial. Everyone could be ‘trained’ being a savvy business person, but having good intuitive and constructive environment certainly helps. I happened to grow up in an artist family and loving arts throughout my life. I was also lucky enough to work with world class business leaders and global thought leaders. I am inspired by many people through out my journey. Many of them became my life long friends and consistently encouraged me to be ‘myself’. Being yourself and knowing what your ‘calling’ is helps you to have the vision beyond what people normally see in their ‘career’.

Originally I planed for Chineasy to be a purely personal project for my children and friends, but when I was invited to talk at TED, I started asking several illustrators to implement my creation. One day I chatted my friend Crispin Jameson, who is the director of an agency in London called Brave New World [BNW] and he recommended Noma Bar. This was how I started working with various parties in addition to Chineasy team.


ST: When you develop an illustration what is your creative process like?  What is your process for getting work out of your head and what are some favorite tools you like to use to create?  I especially love your color choices and the relationship between the image and character is so clear!  I wish I had these when I was learning Mandarin!

Chineasy Tree

Chineasy Tree

SH: The truth is it is a long and thought out process, these illustrations are much more than pretty pictures – as our three designers will tell you! Each character we create has to follow the same three guidelines: 
they have to look stunning, be stylistically consistent with what we 
have produced before and, most importantly, they have to be 
educationally effective.

Traditionally ancient Chinese was mainly Pictographic (the symbols were drawings of what they represented) yet over the past thousands of years, many of those pictographs have morphed into very different shapes from their original forms. Instead of trying to reproduce all of the historical links I use a totally refreshing approach to interoperate pictographs, as our illustrations have to be something westerners can associate therefore easier for them to remember.

Chineasy Character Development

Chineasy Character Development

Before we even start designing our team (which is made up primarily of myself, my two in-house designers, my project manager & research assistant) researches the definition, 
origin and history of the character. We then move on to the applications (for example, how to build more characters and phrases) and finally 
we consider how to make stories out of them. After this research our designers create their different interpretations 
of the character. We always have several versions and numerous drawings for each. Between us we then discuss, debate and bounce 
ideas back and forth. When we come across a challenge (which happens with nearly all of them), we discuss, sleep on it and play around with different combinations of colours, or designs.

Chineasy Sun

Chineasy Sun

Finally, whenever a new illustration is created, I show them to my children. If they can guess the answer immediately, I know we’ve got it right. If they struggle, we go back to the studio and do it all over again

ST: When you create a new Chineasy illustration do you take into consideration not only symbolic representations in Chinese characters, but also tonal sounds?

SH: Chineasy was started as a tool to teach my children how to read Chinese, not to speak, and so the illustrations are meant to act as a memory tool in literature not for sound. I am plotting a new method to teach people how to speak, which will be my primary project next Watch this space, soon I will be able to teach you to speak as well as write.

ST: What are some other hobbies or interests you like?

SH: Unsurprisingly, for someone who has done so many different things, I have a lot of hobbies! I like to keep busy and I believe that health is incredibly important! I spend a lot of time doing sports: skiing, swimming, weights, rock climbing. I love music and performing arts. This summer I did some painting class with my children. I would also love to teach them how to do calligraphy one day, just like the way my mother taught me. Everything. I am also very interested in Eastern medicine and spent some times studying acupuncture (that’s when you use needles to cure ailments, you can end up looking like a pin cushion). I am also a very big traveller and believe that you should experience the world through your own eyes if you can – not through foreign press

Chineasy Moon

Chineasy Moon

ST: How can we start using Chineasy?

SH: Its easy to become a Chineasy user. At the moment I update a Chineasy facebook page daily and already have a thriving community who seem to pick up every character I teach – it is very heartening!  I also have a website (chineasy.org) which anyone can access free of charge, as well as my newsletter which goes out to the community once a week! Now that our Kickstarter campaign has been successful I am also happy to announce that I will be having a beautiful, and educational, book published in Janurary 2014. This book will be available in both e and print formats. We are also going to produce loads of learning tools, such as flashcards and computer screensavers!

Chineasy is a gateway into the language, it is meant to help people who wish to learn, but who have always been thrown by the languages complexity. My children have learned at least 300 characters using this method and that is without vigorous lessons.

ST: I’m ready to start learning Chinese with Chineasy! Thanks ShaoLan! http://www.chineasy.org

Chineasy Person

Chineasy Person

Chineasy Door

Chineasy Door


Print
Posted by , on September 9th, 2013 at 12:35 pm. 2 Comments

Category: adults,Arts & Crafts,classroom,Design,Featured,Scribble Artist Interviews,Scribble Press,Uncategorized Labels: Chineasy, Chinese, , London, , ShaoLan Hseuh, Taiwan


Scribble Artist Interview with Píccolo!

"Petite Print" - Yelena Bryksenkova

“Petite Print” – Yelena Bryksenkova

Scribble Town (ST): Píccolo, a collaborative illustration team, is the dynamic duo Sara Barnes and Lisa Perrin!  These two artists are good at what they do because they bring art to you and help spread the word of unforgettable images from various illustrators. Sara and Lisa are inspirators and makers of the moment.

Sara: Hi! I’m Sara Barnes and I am creative person living in Baltimore, Maryland. I am originally from the city of fountains and land of barbecue, Kansas City, Missouri. You can find me running, baking, making art, or coding on my computer.

Lisa: Salutations! My name is Lisa Perrin (I go by my last name for my personal illustration work: www.madebyperrin.com) I am originally from Long Island, New York but now reside in charming Baltimore, Maryland. I can often be found illustrating, designing, pondering and teaching, as well as spending time with my beloved rabbit companion: Blanche DuBun.

ST: What are you two up to these days?  I can only imagine what a day with Sara and Lisa looks like.  I’m sure Piccolo takes a bunch of your time and I think it’s worth it!

Píccolo: We are always organizing new Píccolo projects and events! Right now we are preparing for the upcoming Baltimore Book Festival where we will have a table. We will be selling our petite prints, ‘to market’ tote bags, and a brand new collaborative artist’s book. We are working with 6 amazing illustrators and cannot wait to see it all come together.

A typical day with Lisa & Sara looks pretty adorable! We really share all of the responsibilities that come with running a small business. We divvy up sending and responding to emails, utilizing social media, updating the website, and so on. We generally include snacks in all of our business meetings.

"To Market" - Karolin Schnoor

“To Market” – Karolin Schnoor

ST: Can’t go wrong with snacks :) Your tote bags are great!  I can carry my apples, pens, and books for a day out in the park.  You girls have accomplished so much. Tell us how Píccolo began.  When did you start creating tote bags and prints?  How do you two creatively work together?

Píccolo: Píccolo began in a fancy coffee shop where it was hard to find a table and even the napkins were really nice. It was the summer before the final thesis year of our graduate program. We knew we wanted to collaborate and had a shared love of well made illustrated products. We did a Kickstarter to get our Petite Print Project off the ground in early 2013 and the rest as they say is history! Our line of tote bags were created this summer for an arts festival and to use at farmer’s markets, gallivanting around town, and more!

ST: And then poof! Píccolo popped up! From what I have read online, you both are illustrators.  Was there somebody that encouraged you to be creative?  If there is a story of your path to finding this medium that fits you so well, please share.

Píccolo: Sara has been a working illustrator but has shifted her focus to curating illustration and running her blog, Brown Paper Bag. Lisa is currently freelancing under her penname, Perrin.

"Red Bud" - paper, paint, embroidery thread by Sara Barnes

“Red Bud” – paper, paint, embroidery thread by Sara Barnes

Sara: My parents always encouraged me to be creative and supported me in whatever I do. I am very grateful for this. I started out by taking art classes when I was younger and trying out as much stuff as I could. Eventually this lead me to oil painting, which later lead me to Baltimore to attend the Maryland Institute College of Art (MICA). While I thought I’d major in painting, I quickly decided that illustration sounded better. I enjoy reading and interpreting text visually, so I thought illustration would be a better fit. I was right! I liked it so much that I went to graduate school for it, too.

Lisa: I was always creatively encouraged by my mother, another creative lady! And my different art teachers were influential as well. My path to illustration was hardly linear. I always loved beautiful pictures and drew compulsively, but I always had lots of varied interests. I was also a pretty serious theater kid too. Ultimately, I went to a liberal arts college and earned a BA in English and a BFA in Painting. I took some time off and then scooted off to grad school at MICA to try and be an illustrator for real.

"Eden -- an Interior" - digital painting by Lisa Perrin

“Eden — an Interior” – digital painting by Lisa Perrin

ST: What inspired you to form Píccolo? Where has this amazing endeavor taken you to?  I’m sure with many surprises along the way!

Píccolo: We knew we wanted to work together. We have unique and different skill sets, but are united in how we feel about illustration, that it is accessible and ubiquitous. Our mission has always been to produce quality illustrated products that are accessible to everyone. We endeavor to promote the illustrators we work with and make things that we would want ourselves.

"Nature of the Beast" - gouache and watercolor by Lisa Perrin

“Nature of the Beast” – gouache and watercolor by Lisa Perrin

So far, it has been a pretty amazing ride! We had a table at Artscape, America’s largest free arts festival, successfully funded a Kickstarter, and recently we went to NYC and Brooklyn to do studio visits with illustrators that we admire. Everyone we have met and worked with has been so genuine and friendly. Making amazing creative pals has certainly been the best part.

ST: When you develop an illustration what is your creative process like?  Also, how is it different for the works created for Píccolo?  What are some favorite tools you like to use to create?  Both of your styles are so unique yet the choice of medium you two choose really brings out the subject in the picture in a perfect way.

Sara: I was always taught to sketch first. I look back at past things I’ve drawn and see if I’d want to incorporate them into what I’m working on. I sketch in pencil first, a bunch of little sketches to try and get the composition how I want it.

"Under glass" - paper and paint by Sara Barnes

“Under glass” – paper and paint by Sara Barnes

From there, I refine my sketch and eventually use it as a blueprint for what I will make. If I am feeling stuck, I will often send work in progress to Lisa, because she really understands my style and how I work.

Lisa: My process begins with lots of thoughts. It Is not unusual for me to just think about an illustration I want to make for days or weeks before it really starts to happen. Then comes sketching and research followed by the revising process. Lately I start everything pencil and scan it in to create my piece digitally. I always send things to Sara in progress because I value her eye and opinion. I don’t think you can have a good collaboration without that mutual respect for each other’s opinions. I always value her feedback!

For Píccolo we give the illustrators certain parameters, like size and color palettes, but generally we give them a lot of freedom to create a unique illustration. Generally, we like letting our artists have a lot of freedom, because we feel that it allows them to make work that they really love!

"Contained Risk" - digital painting by Lisa Perrin

“Contained Risk” – digital painting by Lisa Perrin

ST: For a couple of curious cats, as you two seem to be, what are some other hobbies or interests you like?

Sara: I really enjoy running. I am currently training for a half marathon, and am planning a marathon for early 2014. I also have a major sweet tooth and like to bake cakes and cookies.

Lisa: I love thrifting and hunting down inspiration. I enjoy the process of discovering something that gets me excited and then learning as much as I can about it. I like snacks, movies, and cute animals on the internet.

ST: Where do you find yourself feeling really inspired to create?  Or is there a time of day that better suits these bubbles of creativity?  Who or what is inspirational for you these days?

Sara: My morning routine inspires me. I am an early bird, and make my best creative decisions after I go running, make a cup of coffee, and turn on the radio. Not many people are up as early as me, too, so there is little distraction! I too am inspired by what I see on the web, including blogs, Pinterest, and Instagram.

"Under glass" - paper and paint by Sara Barnes

“Under glass” – paper and paint by Sara Barnes

Lisa: I actively make a point of getting out of my house to go to a studio space because I find fewer distractions helpful for creative productivity. For me it is not about a specific time of day so much as having a sizable chunk of available time to work. I need to know I have a couple of uninterrupted hours on hand (which is easier said than done!) I get inspired by amazing illustrations I see on tumblr and pinterest. I am also a very avid museum goer and Baltimore has got some gems!

ST: What is your studio environment like?  Is there a Píccolo in Baltimore?

Píccolo: We had a studio space while we were in graduate school together. Now we meet mostly in coffee shops. A lot of our process takes place through emails and social media too. Sometimes we see buildings for rent or sale and loftily dream of creating a real Píccolo headquarters. For now we work more simply, and there is a cat or a bunny around, and all is well.

ST: Thanks Sara and Lisa for sharing with us your own artwork and all about Píccolo!  I think it’s incredible that two friends can make their dream come together.  With snacks, of course!  Ok, Scribblers, let’s check out Píccolo at http://shop.heypiccolo.co!

Piccolo 'To Market' Tote Bag by Jessica H.J. Lee

Piccolo ‘To Market’ Tote Bag by Jessica H.J. Lee


Print
Posted by , on September 2nd, 2013 at 12:45 am. 1 Comment

Category: adults,Arts & Crafts,Design,Featured,Scribble Artist Interviews,Uncategorized Labels: Baltimore, , Lisa Perrin, , Piccolo, Sara Barnes,


Scribble Artist Interview with Daniel Tillman!

Scribble Town (ST): Daniel Tillman is an artist and artist representative for C3 Designs. He’s a doer and a maker. And as you can see he brings beauty to blankets in warm ways you haven’t yet imagined.

Quilt by Daniel Tillman

Quilt by Daniel Tillman

Daniel Tillman (DT): Hello, my name is Daniel Tillman, through C3 Designs I represent artists and designers, who make products for the architectural community. It took a number of years but I’ve been able combine quilt-making into my business. I live in New York with my wife and two children. They’re not really children any longer, my oldest daughter is 24 years old and my youngest is 20. In one form or another I’ve been working with textiles for more than 20 years.

ST: What are your days usually like?

DT: During the day I help artists and craftspeople bring their beautiful designs to market. I work with architects and designers to find the right artisan for their projects, maybe a hand-knotted rug, crown moulding or hand-blown glass lamp. Sometimes I get to put my own work into the project. At night, and on the weekends I like to sew. I became interested in quilting after seeing a show by the artist Nancy Crow. Her work is extraordinary, the shapes and colors. I’m also very drawn to Amish quilts, I like the subtle color play as well as the fact that they were made to be used and not just admired.

Quilt by Daniel Tillman

Quilt by Daniel Tillman

ST: It’s wonderful that you are part of the process of bringing artists and their work into the public eye and people’s homes. When did you start creating quilts? How did you discover this medium and was there somebody that encouraged you?

DT: I began making quilts twenty years ago, at the urging of my wife Cyndi. She’s a wonderful seamstress and knows her way around fabric and sewing machines. It was a way for me to keep busy, instead of sitting down in front of the TV. One of the first quilts, I made, and still one of my favorites was for my oldest daughter, when she was very young. She would draw on the quilt, in chalk, while I was at work and then I would stitch the drawing at night.

ST: Wow! What a collaboration between you and your daughter! And all with the great encouragement of Cyndi. Can you please tell us more about your quilting technique? What kind of stitch or patterns do you use? Quilting is a tradition in many cultures, such as with the Japanese and Amish.  Is there one type that you often look towards for inspiration?

Corrigan Quilt by Daniel Tillman

Corrigan Quilt by Daniel Tillman

DT: Aside from the color play of Amish quilts I am also inspired by Japanese sashiko. Their stitches are so tiny and precise. I strive to do that whenever I can, with my work. I generally machine piece the quilts, I like the durability that that brings to the structure, but as I put the three layers together, backing, batting and top I prefer to hand-quilt. It is more time consuming but very rewarding.

Sustainable Queen Bee Quilt by Daniel Tillman

Sustainable Queen Bee Quilt by Daniel Tillman

ST: Where do you find yourself feeling really inspired to create?

DT: For the past six years I have been a co-director of the International Interior Design Association Sustainable Quilting Bee. The design field uses many many yards of fabric samples every year. When those designs are discontinued the fabric ends up in a land fill. The aim of the Sustainable Quilting is to have architecture firms design their own quilts and then work as teams throughout the year, at the end of which we have an auction to raise money for a charity. The samples get re-purposed into something entirely different The beauty of the project is that these very creative people get to have an outlet once a month, at the Bee, to be creative with their peers.

ST: What are some other forms of art you practice?

Drawing by Daniel Tillman

Drawing by Daniel Tillman

DT: My other creative outlet is drawing. I have been trying to translate my drawings into a quilt but to date it hasn’t worked as well as I would have liked. The advantage is that quilts are large and unwieldy while drawing is something that you can always do, no matter where you are.

ST: I think you’ve connected the drawing and your quilting quite well! I can also see how your drawing could be a start for an embroidery pattern.

DT: I would like to share a technique for designing fabric that I learned last year. It was a bit messy, but really fun. You take a piece of cotton fabric, others will work but cotton is readily available. Soak it in vinegar until it’s dripping wet. Lay the fabric on a garbage bag outside and then place nails or other objects that will rust on the fabric in a design. Cover the fabric with another garbage bag and leave in the sun for 24 hours that will usually be enough. The vinegar and the sun speed up the rusting process. After it has sat outside for a day or so take the fabric and set it in a bucket of water with salt added. The recipe I used wasn’t very clear, but a couple of table spoons should be plenty. Let it sit in the bucket for 15 minutes and then remove. The salt sets the dye so that it should be fairly permanent. You will want to wash it after this, because it will smell a bit.

Thank you for this opportunity to introduce you to quilting and I hope you’ll try putting fabrics together. It’s a wonderful entry into creating something of your own.

ST: Thank you Daniel for sharing with us! Don’t forget to check out Daniel’s C3 Designs at https://c3design.wordpress.com.


Print
Posted by , on August 26th, 2013 at 1:35 am. No Comments

Category: adults,Arts & Crafts,Design,Featured,Scribble Artist Interviews,Uncategorized Labels: Amish, C3 Designs, Daniel Tillman, Japanese, , Quilting,


Scribble Artist Interview with Jerry Belich!


Scribble Town (ST): Watch the above video and you’ll see why with an introduction like that we all think that Jerry Belich is a talented artist with a great sense of humor! Jerry, where are you and what are you up to these days?

Jerry Belich (JB): Spatially, I live and work in Northeast Minneapolis. I’m native to MN, but have been fortunate enough to travel quite a bit, including five weeks in London this past winter where the Choosatron was a big hit. I’m the senior mobile developer at Clockwork Active Media, I’m finishing up a movie swede of David Lynch’s Dune, and have been doing a few improv shows in the theatre community! I keep myself busy.

ST: Wow! On top of it all, I’m sure very busy trying to raise funds for Choosatron: Interactive Fiction Arcade Machine.  I first stumbled upon

Choosatron on Kickstarter and your idea sounds great.  Please let us know what the Choosatron is and what you are raising funds for.  We’d like to help you!


JB: Put simply, the Choosatron is small device that prints and plays Choose Your Own Adventure inspired stories. I was trying to think of something I wanted to build, and I thought back to the interactive books I read as a child, along with trips to the arcade. Since I built the first Choosatron, the excitement from both adults and kids has been incredibly motivating. I realized how fun it would be to use, not just as a toy, but a creative platform. It’s a lot of fun to play, but I’m excited to raise the funding for building the writing platform to go along with the device itself. In the broadest sense, I want to raise funding to build a bridge between the technological and creative, with storytelling at the center.

The Choosatron in action at Saint Paul Maker Fair

Choosatron in action at Saint Paul Maker Fair

ST: When did you start creating interactive toys/games/play/amazing machines?!  The thing is that you do so much! You are playful renaissance man. Was there somebody that encouraged you?

JB: I started creating my own interactive stories as a kid. I’d gather friends around, make up a beginning to a story, and give them each a turn to describe what they wanted their character to do in the world. It was my earliest form of roleplaying, though I never participated as a player, only as the game master. From there, making interactive stories and adventures on grid paper, to writing games in basic on an ancient computer. Game design and storytelling have always been lingering in my mind. More recently, it was a client working on the creative for a big installation project in Las Vegas that mailed me an Arduino after I mentioned my interest on a call. I’ve developed software for over a decade, but hadn’t done much tinkering with electronics. I’ve always worked to create more than I’ve been willing to advertise it, so many of my projects get completed, and then a spot on the shelf. It’s due to the encouragement of others that I’ve been more forthcoming. Not out of shyness, but honestly not expecting anyone to find any of it interesting.

ST: What inspired you to make Choosatron? How did the idea develop- conceptually and design wise?  What made you choose text as the source of communication rather than images?

The Choosatron Prototypes by Jerry Belich

Choosatron Prototypes by Jerry Belich

JB: Arcade machine and interactive stories. Specifically choice based, where narrative still has a stronghold over each step in the story. Sandbox games are endless fun, but for very different reasons, and I prefer to get lost in the story. Text is what I’m used to working with. I can’t draw to save my life, so there wasn’t much of a choice. That being the case, I did work on an interactive story using only pictures for the Little Printer by BERG at their second hack day in London. It was called “Ways to Die”. Once a day you’d get an image, starting with you washing up on the shore of an island. It would print a few QR codes, and the one to scanned first would determine the path for the next day. It might take a week, or even two, but one way or another you’d meet a terrible end on the island. I thought it was hilarious.

ST: When you develop software what is your creative process like?  Would you call yourself a software developer?  Your talents run all over the place!  What are some other hobbies or interests you like?

JB: I tend to design as much in my head as possible, and then create the skeleton for the software I’m going to write. It’s all generally quite practical in that sense. What language, what platform, what are the constraints…you have to be pretty organized and have a process in order to work on a lot of projects at once. I’m already scatterbrained enough as it is. Software, and now hardware, is my career. I spend the rest of my time writing stories, putting together or taking part in improv shows, playing the theremin, and making videos or animation. I love hobbies and variety, so will just pick something up for a while and see if it comes in handy, like knitting or building puppets.

ST: Where do you find yourself feeling really inspired to create?  In other words, is there a time of day that better suits these bubbles of creativity?

Picture of Jerry Belich

Picture of Jerry Belich

JB: I’m an extrovert, so being around people gives me energy. I also find the white noise of public places soothing, and have an easier time getting tasks done. I’ve carefully crafted my spaces at home to reduce how easy it is to get distract or too ‘comfortable’, but ultimately I can only get so much done at home. It used to be late at night was my most productive time, but I discovered that it was just being uninterrupted that helped. Actually, even just KNOWING I won’t get disturbed gets me into the right frame of mind quickly. The other element that helps is having access to the minds of whoever I know can help me with a creative problem since I work things out best by trying to explain them to someone. I really have these terribly opposed needs to get through my creative cycle which gets maddening sometimes.

ST: What is your process for getting your work out of your head? Do you sketch with pencil, paint, computer graphics, talk with certain friends for some good dialogue etc. ?

JB: Ah, well just was I was saying above! It’s talking and dialogue. I feel a strange disconnect between what I see in my head and what I’m able to jot down. I hate it because it makes capturing certain ideas much more difficult. I use a combination of a notepad that is always in my back pocket, a small pressurized pen in my front (I hate pens that stop working the moment you need them), and talking everything out with friends and professionals.

Choosatron and Spark Core (https://www.sparkdevices.com)

Choosatron and Spark Core (https://www.sparkdevices.com)

ST: What is your studio environment like? This is where the magic happens!

JB: Organized, at least usually. I get very anxious when I’m in big time crunches that don’t allow me to keep my work (and sometimes not work) spaces clear. I like large tables where I can spread out, and see everything at once, which is helpful for my absent mindedness. There are usually post-it notes with various types of todo lists, and a specific balance of comfort and utility. I want to want to be in my work space, but not want to take a nap.

ST: Since I haven’t yet played with the Choosatron, the idea led me to Brian Eno and Peter Schmidt’s Oblique Strategies game.  Your game brings the player to the next level of the story all and Oblique Strategies helps the player break creative blocks by moving progressively forward, like a story does.  What games do you like to play?  Also, any game theorists you often looks towards for inspiration?

JB: Oblique Strategies is an interesting example. They created something for themselves in order to inspire themselves. In that fashion, the Choosatron is similar. I’ve created a tool that gives me a framework to write and design in a completely fresh way. The content of the cards themselves don’t do much for me though. I’m particularly fond of cooperative games, especially when players are not forced to cooperate with each other, or when one of you isn’t who they seem. I’m fascinated by the influences that cause people to band together and turn on each other. I love Betrayal at the House on the Hill and Red November quite a bit. Munchkin is a fantastic game. My new favorite is Epic Spell Wars of the Battle Wizards. I don’t know that I have specific game theorists that I look to, but I love exploring well known theories such as the Prisoner’s Dilemma within different mediums, and seeing how storytelling can affect the perception of the players. I’ll stop there as I could probably go on endlessly if you let me!

ST: Yes! You’ve given us, Scribblers, all whole lot to think about and plenty of inspiration to get started on making our own inventions, stories, and games.

JB: I think the scariest moments in life, especially creatively, are taking the first step to starting something new. You don’t know if you’re doing it right, or well (and in fact probably aren’t), but you have to push through that in order to find the really great work you are capable of. You need to make the mistakes, gain the confidence, and practice. Trust yourself, and you’ll be rewarded for it!

ST: Thanks Jerry! That’s perfect advice! Just make your idea come true and let’s see where that shall take us. For more information on Jerry Belich and his artwork, please visit his Choosatron website and Monkey with a Mustache Entertainment.

Logo of Jerry Belich's 'Monkey with a Mustache Entertainment' Check out all of Jerry's projects at http://monkeytheater.com

Logo of Jerry Belich’s ‘Monkey with a Mustache Entertainment’ Check out more of Jerry’s projects at http://monkeytheater.com and http://choosatron.com


Print
Posted by , on August 19th, 2013 at 5:38 am. No Comments

Category: adults,Arts & Crafts,classroom,Design,Featured,Scribble Artist Interviews,Uncategorized Labels: Choosatron, Digital Art, Jerry Belich, Minneapolis, ,


Scribble Artist Interview with Susa Talan!

Day 106 by Susa Talan

Day 106 by Susa Talan

Scribble Town (ST): The perfect combination of image and words made by Susa Talan brings the meaning of the highlighted quotes to new visions. Susa’s artwork speak to me. The voice of the author from the quote she bases her artwork on is heard. And I think I’m not the only one! She is often on the move so I wonder, where are you, Susa, and what are you up to these days?

Susa Talan (Susa): At the moment, I’m spending time on a beautiful lake in Southern Maine. My partner and I moved out of our tiny home in rural Massachusetts in May and have spent the spring and summer traveling and visiting with friends and family before deciding where to make our next home. We have lived and traveled in many places over the last 6 years–both in the US and abroad (England, China, Burma, New Zealand, Australia). We like to travel. I actually find it inspiring to draw when we are on the move. That said, I am in the middle of a 365 day illustration project, so I am drawing every day and also starting a small stationery line. It’s definitely more challenging to do all this on the move! So as September looms, we’re both feeling ready to make a home again.

Day 58 by Susa Talan

Day 58 by Susa Talan

ST: The movement of travel and seeing everything new and unexpectedly is very exciting! Drawing on the road is a great way to capture it all. When did you start illustrating? Was there somebody that encouraged you? If there is a story of your path to finding this medium that fits you so well, please share.

Susa: One of my strongest early memories of illustration is from middle school. I did a project on Walt Disney, the artist, and I made a poster full of Disney characters that I hand-drew myself. I really appreciated how precise and detailed those drawings were and I learned from his example. I loved that poster and kept it on the wall of my bedroom. I still have a vivid memory of what it looked like!

My earliest experiences with art, however, come from my time in elementary school. I attended The Common School, in Amherst, Massachusetts which is deeply rooted in creative learning through art, theatre, music, the outdoors. For nine years I was given the choice to draw as a morning activity, surrounded by art materials and free time to explore them. Because of this, my relationship to learning and to making things–anything, really–is naturally integrated with my impulse to make art. I also have a creative older sister who is a musician and an artist. So both at school and at home there were really immediate artistic influences.

Day 96 by Susa Talan

Day 96 by Susa Talan

For many reasons I moved away from art and poetry in high school and it wasn’t until my senior year in college, that I ended up in a poetry class, by some small miracle, and it really changed the course of my life. I dropped my senior thesis in psychology and I started writing poems again. It wasn’t long before I was painting and immersing myself in art. Over the next 7 years, I went to museums and galleries and poetry readings. I read artist biographies and explored painting. I reconnected with my love of both writing and art–and even began, for the first time, to combine them by putting text and language into my paintings. This has always been a very deep wish. To bring text and words into my art. Among many, one person who influenced me during this time is Janeen Koconis, the artist behind the very successful cards, KOCONY. I loved her work. I still love her work. I never met her, but I bought her cards over and over again. She was the first person who I saw putting text together with art in such a way that really moved and inspired me.

Though I desperately wanted to go to art school, I was afraid that I couldn’t make a career of art. I was convinced that it was impractical and so I made a very practical decision to become a teacher and go to graduate school in education. I loved children and teaching came naturally to me, so there were many good reasons to have made this choice. And this became my focus for many years—nearly 15 in all. I worked in schools as a teacher and then a tutor and later I consulted with teachers and parents. I still care deeply about the development of children and their experience of learning.  And even today, I run occasional parenting workshops for parents.

Day 108 by Susa Talan

Day 108 by Susa Talan

Over all these years, my deep love of art and poetry stayed alive in lots of ways. I made cards for friends. I made small paintings. I wrote in a journal and I wrote poems. I eventually even went to art school for one year, in my early thirties. Unfortunately, it was a year of artistic struggle that felt a lot like artistic failure. I didn’t know how to make the kind of art I truly wanted to make. I didn’t know how to trust my artistic voice. At the end of the year, I left feeling very discouraged. I abandoned art-making altogether.

In 2006, a family crisis put everything in perspective and I left my home and life in Boston to join a Buddhist meditation center. For the next 3 years, I didn’t make any art and immersed myself in meditation and contemplative practice. Eventually, I left the center and life took me back to teaching and education and travel.

One day, without plan or preamble, I picked up a single micron pen and an old sketchbook. I started drawing. I drew and drew and drew. So many wonderful things began to happen! I drew butterflies and trees. I drew people and buildings and birds and dogs and patterns. This went on for a year and then another year. Eventually, words starting coming, too. Words of my own and quotes from people I admired and read. Poets, writers, scientists, biologists, artists. Anyone who had inspired me. Eventually, one thing led to another. Two different singer-songwriter friends asked me to illustrate their album covers. I bought the Adobe Creative Suite and learned Photoshop and Illustrator. In December, 2012, on my 39th birthday, I committed to giving myself a year of daily gratitude, a year of making illustrations every day, a year of creative discipline.

Day 137 by Susa Talan

Day 137 by Susa Talan

And the rest, as they say, is history. I am finally living the dream of making art full-time. I’m selling my cards in stores around the US, as well as working on a 2014 calendar and a 365 Days of Gratitude book.

ST: I love the way you told your story! Your earnestness for art making is very much felt in the vibrant way you use words. And now we have a calendar full of your artwork to look forward to!

When you illustrate what is your creative process like? Does your image come after your quote or vice versa? How do you come across these amazing and meaningful quotes?

Susa: My creative process is pretty much the same each time I work, with some variation depending on the project. Most often, I start with a quote or words. Choosing them, selecting them, is it’s own process. There are so many writers whose words have kept me company over the years that finding authors is not the challenge. The hard part is finding quotes that pass something like a sparkle test. Which basically means it moves me, pretty instantly, in some deep way. Like a little whir or spark. A hit of recognition. Because there are a million wonderful quotes out there, but not all of them produce that sparkle in me—something that feels universally meaningful. It’s hard to explain. But I know right away when I come across a quote if it will work.

Day 213 by Susa Talan

Day 213 by Susa Talan

Once I have some quotes, I look for one that produces a similarly quick visual idea. Since I’m working with a daily deadline for the gratitude project, I don’t have much time to re-work an idea. If a quote with sparkle gives me an image, I run with it and start drawing. If it doesn’t produce an image right away, I put it on hold and keep looking.

ST: Time and silence are sometimes the best way for ideas to rise to the top. Please tell us a bit about your 365 Days of Gratitude project. What day are you on?

Susa: The 365 Days of Gratitude project was conceived as both an exercise and a gift. On the creative side, I was looking for a long-term project that would get me working everyday under a deadline. Last fall, I discovered the work of artist and illustrator Lisa Congdon who was only a few months away from finishing a 365 Days of Hand-Lettering project. I was so inspired by her work and her commitment to this year-long project. I knew I wanted to do something similar. On a personal level, I wanted to offer myself a year of gratitude for my 40th birthday year. That seemed like a meaningful way to enter my fourth decade of life. So I started the project the day after my 39th birthday. It will finish at the end of December 2013.

Some days I have to remind myself of what I’m grateful for. That sounds kind of funny given that I’m engaged in a daily gratitude project. But it really feels like part of the path of being human. Don’t we all need reminders to be kind, to feel something directly and not just think about it? So that’s a big part of this project for me, personally. I try and remind myself throughout each day what I’m grateful for. And then creatively, it’s just been amazing to evolve artistically this year and be working so much each day. Today is Day 218!

Day 80 by Susa Talan

Day 80 by Susa Talan

ST: It must be nice to wake up and be totally aware of which day it is and how it places in context to the yearly calendar. Sometimes I don’t even know what day it is!

What is your process for getting your work out of your head–do you sketch with pencil, paint, computer graphics, etc?

Susa: I don’t sketch or plan out my drawings much beforehand. Once an initial idea comes into my mind, I run with it and the drawing evolves while I work. Most of my drawings come out in one take. I don’t tend to re-work or redo a drawing.

Once the image is done, I’ll scan it into the computer. If any minor edits are needed, that happens in Photoshop. Once the lines of the image are set, I’ll bring it into Illustrator and colorize. In terms of my tools, I work with about 5 different sizes of black micron pens.

ST: When you are creating these days what kind of music are you listening to? What is your studio environment like?

Susa: I don’t tend to listen to music when I draw. I enjoy silence and find it pretty necessary for the kind of concentration I use during the drawing phase. It doesn’t need to be pin-drop silent. I just like a quiet space, and the natural sounds of life happening around me. Once I enter the computer phase, I do listen to music and often to podcasts. My current favorite is “On Being” with Krista Tippett. Even though I don’t often listen to music while I’m working, music is a big part of my creative life. I play guitar and it provides a really different, but complimentary, creative outlet. So lots of inspiration there. Recently, I’ve been going back to Paul Simon. I came across his album “Graceland” and forgot how much I love it. He’s such an innovator.

Day 199 by Susa Talan

Day 199 by Susa Talan

ST: Many childhood family road trips were spent belting out Paul Simon. I should bring him out again too! Out of all of the quotes and sayings you have depicted, which one holds a very close spot to heart at the moment? For me, Thich Nhat Hanh’s quote for Day 199 really spoke to me and your picture made it all the more clear, tangible and understandable.

Susa: Each gratitude page holds a different connection and relationship for me. And yet, over the year, different pages do, inevitably, feel more or less impactful. Right now, Day 207, the Ernest Hemingway quote, “The best way to find out if you can trust somebody is to trust them” has been a strong one for me. I was really pleased with how the illustration came out and felt it embodied what I had hoped to with the quote—which is so potent, so true, in my experience. The practice that the quote implies, moving towards trust when you feel untrusting, is a deep one.

Day 207 by Susa Talan

Day 207 by Susa Talan

ST: Susa, you have touched us and opened our eyes to many great people who value life and being. Thank you for that! To see more great artwork by Susa, please visit her website, http://susatalan.com/.

Special treat today is ‘Drawing with Susa Talan’ on the Scribble Shop! To do the art activity with Susa, you can click here. Let’s enjoy the moment, but I have to say that I’m getting giddy for the Susa’s 2014 calendar and 365 Days of Gratitude book. Check back for more details!

Day 136 by Susa Talan

Day 136 by Susa Talan


Print
Posted by , on August 12th, 2013 at 2:03 am. No Comments

Category: adults,Arts & Crafts,classroom,Design,Featured,Scribble Artist Interviews,Uncategorized Labels: 365 Days of Gratitude, , Massachusetts, queen of hearts, Quotes, , Susa Talan


Scribble Artist Interview with Andres Amador!

Jersey Beach Art Festival. Andres working. Photo: Stepane Gimenez Photography

Jersey Beach Art Festival. Andres working. Photo: Stepane Gimenez Photography

Scribble Town (ST): The world is your canvas!  Visual artist Andres Amador proves that to be true with his landscape art whose primary canvas currently is the beach.  After you read more about Andres I think you’ll be inspired to create with the earth and appreciate it for all its beautiful components that make it fresh, colorful and alive.

Andres Amador (AA): I call myself an Earthscape Artist, though this feels to more capture the heart of my pursuit- engaging the natural world at the landscape level using natural materials.

ST: I think Earthscape Artist encapsulates what you are doing and what the art is about!  Where are you and what are your days like?

AA:
Currently I reside in an open-walled, safari-style tent on a family homestead farm outside Grass Valley, California. When I am not working on the farm, I am working on projects for clients and developing the next iterations of my art.

ST: You live and work with nature- both with sand and soil.  When did you start creating beach murals?

AA:
I started in 2004. The idea came to me as I was studying crop circles and sacred geometry while on vacation in Hawaii. I was on the beach explaining concepts to a friend when, like a bolt from the blue, I saw what could be possible on the beach.

ST: Wow! I can imagine the blue bolt came straight out of those Hawaiian blue ocean waters! You never know how these ideas will volcano out from your imagination. When it comes to visualizing your projects, does the place inspire your style or is it the purpose of the drawing that takes precedence?

AA:
In general the design is primary. However, there have been opportunities in which the shape or limitations of a location suggested a certain way to work with it. There have been rare moments in which a location inspired a design.

Inspired by the cave and the narrow channel leading from the cave to the larger beach. I started way at the back of the cave where the sand started. In my mind the cave was breathing flames which turned into vines, then flowers off of which bud planets and stars. Plemont Beach, Island of Jersey. during the MyMemory.com World Beach Art Championships.

Inspired by the cave and the narrow channel leading from the cave to the larger beach. I started way at the back of the cave where the sand started. In my mind the cave was breathing flames which turned into vines, then flowers off of which bud planets and stars. Plemont Beach, Island of Jersey. during the MyMemory.com World Beach Art Championships.

Currently, now that I am using a remote controlled aerial camera, I will have the opportunity to truly work with the landscape- to know what it looks like from vantage points higher than I have been able to see from before and to capture the imagery. This is the cutting edge of my art development and has me quite excited.

ST: It’s great to see how technology is advancing your artwork not only with documentation but also with accessibility.  I can really see how the cave and the rocks guided the flow of your design elements!  What other forms of creativity do you do?

AA:
At the moment I am appreciating origami- its tough! I also love contact improvisation dance, in which I have been developing a signature style. Sculpture weaves in and out. Cooking is a major love. Many creative thoughts pass by me all the time, like butterflies flitting about. It feels as though I am capturing and expressing such a tiny percentage at any particular time. As my major expression at the moment is the earthscape art, many of my ideas turn towards pushing its boundaries. Often this means entirely new lines of creativity being born and adapted to the beach.

ST: For a person that has so many different creative interests, sometimes it’s also good to just put more attention to one project or medium. How do you start planning your projects?  Some have been very big productions requiring a lot of help from others! What is then your process for creating it on the beach?

AA:
The main thing I do is somehow capture the idea- whether as a sketch, a written note, a phone message to myself, a recording- whatever I have on hand. For the past 10 years I carry with me practically all the time a pencil case with pencil, sharpener, and flash cards. I have found flashcards to work the best for me. With them I can do many sketches of ideas and make variations then later group them into categories and later still select a few that would make good candidates for being on the beach. I also carry an iPod touch, the kind with a camera. I use it for taking notes, for doing recordings, and most usually for taking quick photos of inspirational imagery.

Andres Amador's example of a flash card with a design sketch.

Andres Amador’s example of a flash card with a design sketch.

If there is geometry to work out then I will use Illustrator on the computer as it makes the process, and being perfect, very easy (with the geometric designs perfection is important).

Once on the beach I will turn to a number of techniques. Often I am coming up with new ones to fit the needs of the design. In general though, the main thing I am working with is keeping a sense of what is happening around me while I work from the inside. Its an acquired skill, keeping it together. With the geometric is about knowing the steps I have set for myself. With the organic designs its about knowing the process I am engaging, which shifts according to the design. I am always learning more. Now that I am using an aerial camera, the scale can go even larger, which means that the lines that have generally been good enough now much be much much larger to be visible. So there’s a constant re-orienting. For me that’s part of the fun. There is no ‘way’ to do it. It’s a constant exploration.

Here’s a guide I made to create a geometric design,

Torus-recreation

Torus-recreation


which became this:

Ocean Beach, SF

Ocean Beach, SF

Below is a photo of an organic design.

Ocean Beach, SF

Ocean Beach, SF

ST: I really like the impermanent aspect of your work. So much effort only to last for a short time. I wonder in what ways do you document your work (to make it permanent : ) ).

AA: Impermanence was not an aspect I was looking to engage when I started. But its the overwhelming feature of the artwork. Often as I am working on a piece it is being simultaneously washed away. I was being filmed recently and as I finished and the film crew was flying a camera up, a huge wave bit into the art- too soon! We had to redo the creation the next day (fortunately we had that option!). Prior to this art form I was doing large sculptural installations. I still have a garage full of my art. I can’t let it go! With the beach, I have no choice, which is refreshing :-)   Of course I do take care to capture my creations and so am dealing with digital detritus(!)

If someone didn’t know how large my works were, the designs alone would not be so impressive. But knowing that so much effort went into something with such a short lifespan creates a different impact. Attention is given to the work and the reasoning behind it. Philosophically, the aspect of impermanence has had a big impact on me. In the end, our own existence is temporary. Nothing that is made will last forever. We subconsciously anchor ourselves to what we feel is solid in the world. We act as though the lives we live have stability to them. But that is an illusion. When upheavals in life happens we are reminded that the only thing we can count on is change.

It can seem as though making my paintings on the beach is a pointless act. But in reality, all acts are ‘pointless’ in that there is no inherent meaning. When we are able to stand tall and enthusiastically create from our hearts unencumbered by such concerns, aware that all our acts and achievements are but drops in the rain but engaging regardless, the offering becomes even more powerful, more poignant, more infectious. It doesn’t matter what we do- if it is done as an expression of love- that is its own validation and it is then a true offering to the world.

ST: Even if your beach murals have faded, they have made an impact on who has experienced them. Have you done collaborative beach murals with other artists?  I got an idea- what about collage beach murals?!  Your murals would be a perfect stage for a performance- instead of a curtain you can draw the next props to set the scene!

AA:
I’ve done lots of collaboration. I love collaboration- the mixing up of ideas and abilities. At the moment I am collaborating with the director of the Santa Cruz Symphony. I am always open to interesting collaborations. And I have done performance within the artwork [see image below]. I look forward to other opportunities to do interesting things within the art I create.

‘This Constant Yearning’ dance performance

‘This Constant Yearning’ dance performance

Over the years the art has dictated the documentation. As I got more serious about the art, I had to get more serious about the recording of it. I’m working on the next iteration of that trend as I shop the next level of camera I wish to use. I recently did a memorial ceremony artwork [see image below] that had about 200 participants, which was very powerful.

Ceremony artwork by Andres Amador

Ceremony artwork by Andres Amador

ST: Please tell us more about your Playa Painting Workshops.  How can we get involved?

AA:
I haven’t been as active with the workshops since I moved from the San Francisco bay Area. However I do work with groups and very much enjoy working with schools. I am also looking to do some very large creations for which I will be putting out calls for assistance. The best way to be involved with something I do is to join my facebook fan page:

ST: Thanks Andres for all your insight and inspiration!  Scribblers, here’s an activity Andres came up for you to start with your own Earthscape Art.  Click here to have a look.  See you by the shore!


Print


Scribble Artist Interview with Marianne Murphy!

Scribble Town (ST): Just like this picture of an alien astronomer, Marianne Murphy is an artist who is a seeker of all sorts and finds a way to communicate with you…even with creatures from outer space.  Creative to the bone, Marianne let’s us know what she’s done and where she wants to go.  3 2 1 blast off!

"Alien Astronomer" 2013, digital art, by Marianne Murphy

“Alien Astronomer” 2013, digital art, by Marianne Murphy

Marianne Murphy (MM): My name is Marianne Murphy, I’m 21 years old, I was born in Maryland and attend the University of the Arts in Philadelphia, where I’m studying animation. I also have a lot of experience with filmmaking, puppetry, and graphic design. I hope to work in children’s media when I graduate and to someday design and write children’s books, television shows, and games to promote education, literacy, creativity, and self esteem.

ST: You are off to an amazing start!  Your goals and your vision are so clear.  I’m excited to see what paths will unfold before you, but for now where are you and what are you up to these days?  That is, besides you making these great folded paper animations such as your “Penguin Journey” 2013.


MM: I’m currently in Philadelphia, sequestering myself in my apartment to finish a film I’m working on for a puppetry festival in my hometown, Bethesda MD (Puppets Take Strathmore). It’s about the ideas of nostalgia and memory, and it combines a lot of cool puppetry and digital animation techniques. I’m also working on putting together some curriculums for Creative Writing and Cartooning camps for children ages 8-12, and will be leading them as a counselor in early August, which should be really fun. I love inspiring children to be creative and I can’t wait to see what they come up with during those weeks!

"Cloud Explorer" 2013, digital art by Marianne Murphy

“Cloud Explorer” 2013, digital art by Marianne Murphy

ST: Puppets Take Strathmore looks like such a fun event!  I can’t wait to see your film.  When did this creative bug start buzzing around in your body?

MM: I’ve been drawing for my entire life and my parents and teachers have always encouraged me. I started making films when I was in elementary school with my mom’s video camera, and I taught myself how to use editing software. At that point I was just making short videos with my friends, but in middle school I started making puppet films and having my puppets lip sync to popular songs. This interest in puppetry went on all the way up to high school, and I briefly attended the University of Connecticut to study puppetry. I realized there, however, that my interests had expanded to include illustration, writing, drawing and graphic design and I transferred to my current school to combine all of these interests into a new major: animation!

"Puppy Dreams" 2012, digital art, by Marianne Murphy

“Puppy Dreams” 2012, digital art, by Marianne Murphy

ST: New interests always come about in interested people and I think you definitely fit the bill ;) .  I wonder, where do you find yourself feeling inspired to create?

MM: I’m very inspired to create by children’s books and television. I love seeing how shows and books are creatively using new technologies and art forms to inspire children. I also notice a lot of shows these days are focusing less on education/creativity and more on marketing products, and these kinds of shows inspire me to create art that can help children learn real, important lessons about life. Artists who believe in teaching children these lessons, such as Jim Henson, Fred Rogers, Judy Blume, and Lemony Snicket, are very inspiring for me.

Pears, France" 2011, digital art, by Marianne Murphy

Pears, France” 2011, digital art, by Marianne Murphy

ST: You mention artists from a range of mediums and genres.  I take it that you are a fan of everything art.  What other forms of art do you practice and what are your favorite tools you use to create?

MM: I practice a lot of filmmaking, editing, puppetry, and figure drawing. I also play piano and drums and love to create soundtracks for film projects. I love working digitally with a Wacom tablet and pen, and I love working in my sketchbook with mechanical pencils.

"Honeybee" 2012, digital art, by Marianne Murphy

“Honeybee” 2012, digital art, by Marianne Murphy

ST: Get ready for a hard question- who is your favorite artist?  Sometimes this gravitation towards a piece of art comes out of nowhere, but why do you think you connect with their artwork?

MM: My favorite artist is children’s book illustrator Lane Smith. He worked on books such as “The Stinky Cheese Man and other Fairly Stupid Tales” and “Math Curse” with Jon Scieszka, which were my favorites growing up, and he most recently wrote and illustrated “Abe Lincoln’s Dream”. I love his drawing style and his use of collage and different mediums to create wonderful, haunting works of art. Each of his books feel like an awesome, magical world to me. I also love the work of children’s book illustrator Jon Klassen (This Is Not My Hat) and children’s book writers Mac Barnett (Chloe and the Lion) and Joanna Cole (Magic School Bus) for their extremely innovative designs and ideas.

ST: From an artist who has already explored and created so much and is on a mission to encourage young artists, do you have any tips, advice, or ways of encouraging our scribblers?

"Ice Skating Unicorn" 2011, digital art, by Marianne Murphy

“Ice Skating Unicorn” 2011, digital art, by Marianne Murphy

MM: In my experience, all children are creative, and drawing is an amazing activity. I recently taught a camp with 6-8 year olds, and whenever a child had a problem or a troubling anxiety, I asked them to draw their feelings or what they wish would happen. The creativity helped them express themselves and deal with their emotions! Also, I’ve noticed that children are really interested in a lot of popular television shows and characters and love to talk about them. The excitement for these shows can easily be transferred into creativity. Inviting children to create their own stories, comics, drawings, props, costumes, or games about their interests is always a good idea!

ST: Marianne has shared a great Quick Scribble Activity with us on the Scribble Shop.  Try it out for yourself! http://www.scribbleshop.com/content/quick-scribbling-marianne-murphy  Thanks Marianne for sharing so much with us!

We will say, “see you later!” with Marianne’s winning Best Sophomore Object Animation at UARTS 2013 titled “Numbers”.


Print
Posted by , on July 29th, 2013 at 4:19 am. 1 Comment

Category: Arts & Crafts,classroom,Featured,kids,Scribble Artist Interviews,Uncategorized Labels: , , Marianne Murphy, , origami, , , University of the Arts in Philadelphia


Scribble Artist Interview with Eric Maruscak!

Scribble Town (ST): Pictures as big as streets that depict the wows and wonders of the imagination.  In that sense, Eric Maruscak, makes the impossible possible…and all with chalk!

Chalk art of a Pool at July Fest. By Eric Maruscak.

Chalk art of a Pool at July Fest. By Eric Maruscak.

Eric Maruscak (EM): My name is Eric Maruscak, I am a life-long artist. My styles range through illustration, both traditional and digital, to cartooning, comic strips and the like. However, I am mostly known for my giant chalk art murals that I create at conventions across the United States, often of various pop culture themes including comic books, video games, and anime characters.

ST: Eric, where are you and what are you up to these days?

EM: I am located in Upstate New York, but I travel all across the United States for appearances. I’ve done chalk murals everywhere from Chicago, Dallas, and Seattle, to LA, Philadelphia, New York City, San Diego and more. I create art for various companies that want to highlight a property – a new book, video game, movie, TV show… etc – as live performance art mostly at pop culture conventions, often taking up to 30 hours to complete.

I also work as an illustrator for all sorts of freelance jobs. I specialize in cartoon style work, but do everything from concept art to sequential story telling.

ST: Your ability to draw realistically is unbelievable!  How long have you been working at this talent?  Who are your mentors, personal cheerleaders and biggest fans?

EM: When I was young, both of my older brothers AND my dad all drew. I was impressed by what they could do, so I set out to be like them. I started by copying everything I could, newspaper comics, Norman Rockwell drawings, and the like. Over time, I got very good at copying, so I took the next step and started working from my imagination. All of my family encouraged me greatly in my pursuit to be a better artist. I also specifically remember Mrs. Hall, the art teacher in my elementary school who encouraged me greatly along the way.

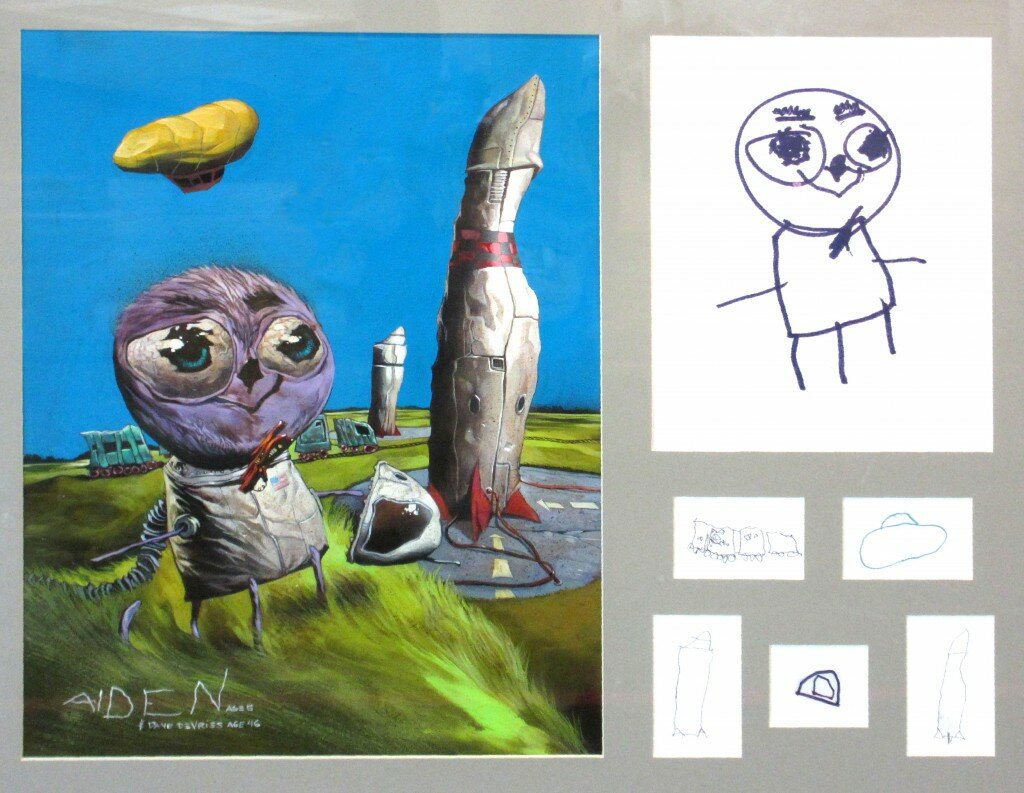
ST: How do you get the vision for your characters?  I can sense that Robot Smith, your Iron Worker, has quite a big personality.  Where did this guy come from in your imagination?

"Robot Smith" - Digital Illustration (unfinished) by Eric Maruscak

“Robot Smith” – Digital Illustration (unfinished) by Eric Maruscak

EM: Images come from several different sources. Sometimes it is from seeing something that already exists, then my mind naturally begins to play with it, wondering how it would look if I took it in a different direction. Sometimes it comes from shape building. I love to sketch freely, just letting forms and contours happen naturally, then looking into those forms to find things. It is amazing what will emerge. Other times, especially when I am tired or near sleep, full, complete images will pop into my minds eye like a flash bulb going off. From that point on it is all work to get as close to that complete image I saw so instantaneously.

The Iron Worker was one of those that popped into my head rather quickly. I had an image of an old fashioned, turn-of-the-centry type steel working, but then my brain played one of it’s usual tricks and I saw him working on some sort of high-tech, futuristic machinery. From there, it was all about capturing that old-time feel.

I’ve always had a love for science fiction and fantasy stories, movies, novels…. etc. All of those bring something to the table when I create new artwork. But reading is one of the best things to train your mind. Read an authors description, then try to bring that to life as a drawing while being as true as possible to the details the author provided.

ST: As for your recent work- I’m guessing you are a huge Star Wars fan!  What are some other movies, games, or characters you really like that end up being a theme for you?

"Star Wars: The Clone Wars - Season V Chalk Art" - Star Wars Celebration VI, Orlando Florida, 2012

“Star Wars: The Clone Wars – Season V Chalk Art” – Star Wars Celebration VI, Orlando Florida, 2012

EM: I am a child of the 70′s and 80′s, so a lot of classics still play at the drive-in theater in my mind. Star Wars is clearly the biggest influence on me, as it was with many people. But movies like “The Black Hole” from Disney, or “Flash Gordon” were very influential on me when I was growing up. I am a fan of the weird and cult films, things like all of the Godzilla movies, or “Big Trouble in Little China”, horror films with EXCELLENT design like “Alien” to the original movie version of “Dune” which, to me, is still incredibly under-rated for the world it created and the place it took you. I find I can watch that movie endlessly for some reason, dated special effects and all.

I loved looking through the Dungeons and Dragons manuals when I was young. I never played the game much, but poured over the pages looking at the fantastic artwork. Dragon magazine was another that high-lighted some of the best fantasy artists working at the time.

I’ve also ALWAYS played video games, and naturally been drawn to the graphics even more than gameplay experiences. I owned everything from a Commodore 64 (where I played “Maniac Mansion” from Lucasfilm over and over” to game systems from Atari, Colecovision, Nintendo, Playstation, Xbox and on. The games that have influenced me over all of these years are too numerous to mention, but I still game to this day playing Skyrim, Bioshock Infinite, and more.

"Madoka Magika Chalk Mural" - Anime Central, Rosemont, Il. 2012. Eric Maruscak.

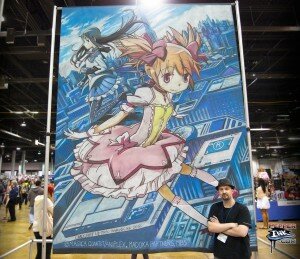
“Madoka Magika Chalk Mural” – Anime Central, Rosemont, Il. 2012. Eric Maruscak.

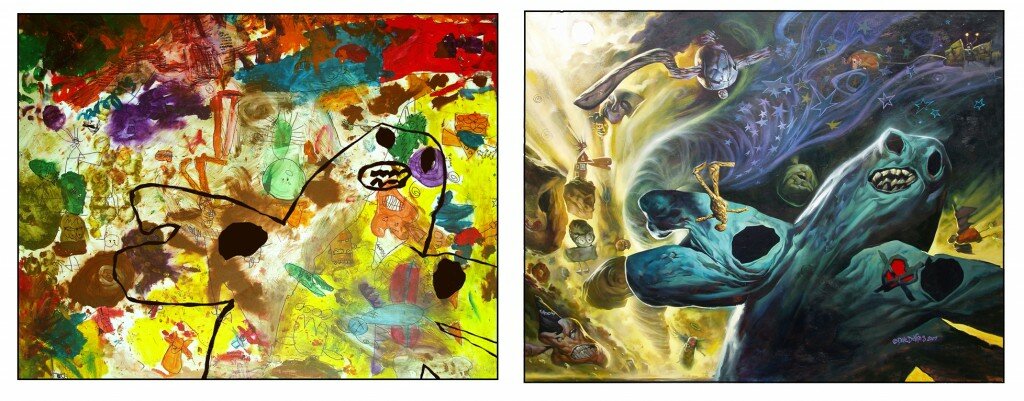
ST: Do you separate between your children’s artwork from your adult artwork?  I can see a difference in style and content.  Perhaps you can tell a bit about your different types of pictures and artworks.

EM: It is hard sometimes. I feel like I tend to skew old in everything I do, and maybe… sometimes…. go a little too far when the art is intended for a younger audience. But I think back on what it was like being one of those kids (and pride myself on having not forgotten the feeling), and one thing that always caught my attention, and kept it, was not being “talked down too.” I think the best artwork (and movies, stories, you name it) for kids are the ones that work for adults as well, and don’t play down to their audience. And that is the trick, that is the balancing act that has to be maintained when drawing for youth and adult audiences. I’ll readily admit I miss that line some times, but I try to keep my children’s work something that an adult would enjoy looking at as well. Obviously certain techniques in the level of detail, the “cuteness”, if you will, of the characters, the simplicity of the story or concept I am conveying, all come into play when thinking about a younger audience. Then I step past that and push more adult techniques into the mix, and I find that is when the work really comes to life.

A lof of my younger work involves my cartoons. They naturally lend themselves to younger audiences. And, of course, when I teach my chalk art classes I definitely simplify the techniques and make it much more about having fun with the artwork as it will keep their very short attention spans engaged longer that way. And as the age range goes up, I can increase the level of technique involved, layer on more detail and complex concepts…. but like I said before, I am as guilty as any artist of missing that line and maybe aiming to “old” sometimes.

"Wolverine: Joe Maduriera Tribute Art" - Upstate NY Art Festival

“Wolverine: Joe Maduriera Tribute Art” – Upstate NY Art Festival

ST: What is your process for getting your work out of your head- do you sketch with pencil, paint, computer graphics, etc. ?  I suppose for the chalk art- nature will take over and wash it away with the rain.

EM: I almost always sketch very small first. Thumbnail work is key in my process to creating images. Often it is on scraps of paper as well, I guess it is a way of tricking myself into feeling like the drawing isn’t as important if the paper is scrap, that way I have a lot less pressure and my style is looser. Once the thumbnail (or many is drawn) I will go to a more involved drawing based on the original sketch, changing things (hopefully for the better) as I go. If it is a detailed piece of art, I will work from photo references in certain parts to keep it as accurate as I can, but my natural style leans toward exaggeration, so I try not to sweat the small details too much. It is more about keep the energy up in the drawing, making it feel fresh, and not getting so bogged down in my lines or details that the drawing feels like it becomes static and loses all sense of movement.

Often, I’ll scan the drawing into my computer at some point in the process and continue working digitally from there, either in Photoshop or Corel Painter. I love the freedom a computer allows to experiment, and rework, but those can be downsides too if you don’t keep your focus on what you are trying to achieve. Too many possibilities lead you to get off track way too easily, so maintaining focus on your ultimate goal with the art is key. I’ll often ink the work digitally, then do digital color work as well to get to the final piece.

If chalk art is involved, finishing the drawing is only the beginning. At that point I will create a small grid on the art, then draw out a large grid on the big paper (or directly on pavement if it is an outdoor piece) and get to work re-drawing the artwork in it’s enlarged form. That is right, if I am creating chalk art I end up drawing the entire thing TWICE…. it is the only way. Once the outline on the paper (or pavement) is done, the rest of the rendering and coloring happens live at the event while people watch. Sometimes I am working with 40, 50, 60 thousand people or more moving past the artwork while I draw. I do my best to ignore the pressure that comes with that, and simply do my best and recreating the piece as accurately as possible, right down to the smallest detail.

"3D Chalk Art Hole" - Upstate New York Art Festival

“3D Chalk Art Hole” – Upstate New York Art Festival

ST: When you are creating these days what kind of music are you listening to? Or what is your studio environment like?

EM: I listen to all sorts of things, and often play on shuffle as I like the musical styles to vary as time passes. I have always described my musical tastes as HIGHLY eclectic, meaning that I simply enjoy songs much more than follow artists. There are a few I will buy everything they release, They Might Be Giants being one of them. But then I can range from Metallica, to show tunes, to Weird Al Yankovic, to Ben Folds, to orchestral movie soundtracks, to the Beatles, to Gorillaz, to Hall and Oats, to Iron Maiden, to Muse, to….. well, you get the idea.

My studio is still a work in progress as I bought a house a little while ago, and there is still much work to get it in order. My art studio is currently my computer and drawing table space, but none of the full size chalk artwork is done here. I will draw and the drafting table, and work digitally in the computer space, but if large chalk art is required, I literally have to rearrange the furniture in my living room to make space to work on it, and I can still only unroll about half of the art at any one time. This means that I actually never see the full sketch of a chalk art mural all at once until I actually get to a show.

ST: Your chalk art is absolutely amazing!  I’m sure you have many great stories because you, at times, draw out in the open.  People probably stare in awe.  Is there a story that sticks out in your head?  What’s the biggest chalk art piece you’ve ever done and how long did it take?

EM: The largest piece I have ever done was around 16 feet wide by 14 feet tall at it’s largest dimensions. They average around 9 feet wide by 13 feet tall most of the time, and will often take over 30 hours to complete (the largest one I mentioned clocked in near 40 hours over 4 days). I’ve had all sorts of things happen while working in public, with people often not paying attention and walking over the artwork (even if it is blocked off), I’ve had coffee spilled on one, kids run out onto others, even intentional vandalism at one of my outdoor pieces. I have to be very zen about all of it, breathe deep, fix what damaged parts I can and move on to finish the piece on time. The outdoor ones you especially have to disconnect yourself from as you know it will be gone once it rains.

"Hulk Street Art" - Italian Festival Street Painting Fair, Endicott, NY 2008

“Hulk Street Art” – Italian Festival Street Painting Fair, Endicott, NY 2008

Once I was at a show, and this guys started moving around my mural, filming the art on a video camera. He was running around it like a wild man, filming from different angles and acting generally weird. Then he got down really close to me to film and slapped his hand down on the art. This was an indoor piece on paper, and the paper can actually be very fragile and rip easily so I quickly said “Be careful…” I think that was all I got out before the guy dramatically whipped his hand away, looked at it like he had touched something poisonous, then stood up, kept filming and quickly moved away in the same odd manner he had been acting the whole time.

I continued working, and it wasn’t until a few minutes later that one of the convention goers came up to me and said… do you know who that was? I thought they meant did I know him personally so I said no I didn’t and then they told me that was Thomas Jane, the actor. I had no idea at the time, and to this day I still have no idea why he was acting like that. But I smile at the thought that I told The Punisher not to touch my art.

ST: Great story!  Keep smiling :)   Any tips on that?

EM: I mentioned above about drawing shapes and looking into them… that is actually something I teach in my art classes called “The Scribble Technique”.

ST: To read more about it have a look at The Scribble Shop Blog.  Thanks Eric and we’ll look out for your next masterpiece!


Print
Posted by , on July 22nd, 2013 at 7:40 am. No Comments

Category: adults,Arts & Crafts,,Design,Featured,kids,Scribble Artist Interviews,Uncategorized Labels: Cartooning, Chalk Art, Comic Strips, Eric Maruscak, , , Pepperink,


Scribble Artist Interview with Xavi Carbonell!

Scribble Town (ST): Stories come alive in your imagination when you look at the paintings of Xavi Carbonell, an artist from Spain.  Let’s meet Xavi and learn how he creates these beautiful story builders!

Untitled, 2012 Mixed media on paper 26 x 40 in (70 x 100 cm) XC1361

Untitled, 2012
Mixed media on paper
26 x 40 in (70 x 100 cm)
XC1361

Xavi Carbonell (XC): Hi my name is Xavi Carbonell, I am 42 years old, live in Alcoi, Spain with my wife and two daughters.  I am a full time artist. have exhibited in various countries in Europe, Africa and the United States and my work is in many international collections.   I am often described as an Abstract Expressionist, and infantile painter.  Infantile is a genre not well known in the US, but it means my work reminds the viewer of a child’s work, but remember making something look simple is usually the most complicated task!

ST: Where are you and what are you up to these days?

XC: I am currently in New York City, painting and preparing for an art fair with my gallerist later this summer.

Untitled, 2012 Mixed media on paper 26 x 40 in (70 x 100 cm) XC1404

Untitled, 2012
Mixed media on paper
26 x 40 in (70 x 100 cm)
XC1404

ST: That’s exciting!  Your days are spent with filling canvases with color.  Sounds like a wonderful summer, but I’m sure it’s quite a lot of work too.  When did you start painting?

XC: I started painting when I was 20 and was inspired after seeing works by the Spanish Artist, Antonio Saura in a museum exhibition.  At that moment I realized I wanted to paint and create my own path.

ST: It’s pretty remarkable how those unforeseen moments in life realize the paths we take.  Similar to you stumbling upon Antonio Saura, is there a way that you run into inspiration?  Where do you find your spirit to create?

XC: I am most inspired to create in NYC, the city has such a powerful energy.  The process of creativity is difficult to describe, but I find it’s often a result of new experiences, travel, meeting new people, but at the same time when I am in front of a blank canvas it just guides me.

Untitled, 2013 Mixed media on canvas 48x 48 in (120 x 120 cm) XC2403

Untitled, 2013
Mixed media on canvas
48x 48 in (120 x 120 cm)
XC2403

ST: Since your paintings are so narrative for me- I start to hear a soundtrack that goes along with the picture.  Do you ever listen to music when you paint?

XC: There was a period when I exclusively listened to classical music, then it was Jazz, and lately I don’t listen to much music while painting.

ST: Your paintings are so vibrant and strong from your choice of shapes and colors that I make up my own story when I see them.  My imagination just takes off!  Is there a story you are building in your head as you paint?  Is that why you title your pieces Untitled- as to keep the mystery and openness available for all viewers?

XC: Yes, there’s a story in my head and that’s exactly why all my pieces are untitled.  If I use a title, the viewer is pre-conditioned to see something.  I prefer the viewer to create their own story, as I think that’s more fun and I want each person to see what they want to see in my work.

ST: It’d be interesting if you had a book next to your paintings and you could have the viewer write down the story that comes to mind when they see your paintings.  You’ll get loads of different responses!  That leads me to other mediums- what are some other forms of art you practice? Do you ever mix other mediums with your oil pastels?

XC: I have worked in the performance genre, and I love to cook which is a creative outlet.  My concept of mixed media is based on oils but I also include, magic markers, chalk, colored pencils, oil sticks and charcoal.

Untitled, 2012 Mixed media on paper 19.75 x 27.5 in (50 x 70 cm) XC1441

Untitled, 2012
Mixed media on paper
19.75 x 27.5 in (50 x 70 cm)
XC1441

ST: Painter Joel Garten mentioned to me that you had once said your work is influenced by childrens art.  I am interested to know more about his comment.

XC: I am very inspired by the imagination of children and how they execute the concept on paper.  I am always fascinated by how you can have a conversation with a child on paper with out actually using words.  The innocence of children is the most exciting as adults unfortunately rarely preserve that quality.  It’s something most of us sadly just lose along the way.

Kids, never lose your innocence.  Adults, if you feel like you have lost it, try hard to find it in yourself as it’s the best part of each of us.

ST: With that said let’s try Xavi’s drawing exercise.

XC: One exercise is to draw with your eyes closed.  For instance draw a landscape from memory, but remember to keep your eyes closed!  You’ll be amazed with what you can create.

ST: Scribblers, send in your drawings to and we can post them on the Scribble Blog.  Thanks Xavi for sharing so much with us!  To see more of Xavi’s work you can go to http://www.artangler.com/Carbonell.html.

Untitled, 2012 Mixed media on paper 19.75 x 27.5 in (50 x 70 cm) XC1463

Untitled, 2012
Mixed media on paper
19.75 x 27.5 in (50 x 70 cm)
XC1463


Print


Scribblin’Spiration

Time for a new dose of inspiration to get your hands scribbling!

Do you have a sweet tooth? What are your favorite sweets and candies to splurge on? We all have our usual preferences, but did you ever stop and think how wildly diverse candy is? Chocolates, gummies, sour candies, bubblegum, licorice, taffy, lollipops… the list goes on and on!

ChocolatesImage: Wallpy

Peach RingsImage: Dylan’s Candy Bar

That makes it the perfect inspiration for some scribble action. Grab your pencils, crayons, markers, or paints and get ready to explore the sweet world of candy.

The fun thing about sweets is that they’re just as yummy to look at as they are to eat. With bright colors, nifty patterns, and differing shapes and sizes, this sugary snack group is a feast for the eyes as well as the tongue. So it’s no surprise that artists like Wayne Thiebaud and Margaret Morrison find it such a fascinating subject. They focus on extreme detail and texture when creating their incredible still life works.

You can follow these painters’ leads and try your hand at still life sketches of sweet treats or take the inspiration a bit more conceptually.

Three Machines by Wayne ThiebaudThree Machines (1963) by Wayne Thiebaud, Image: Wikipedia

Gummi Bears by Margaret Morrison 
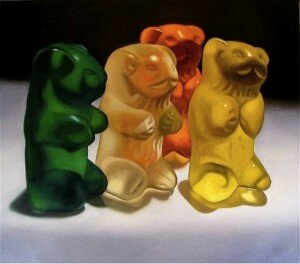
Gummi Bears (2008) by Margaret Morrison, Image: Art Fumes

Let the rainbow of vivid colors, bevy of interesting textures, and myriad of shapes and sizes inspire and inform your scribbling! Pay attention to the labels and packaging… or just focus on what’s inside the wrappers. Perhaps you’ll want to try an extreme close-up of a sour gummy worm’s texture, or a collage of your favorite treats, or even something totally abstract yet inspired by the elements of candy. Draw what you think a certain candy tastes like. Or use the color scheme of certain brand or flavor to create a picture.

Assorted CandyImage: Sparknotes

 Enjoy your extra-sweet scribbling treat! What’s your favorite kind of candy?


Print
Posted by , on July 12th, 2013 at 9:32 pm. No Comments

Category: adults,Arts & Crafts,food art,kids Labels: , , , , , ,