A Bright and Sunny Day, cut and torn paper art, Patrick Gannon
Scribble Town (ST): Patrick Gannon is a magician when it comes to paper arts and storytelling with images! Maybe he has magical powers elsewhere too! He knows how to play with paper in a way that shapes space and builds a mood for all kinds of places.
Patrick Gannon (PG): Hi, I’m Patrick Gannon. I’m a cut paper artist, which means that I cut up sheets of really fantastic hand-made papers, then layer them on top of each other to make a picture. I’m originally from New Jersey in the US, and now I live in Fukuoka, Japan. I spend most of my time drawing, cutting, gluing, walking along the ocean, hiking up slightly creepy mountains, dreaming up odd creatures in the forest, and collecting tons and tons of paper.
ST: The way you’ve described your day look like this happy creature in your piece on the right, ‘A Bright and Sunny Day.’ Where are you and what are you up to these days? I’m sure very busy with your The 2014 Cut Paper Art Calendar campaign on Kickstarter. Please let us know more about the project so that we can support you.
PG: For the past 2 years, I’ve been making my home in Fukuoka, in southern Japan. Before that, I lived in Tokyo around 5 years, learning as much as I could about hand-made washi and chiyogami papers, and creating as much cut paper artwork as I possibly could.
When I’m not hiking up the nearby mountains or exploring the island of Kyushu, I spend most of my time slicing increasingly intricate cut paper artworks. The last few years, I’ve been showing my work in galleries, Art Fairs, etc. in Japan and more recently, Korea.
The 2014 Cut Paper Art Calendar is an annual project for me. It’s a great way to share my work with as large a group of people as possible, and to introduce cut paper artwork to people who might not have the chance to see it in their daily lives. The campaign (which has already met it’s goal) runs until October 7th this year. Without the campaign, I wouldn’t be able to publish the calendar – or all the other cool rewards like laser cuts and stickers.

The 2014 Cut Paper Art Calendar – Cover option (people are voting to choose the cover, and this is in the lead)
ST: I know it’s a hard question, but how would you define your work? It seems to be a peaceful combination of craft and fine art. It reminds me of traditional paper arts, but with a new twist. I have never seen anything like it before.
PG: Honestly, I try not to define it. For me, defining it too much creates boundaries, and I’d be in danger of failing to experiment and try new things. I approach the work as a fine art, I guess, by which I mean I create all of the designs and sketches myself. I begin with an emotion or a concept in mind, sometimes as simple as a single word. Somehow, when traveling from my mind to my hand, the ideas become these beings and environments. Then I let it grow organically from the sketch, to the final drawing to choosing the right papers. If there is a craft mode, it’s in the final steps of cutting and gluing. I’ve certainly gotten better over time. Looking at my clumsy early work can surprise me sometimes.

Until that Day, Rooted I Shall Remain, cut and torn paper art by Patrick Gannon
ST: You seem like a person on a playful path steered by passion. I wonder what what led you to paper arts. Was there somebody that encouraged you? I like how you use different methods of paper cutting like tearing.
PG: When I was in graduate school studying art (I was a literature major as an undergrad), I wasn’t particularly experienced with paints, or using color at all. I had really only worked in black-and-white. I didn’t dislike painting as such, but I found the infinite possible colors I could mix to be stressful. One of my professors suggested using cut paper – at the time, big blocks of colored paper in abstract shapes – behind my ink drawings.
And it just felt right.

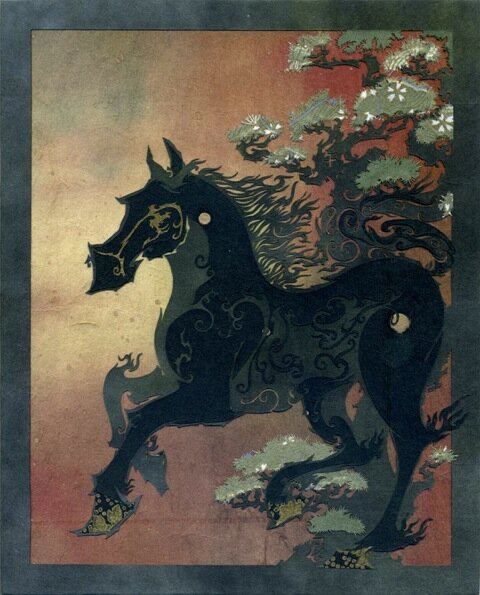
Fierce Nekomata and the Skull of Goemon, cut and torn paper art by Patrick Gannon
At the time, I had no idea about the history or traditions of cut paper art. I just started experimenting and creating a technique and style of my own. As time went on, I started to discover different paper cut art, from the jazz-inspired American styles to the traditional Chinese and Japanese monochromatic work. It’s been an eye-opening journey.
ST: When it feels right, it feels right! Where do you find yourself feeling really inspired to create? How do you find themes for your artwork?
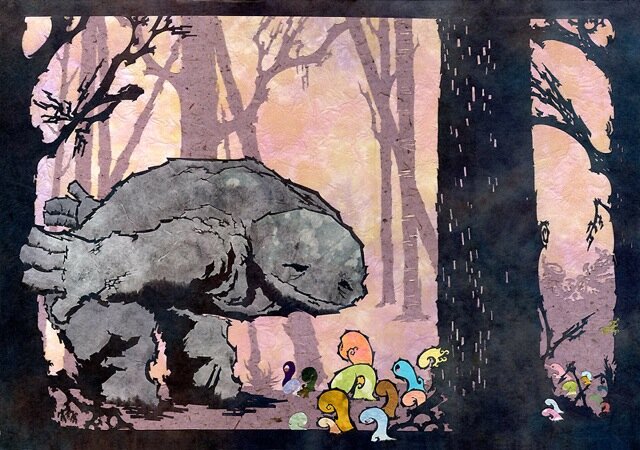
PG: I find myself inspired almost everywhere. A short train trip can be a great time to sketch. Ideas pop into my head while I walk or run and listen to music. Escaping from the city and hiking through the mountains around Fukuoka is a huge source of inspiration to me at the moment. Most of my work combines these elements, and my themes tend to be a conversation between the conflicting partsof my life; urban and nature, ambiguous relationships (especially parasitic vs. symbiotic relationships), pop culture. I think it’s important to allow yourself to be amused or fascinated by just about everything.

The Ghost Parade, illuminated cut paper installation by Patrick Gannon
ST: Please let us know about some of your cut paper installations such as The Ghost Parade and A Pacific Place of Rest. Where were these installed and how did you fit the themes with the environment?
PG: Both of these pieces were created for a Yokai (Japanese supernatural… and really weird… creatures and beasts) themed exhibition I held in Tokyo. The gallery space already looked a bit like the inside of a cave, with warm brown and orange walls and protruding chunks of wood.
The exhibition was also doubling as a Halloween party, and I felt hauntingly playful while designing A Pacific Place of Rest. It was designed to be a graveyard rising out of the back of a long, black bench against the main gallery wall. Over it’s length, it transforms from a traditional Japanese style graveyard to an American one (probably from the deep south – before coming back to Japan, I lived in Savannah, Georgia for a little while. They have some amazing cemeteries).
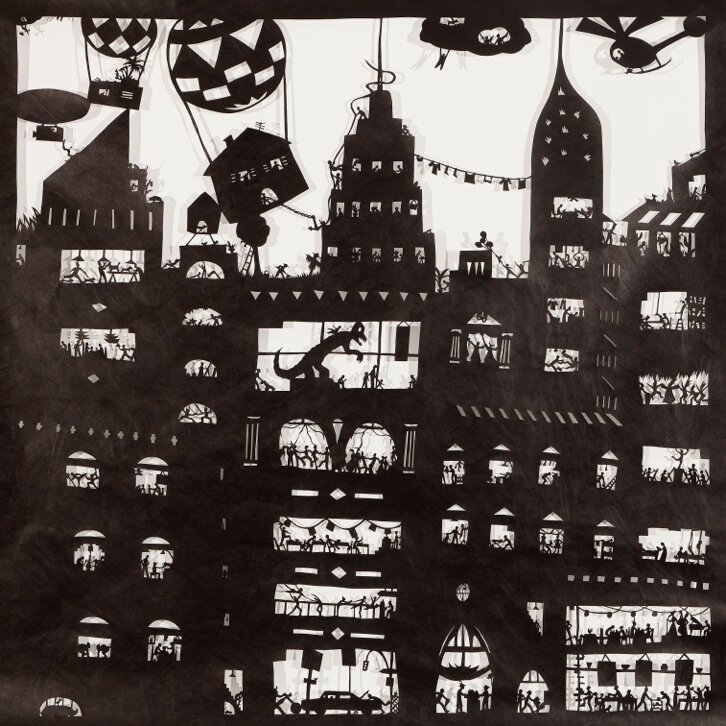
For a long time, I had been thinking of creating an illuminated cut-paper piece as well. The Ghost Parade was a way to continue the playful halloween theme while combining it with truly beautiful lighting and layers of shadow.
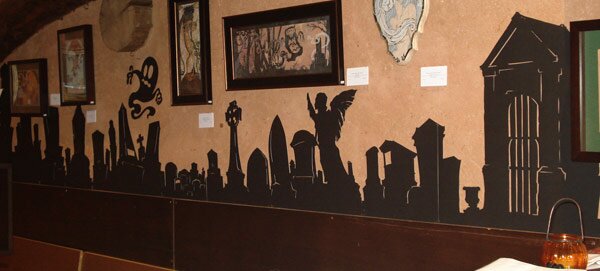
A Pacific Place of Rest by Patrick Gannon
ST: Savannah does have some amazing cemeteries and ghost stories to match! What forms of art do you include in your mixed media paper cutting paintings? What are some tools you like to use? Do you put your cut paper on wood for a reason?
Through the Pines, cut paper art by Patrick Gannon
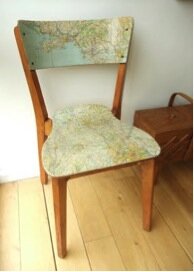
PG: I started to use wood as a backing to my work for the simplest reason of all. I thought the grain and warmth and depth of color was beautiful, and I wondered it if would go well with the textures and colors of the paper. Luckily, they suit each other. Which makes sense, seeing as paper starts out as a type of wood. I also like the roughness that the wood adds to the finely cut paper. Life is full of seemingly conflicting feelings coinciding together. I wanted to reflect that in my work.
Other than wood, washi and chiyogami papers, I don’t use any other media. I sometimes stain or varnish the wood, but the paper I like to leave as is, without adding any paint or color to it. I think it’s a fun challenge to find exactly the right combination of colors. I have some papers which have waited years for me to find the exact right place to use them.

Your Touch, It Does Something to Me, cut paper art by Patrick Gannon
My tools are pretty basic. A self-healing mat, and NT cutter design knife – it’s similar to an X-acto, but the blade is thinner with less of an angle. It breaks more often and needs to be changed more, but I’m able to make finer cuts with it. – pencil, eraser, tracing paper, various glues (I’m always trying to find better glue and adhesives). A computer with design software gets used to put together my sketches and blow them up to the final cutting size.
ST: Patrick, can you give us Scribblers any advice on creativity?
PG: The best advice I can give to anyone dabbing in cut paper art (or any art, actually), is to play. Play constantly. Draw without thinking sometimes. Draw the craziest thing. Don’t worry if it’s great. Not everything has to be perfect. I never use 90% of my sketches.
In each project, I usually come to a point where I’m not sure which color paper to use. I take out and test all of the colors that I think might work. Then I grab a few pieces which I’m positive will absolutely not work. And sometimes they are absolutely the right thing. The greatest things in life come from play.
Evening Aisatsu, cut and torn paper art by Patrick Gannon
ST: With that said, let’s play! For more inspiration please check out Patrick’s website, http://www.pgannon.com. You can follow Patrick on Twitter: and get updates on his Facebook Page: . Thanks Patrick and keep us posted on your 2014 Cut Paper Art Calendar!
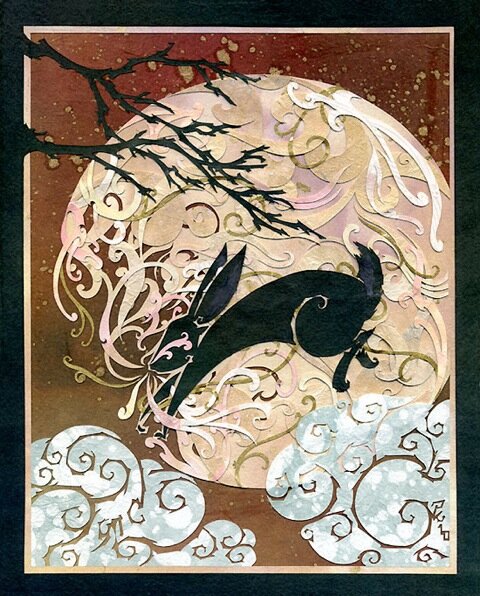
To Breathe the Pale and Shining Moon, cut and torn paper art by Patrick Gannon


 Image via
  Image via
  Image via
  Image via
  Image via
  Image via
  Image via