Search This Blog!


Email

Scribble Picks Pablo Picasso!

Picture of Pablo Picasso

Picture of Pablo Picasso

Pablo Picasso was born on October 25, 1881 in Málaga, Spain. He was the first child of Don Jose Ruiz y Blasco and Maria Picasso y Lopez. Perhaps it was because Pablo’s father was an art teacher, but from an early age he showed an interest in drawing. He was so much into art that his mother said his first words were “piz, piz”, which is short for “lapiz”, the Spanish word for pencil.

When he was nine, Picasso finished his first painting, Le picador, which shows a man on a horse at a bullfight. At first he painted very realistically, but then he started to experiment with new ways of drawing, painting, and showing his emotions.  Picasso was never that interested in regular school, but excelled in art school.  When he was 13, he was admitted to the School of Fine Arts in Barcelona, Spain and at 16, Picasso’s father and uncle decided to send him to Madrid’s Royal Academy of San Fernando.  Not surprisingly, this was Spain’s top art school!  That came to an end because Pablo was a person that needed to be free from instruction from his professors and confines of the classroom.

In 1912, Picasso began to paste paper and pieces of oilcloth to his paintings and then paint either on them or around them.  These where his first collages.  This technique is called synthetic cubism, which grew out of analytical cubism.  Synthetic cubism is a more decorative, colorful style of art.  Picasso and his friend George Braque together created and developed this genre of cubism.  Below is an example of Picasso’s work in this style.  How does Picasso play with the strong shapes and colors?  Where are the shadows?

Still Life with Mandolin and Guitar by Pablo Picasso, 1924 (oil on canvas)

Still Life with Mandolin and Guitar by Pablo Picasso, 1924 (oil on canvas)

“I paint objects as I think them, not as I see them.”
-Pablo Picasso

Picasso’s very famous work titled Three Musicians is a large painting measuring more than 2 meters wide and high.  It now lives at  the New York Museum of Modern Art.  Three Musicians is part of series painted while he was with his family in Fontaineblueau, France in the summer of 1921.

Do you think Three Musicians is painted in the style of Synthetic Cubism?

Three Musicians by Pablo Picasso, 1921

Three Musicians by Pablo Picasso, 1921

Yes, it is!  You can see that because it gives the appearance of cut paper.  What are some other reasons that makes it cubist?

“In Cubism, the subject of the artwork is transformed into a sequence of planes, lines, and arcs. Cubism has been described as an intellectual style because the artists analyzed the shapes of their subjects and reinvented them on the canvas. The viewer must reconstruct the subject and space of the work by comparing the different shapes and forms to determine what each one represents. Through this process, the viewer participates with the artist in making the artwork make sense.

Picasso paints three musicians made of flat, brightly colored, abstract shapes in a shallow, boxlike room. On the left is a clarinet player, in the middle a guitar player, and on the right a singer holding sheets of music. They are dressed as familiar figures: Pierrot, wearing a blue and white suit; Harlequinn, in an orange and yellow diamond-pattered costume; and, at right, a friar in a black robe.”  For more information, please have a look at http://www.pablopicasso.org/three-musicians.jsp

Now you try!  Go ahead and download the coloring sheet below and Scribble your own Three Musicians.  Go wild with color!

“All children are artists. The problem is how to remain an artist once he grows up.”
-Pablo Picasso

Three Musicians by Pablo Picasso

Three Musicians by Pablo Picasso

Print
Posted by , on December 30th, 2013 at 4:22 am. No Comments

Category: adults,Arts & Crafts,Design,Scribble Picks,Uncategorized Labels: , , , , Pablo Picasso, , , Synthetic Cubism


Turkey Take 2!

Let’s keep the Thanksgiving momentum going with another fun turkey craft! If you missed yesterday’s variation, take a look here. Today’s turkey gets a beautiful, natural twist by using dried autumn leaves. It’s the perfect way to celebrate both the holiday and the season!


You’ll need leaves (dried and flattened), cardboard or brown cardstock, glue, and crayons. If you’d like to make some substitutions (synthetic leaves, googly eyes, construction paper, markers), go right ahead!

Leaf Turkey Image via Baby Center

 There are several ways you can approach this project, depending on your desired final product, so feel free to put your own stamp on it. Cut out a brown cardboard or cardstock circle for the turkey’s body. Then cut out a smaller circle to use as the head and glue it to the body. If you’re mounting this to a piece of paper, glue the body to your paper and leave a little space unglued at the top for leaves. Start arranging your leaves by sliding then behind the turkey’s body (in the unglued space) and gluing them down.

  Leaf TurkeyImage via My Creative Stirrings

 If you’d prefer to leave your turkey freestanding, just glue the leaves to the back of its body. Finally, add some facial features to your turkey’s head—cut out leaves to make a beak and waddle and use crayon or marker to draw its eyes.

 Leaf TurkeyImage via

 So cute, right? And it not only celebrates Thanksgiving, but really honors this beautiful time of year. Make sure to hang your turkey somewhere special as Thanksgiving approaches! What other Thanksgiving crafts are you looking forward to trying?

Print
Posted by , on November 15th, 2013 at 12:15 am. No Comments

Category: Arts & Crafts,holiday,kids,Paper Art Labels: , , , , , , , leaves, ,


In the Loop

It’s not often you find art supplies you can also eat, but when you do… it’s sure to be a tasty crafting session! Because of their bright colors, Froot Loops are perfect for art projects. You can pretty much find an excuse to craft with them every time of year. Right now, try creating some autumn-themed pictures with subjects such as trees with changing leaves, pumpkins, maize, or apples.


For this project, grab some Froot Loops (and maybe Cheerios, depending on what colors your picture requires), glue, and some sturdy white paper. You’ll want a slightly thicker paper so it can handle the weight of the cereal. To round out your picture, you can also use paint and construction paper.


Before you start, take a pencil and create a rough outline of your drawing. If you want to use paint or colored paper, add it to your white paper first before starting with the cereal. Now, sort the colors you’ll need and arrange your Froot Loops on the page before gluing them down. Once they’re all glued, let the whole thing dry.


Finally, hang your fabulous picture up and eat the leftover Froot Loops!

  Froot Loops Fall CraftsPhoto via Putti’s World

 Froot Loops CornPhoto via Musings of Me


Bonus! If you want to get a head start for Thanksgiving…

 Froot Loops TurkeyPhoto via Putti’s World


You could create one of the ideas shown here or try something new. Work on a batch of Halloween themed Froot Loops drawings this week. What are you going to create with your Froot Loops? Do you have a favorite kind of food to craft with? Or a favorite craft to make with food?

Print
Posted by , on October 24th, 2013 at 2:37 am. No Comments

Category: Arts & Crafts,food art,holiday,kids Labels: , , , , , , , ,


Around the Globe

Happy (almost) Columbus Day, Scribblers! How are you planning to enjoy your long weekend? This holiday marks the anniversary of Christopher Columbus’ arrival to America in 1492. Everyone knows any good explorer always has a few tools on hand and a definite crucial one is a map.


It seems only right to embrace the adventurous spirit of the day with some fun DIY inspirations involving globes and maps! This is a great way to use souvenir maps from past trips or vacations, old atlases, and road maps; or breathe new life into broken or shabby globes with these exciting updates. Have fun exploring these cute and timely crafts on your day off!


Take half a globe and turn it into a unique bowl. Globe Bowl

Photo via Better Homes and Gardens

Spread “peace” on earth with contact paper and spray paint.       Peace on Earth globe

Photo via Endlessly Inspired

Grab some maps and some modpodge and spruce up a piece of furniture with decoupage.

Decoupage Map Dresser

Photo via Shelterness

Decoupage Map ChairPhoto via Roddy & Ginger

Save souvenir maps from vacations and cut them into shapes to display. Try butterflies or hearts.Map Butterflies

Photo via Image Surgery


Are you going to give any of these projects a try? How would you transform your old maps or globes?


Have a great Columbus Day everyone!

Print

Magazine Strip Silhouettes

It seems like magazines always find a way to pile up. For some reason, I can never bring myself to just throw them out. Filled with beautiful images, colors, and articles, it feels wrong for them all to end up in the trash. So anytime I can put them to good use with an art project, I jump at the chance! This magazine strip silhouette is a great way to transform your old magazine pages into something creative, personalized, and beautiful!


For your silhouette, you can pick an animal, a person, your home state—whatever you want. Just keep in mind the level of intricacy involved in cutting the strips to fit the shape.


 States Magazine Strip SilhouettesPhoto via Meaningful Details on Etsy


You’ll need some old magazines, scissors, glue, a pencil, an X-acto knife, the shape you want to trace for your silhouette, and something to mount this project on—it can be canvas, cardboard, or poster board.


Start by cutting your magazine strips. Tear out any pages that have a lot of color (or just the colors you’re looking for). Don’t worry if it’s a picture of something weird—you won’t be able to see it once it’s cut up. Cut them into thin, straight strips, roughly the same width (the length can and should vary).


 Elephant Magazine Strip SilhouettePhoto via Apples of Gold Set in Silver


In pencil, trace the silhouette on your canvas. Then, start gluing down your magazine strips inside. You can trim each piece with your X-acto knife as you glue it down, or you can mark them with a pencil and trim them afterwards.


Once your silhouette is all filled in, it’s a good idea to finish it off with a coat or two of mod podge. This will seal down your collage.


 Butterfly Magazine SilhouettePhoto via Designed By BH

And that’s it! Let it dry and hang it up. Colorful, customizable, and recycled—this fun project is great for the eyes and the environment. What are your favorite projects with recycled materials? Any other fun ideas for magazines?

Print
Posted by , on October 3rd, 2013 at 11:38 am. 1 Comment

Category: adults,Arts & Crafts,Paper Art Labels: , , , , ,


Soda Can Vases

Have you heard the phrase, “One man’s trash is another man’s treasure?” Well, sometimes your own trash is your own treasure! Crafts that utilize recycled materials are not only good for the environment, but they can look surprisingly chic and unique. For unexpectedly elegant and super cool flower vases, try painting some old soda cans. These mini vases are so striking that several companies manufacture porcelain versions to buy; however, you can make your very own in hardly any time for hardly any money!


For this project, all you’ll need are empty soda cans and white spray paint. Really… that’s it!


Wash the cans out thoroughly and dry them off (you don’t want any soda residue left inside). If you’d like some of them crushed a bit to add dimension, simply do so with your hands. Next, take the cans outside and spray paint them. White paint gives the project a very clean, modern look—a great contrast with the recycled can—but feel free to use whatever color appeals to you. Cover them in two or three coats of paint and let dry.


Finally, fill them with water, put a flower in each, and display!


 Soda Can Vases

Image via Indulgy

Recycled Can Vases

Image via Two’s Company


Even without flowers, these cans make an eye-catching, unique sculpture set.


This simple craft is a great example of turning the ordinary into something extraordinary and a wonderful way to enhance your recycling.

Print
Posted by , on July 19th, 2013 at 9:32 pm. No Comments

Category: adults,Arts & Crafts,Design,Found Art,kids Labels: , , , , home decor, , , spray paint, under $10, vase


Scribble Artist Interview with Yulia Brodskaya!

Scribble Town (ST): Yulia is everywhere!  We first discovered her while flipping through an Oprah magazine and then saw her work featured in Material World: The Modern Craft Bible.  Yulia is an expert paper artist and is generous to share her tips!  Where are you and what are you up to these days?

Yulia Brodskaya (YB): I live close to London, very busy with my paper art and two little kids.

M Real by Yulia Brodskaya

M Real by Yulia Brodskaya

ST: I have never seen anything like your art.  How would you define your work?  It seems to be a peaceful combination of craft and fine art.

YB: I just call them paper artworks; but I don’t normally try to put any labels such as craft or fine art or even focusing on the term ‘quilling’ too much. I use a combination of paper manipulation techniques to create my paper artworks.

Jungle Bird by Yulia Brodskaya

Jungle Bird by Yulia Brodskaya

ST: How did you discover this artistic process of creating paper artworks?  Was there somebody that encouraged you?  With your two kids perhaps they help with the playful aspect of your images!  Your birds and butterflies look like they will just fly away.

YB: I always had a special fascination for paper, I’ve tried many different methods and techniques of working with paper, for instance Origami, paper collages, however Quilling technique turned out to be ‘the one’ for me. I started to use it about five years ago: I was planning to create a small brochure with my hand-drawn illustrations to be sent out to potential clients and I was looking for an eye-catching image with my name ‘Yulia’ for the cover. I created a number of hand-drawn variants, but I didn’t like any of them and then I remembered an image from some school book showing a paper strips standing on edge, so tried to make the letters using this technique and apparently the attempt was successful; over the next couple months I switched to paper illustration completely.

Nature by Yulia Brodskaya

Nature by Yulia Brodskaya

ST: Through playing and dabbling we just stumble upon what we didn’t expect! Where do you find yourself feeling really inspired to create?

YB: In my little studio.

ST: How do you manipulate your paper? What is the process?

YB: I use cocktail straw and little cocktail sticks for rolling the paper strips (I didn’t know that there are specially designed tools available when I taught myself to shape the paper strips, I started to use the cocktail straw and I still use it now). Also, scissors, twisters for little details, glue and of course paper paper paper. For the process the best thing will be to search for some basic youtube lessons.

ST: Yup, anything can be a helpful tool especially when you know what your aim is.  Cocktail straws do the trick!  Yulia, any tips for our scribblers out there?

YB: Just have fun with it; it will be a pleasure if you enjoy it. The process is very slow and time-consuming so if you are not enjoying it the whole experience can be a plain torture.  I have a fish pattern that I designed for my workshop in Shanghai, it is very simple, people can use it as a basis for the quilling experiments.

ST: Thanks Yulia!  I’m going to give it a try!

Pure by Yulia Brodskaya

Pure by Yulia Brodskaya

Print

Scribble Artist Interview with Doris Sampson!

Scribble Town (ST): Here with us on the Scribble Blog is Doris Sampson!  Doris is an artist full of energy, stories, creativity, and much much more as you will soon find out.  Doris, where are you and what are you up to these days?

See how I found shoes in this drawing? Added eyes to create a shy guy asking for a dance.

See how I found shoes in this drawing? Added eyes to create a shy guy asking for a dance.

Doris Sampson (DS): I live in Duluth, Minnesota . . . U.S.A.  This city is located at the western-most tip of Lake Superior, the largest of the Great Lakes.  It’s awesome!  Like living on the shore of an ocean, from our shore we cannot see land on the eastern horizon.  Weather events can rile up some terrible storms, occasionally over even modern decades taking a freighter to the bottom of any one of the Great Lakes.  The Big Lake is also our natural air conditioner.  Because the temperature of the lake is always much cooler than the air, when we get a wind off the lake, Duluth can be significantly cooler as we’re situated in the valley of a big hill alongside the shore.  Over the hill, much warmer!  I like it this way because I’m no fan of hot weather!

DS: My career as an Artist spans 48 years, and I started Photography shortly after that, too.  I’ve put tons of time and money into taking pictures, and since starting digital in 2002, in total over all my years, have tens and tens of thousands of pictures.  Therefore, big chunks of time have gone into organizing those photos and since digital can fix OLD photos, in recent years lots of time has gone into restoring many, many photos from family albums covering  my Finnish-American family heritage and history.  I eventually will produce books about my personal memoir and probable historic photo books.  I’ve also been a writer, starting with journaling at the end of 1977.  I absolutely love writing, and my computer storage now contains working manuscripts for at least a dozen book concepts, with other ideas piling up behind those.  But I need to update my computer equipment soon so I can better format manuscripts, and art/photos into them, too, to prepare them for electronic self-publishing.  I love that option we have now!

The shape looked like a golf club, though wildly abstract!

The shape looked like a golf club, though wildly abstract!

ST: When did you start drawing and painting?

DS: As a child I was already a natural artist.  I believe it was genetic as I’m 100% Finnish lineage–and the Finns are genetically extremely artistic.  I loved doing art as a child, all the way through school to graduation.  Because my family was farmer-laborer, I didn’t go to college for higher education–but was smart enough to have done that if there had been money.  Instead, I never sat back on the learning process as a young adult–in any subject.  But rather quickly did return to art . . . painting . . . about 5 years after graduation.  I had two pre-school daughters by then, and began painting on the kitchen table–of course, needing to clean up scrupulously after each session!  Especially because I’d started with oil paints–eventually switching to acrylics to avoid the fumes and possible other contact-toxins from handling oil paints.  Especially Flake White, which has lead.

ST: Was there somebody that encouraged you?

DS: Yes, there was someone who inspired me as an artist starting from a very young age.  Actually, my mother had painted as a teenager with a friend whose name was Marion.  So it was seeing as a child craft pieces my mother had made so many years before by gluing fall leaves on the then-78rpm records.   And then painting the leaves yellows, oranges, reds.  There were three paintings my mother had done that still exist to today.  So those were always on display in my grandparents’ farmhouse in Northern Minnesota.  My father had also been artistic, and had begun art school when they lived in Detroit–I was born in a suburb, Ferndale, at that time.  But he was drafted into World War II and had to quit art school.  Only one drawing my dad did, of the violin maker, Stradevarius, existed then, and to date.  It’s framed and hanging on a wall in my sister’s apartment here in Duluth.  Neither of my parents  were able to follow art as adults.  My mom was a homemaker and my dad a laborer.  Thank God he returned home from the war with just some back problems from a glider crash.  He was in the Battle of the Bulge in the 101st Airborne Division–a terrible event during WWII.

Here is a scribble drawing that reveals a woman by how I filled in spaces with black ink.

Here is a scribble drawing that reveals a woman by how I filled in spaces with black ink.

Marion, as Mom’s girlhood friend since kindergarten (or maybe it was first grade then–did they have kindergarten so very long ago?) . . . was still her friend as I was growing up, and we’d visit her home in that rural area near my grandparents’ farm on occasion.  Marion had taken up painting during her adult  years, but did extremely few in total that I know of.  One was a stunning portrait of a sister who had passed away, painted ethereally in blues, like the sky, her imagery as of angels.  Riveting to me!  Then, I believe this was after I was an adult with a toddler, as I recall one specific visit with my mom to Marion’s, with my daughter; she showed us another painting more recently done . . . a Moose in a Northern Minnesota swamp, edged with the typical swamp spruce and tamarac forest–a beautiful fall scene that I can see in my mind’s eye still.  Marion was so special to me and I just soaked up her artist-ness into my soul!

This mushroom shape becomes one with some embellishment; not the different pen strokes creating varieties of texture.

This mushroom shape becomes one with some embellishment; not the different pen strokes creating varieties of texture.

My family was always supportive of my love of art and Nature as a child.  I would do Paint-by-Number sets, and, again, I loved art in school.  I would save my artworks and when several aunts and uncles came visiting from Detroit and Florida to Minnesota in the summers, I’d bring out those drawings and paintings to put on an ‘exhibit’ . . . and they’d give me a dollar!  Guess what . . . I still have my best, saved artwork from the first dated to when I was 11 years old, through the 7th, 8th and 9th grades of junior high school!  They can be seen on my website:  dorissampson-lenscanvas.smugmug.com !  For so long I’ve wanted to be an inspiration to children, and here is my first opportunity!

ST: I bet you have been an inspiration to children even when you didn’t mean to be one.  I’m impressed with you range of techniques! You even have collage and modeling pasted paintings.  How did you discover and use this technique?

DS: I don’t remember right now what started the collage/modeling paste paintings.  Since I’ve kept good records throughout my art career, it’s probably written down somewhere for me to find when I can start digging.  But they were fun to do, using materials to build a foundation for a painting; then gessoing that ground (a primer layer); finally painting everything.  Then, give it a wash of diluted burnt umber (brown) acrylic paint mixed in a lot of water and quickly wipe it off again with a soft rag–before it could dry.  Then only a little bit of pigment would remain on the surface of the painting to provide a slight antiquey appearance to it.

ST: How do you handle moments when you get a zoom of inspiration?

DS: Since I do Art, Photography AND Writing, inspiration is more or less a constant on-going thing of which I can never keep up; as much as I would like to.  So Art ideas get noted on paper, some started; Photos are a never ending job in my computer now; and my external hard drive is exploding with accumulated Writing projects, or notes and notes and more notes for those underway, and new project ideas.  What I work on from day to day has no schedule–except to plow into whatever project/s are staring me in the face . . . NOW.

Color can be dropped into a drawing as desired on a computer, for me this was done in Photoshop4.

Color can be dropped into a drawing as desired on a computer, for me this was done in Photoshop4.

ST: What other forms of art do you practice?  What are some tools you like to use to create?

DS: Art, Photgraphy and Writing take up all my work time creativeness.  However, I am a ballroom dancer, and good at it.  Genetic I’m sure as both my parents loved to dance and were great dancers in their early years.  Raising a family, I only saw them dance about three times that I can remember.  I sure wish I could see a movie of the years I was never a conscious part of!  Dance  is a wonderful, beautiful and happy form of Art!

ST: How do you find you models for your pen and ink drawings? There must be hundreds of beautiful portraits!

Here I wanted to make a heart shape with abstractions--a very fast swish, swish, swish with the hand kind of drawing.

Here I wanted to make a heart shape with abstractions–a very fast swish, swish, swish with the hand kind of drawing.

DS: A couple of the people and pet pen and ink drawings you see are ones I did because I wanted to do them for myself.  The rest are commissions from folks who saw my first portrait promotions starting around 2002.  What you see in my website are what I’ve done.  There might be another couple or so not shown, but I can’t remember at this writing.

ST: I’m sure there must be many, but what is one of your favorite songs?

DS: It’s probably better to ask what are my favorite genres of music.  I love Finnish music that depicts my era of growing up–accordian and fiddle bands.  There are two in particular I have tapes or CD’s of; Minnesota bands, “Third Generation” and “The Finn Hall Band”.  Next, whenever I have an opportunity to work in my office AND listen to music at the same time, I’ll put on internet radio with Pandora.com . . . and I’m already keyed in to Classic Country-Bluegrass Gospel songs by historic Nashville voices from yesteryear to current singers who still have the same classic sound.  On Sunday mornings, we have a local radio station, WKLK, that also plays those old gospel songs.  I absolutely love them, and they are my inner Church every time I listen to them; filling me with the Spirit of God!

I also enjoy classical music on occasion; and my everyday favorite genre is the current “Music of Your Life” station that is streamed via many radio stations across America.  Those songs truly depict the best pop songs I’ve heard over my 70 years of lifetime!  So it would be more correct to speak of favorites in each genre–but that would be too big a project to do!

ST: Your art career has taken you on such a journey!

DS: I started my Scribble Drawings, which I now call my “Human Emotional & Thematic Caricatures . . . or Just Pure Art Form”, when I was taking drawing classes at a local university in 1985.

Do you see how you can add human emotion to a drawing than can be transformed into a man by adding teeth, an eye and a hat!?

Do you see how you can add human emotion to a drawing than can be transformed into a man by adding teeth, an eye and a hat!?

University art classes were already far into the “modern” thing . . . be loose, let your mind wander, and finally . . . just scribble and see what happens.  Well, I absolutely LOVED what I did with scribbles, learning immediately that the most important thing to remember is . . . WHEN TO QUIT!  My personal take on it was to use quality pen and ink, and then take a good look at the scribbles to see if or what there was anything recognizable in the shapes.  If so, then I’d start filling in space with my black ink to bring out that ‘something’ . . . or ‘someone’, if it had an abstract human element to it.  Other times the shapes and forms depicted only abstract shapes and forms!  So then I filled spaces in while keeping COMPOSITION in mind; to create Pure Art Form.

I did a large number of them around 1985, and it was the year 2000 when I took it up again.  I was working on a book of poems about the subject of “Love” as a “mystery”.  I wanted to illustrate the book and it occurred to me those 1985 drawings could be termed mysterious.  When I checked them out, I discovered that many of my poems actually matched what some of the drawings seemed to be displaying.  So I included them into my manuscript, and started doing the scribble drawings again here and there until now.  I have about 250 of them now!  These can be seen on my website also:  dorissampson-lenscanvas.smugmug.com.  Find this gallery under ART OF DORIS SAMPSON.

ST: Doris, thank you so much for sharing with us! You have shown us how to look at life, lines, and color in a different way with your creative scribbles!  If you have any tips for parents and adults for how to create with children please let us know.

This drawing shape clearly resembled a pumpkin, so I gave it color and an abstracty kind of face!

This drawing shape clearly resembled a pumpkin, so I gave it color and an abstracty kind of face!

DS: As for tips for parents, EVERY CHILD IS AN ARTIST!  Provide the materials for them, and they will draw and/or paint.  Display the Artworks.  Choose the best from every year’s work and place these into an archival album–learn HOW to preserve art and photos archivally, don’t just glue or tape them in.  There are album stores all over the country now.  There is one online source I’ve been able to get oversize albums from in which to store my Scribble Drawings.  It used to be called Century Plastics . . . don’t know if that’s a current name or not.  These albums were acid-free, as I recall, with 12×18 pages of sturdy paper.  A perfect ground for archiving your children’s artworks.  The best of the best artwork/s–mat and frame them!  I have some from my daughters.  Once, when her dad and I went to a conference night, there were pastel painting pictures hanging all around the room–one by each child in that class.  My eyes flew to one in particular that clearly shouted, “This child IS an Artist inside already!”  It was so good compositionally, and with colors, lines, shapes and forms!  Well . . . it was my daughter’s . . . a chip off the old block, going all the way back to both of her grandparents’ generation, too!

This daughter is now an assistant professor in the Art Department of a University in the State of Missouri!  My other daughter is a Certified Public Accountant; and far on her way, too, of becoming a Nutritionist . . . already, via the internet, she is teaching people how to live and eat NATURALLY.  That was something else our family did–we gardened organically, I canned and froze vegetables and fruits; and by golly, both grew up to follow in those footsteps.  The Artist of my two daughters, and her husband, own an organic farm and apple orchard in Missouri!

ST: You are right, Doris, every child is an artist.  Thank you :)

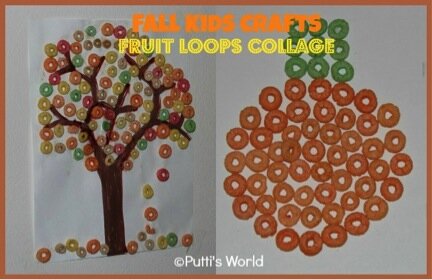
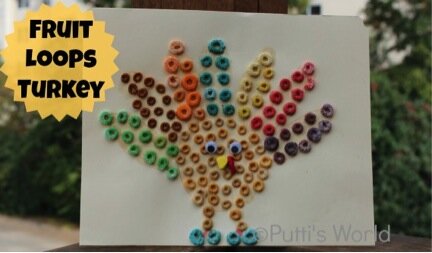
Try these two Scribble Inspirations from Doris Sampson:
‘Yellow roses for my birthday’ and ‘Collage painting art project’

Ultimately I elaborated on the original (displayed above) by adding red and blue for a patriotic statement, "I Love America!" This is a wonderful example of how and why I plan to produce a line of products, such as greeting cards, from my drawings!

Ultimately I elaborated on the original (displayed above) by adding red and blue for a patriotic statement, “I Love America!” This is a wonderful example of how and why I plan to produce a line of products, such as greeting cards, from my drawings!

All photos: Copyright Doris Sampson 2013.  Permission for free educational use for children granted.  All Artist Reproduction-Distribution Rights Reserved. Contact Information:  “.  Feedback to Artist is welcome!”

Print

Father’s Day Homemade Gift Guide

Now that we’ve celebrated the moms, it’s time for Father’s Day this Sunday! How do you plan to celebrate the special fathers and father figures in your life?

Dads can be pretty tough to shop for.  A great alternative to spending money on a gift is to create something yourself. A homemade gift is unique and personalized, it took time and love to make, and it’s cost effective. And who can say no to that?

Here is a round up of some of our past craft tutorials that could be tailored into perfect homemade Father’s Day gifts:

DIY mug

photo: Oh, Hello Friend

For his morning cup of coffee or tea, why not give Dad his very own personalized mug? With just a dollar store mug, some Sharpie markers, and access to an oven, you can create a one-of-a-kind cup that’s sure to become his favorite! Another great variation is a personalized chalkboard mug. Take that same dollar store mug and grab some chalkboard paint and chalk.

DIY phone cover

Photo: Unexpected Expectations

Keep the personalized gifts with Sharpies coming with a unique phone case! If your pop has an iPhone, try creating a neat cover for him. With a plain white phone cover and permanent markers, you can design an exclusive phone case. Draw a picture, create an abstract design or pattern, or write a personalized message.

Does Dad have a green thumb? Paint a terracotta pot for him to showcase his plants in! It’s sure to dress up any office, patio, or windowsill.

I don’t know about your dad, but mine leaves pens and pencils all over his desk.

Regardless of their profession, most dads need something to write with so a pen and pencil receptacle makes a very practical present. Try altering this pencil vase (you can use a shorter vase or jar and golf pencils to make it smaller). You can also use the same technique for this wine goblet and apply it to a jar or cup for a perfect pencil holder.

Magazine Collage    Melted Crayons

photo: Pro Arts                      photo: Whatever

Maybe your dad has an office or room that could use a little decorating. Try a fun project for beautiful and original artwork to spruce up dear ol’ Dad’s walls. Grab some magazines and recycle them by making a colorful collage. Or discover the possibilities of melted crayon art with this gorgeous abstract masterpiece or this bit of pointillist perfection. Try something a bit more experimental with watercolor paint, salt, and glue.

Don’t forget to wrap your homemade gifts! Here are some great ideas for creative ways to wrap presents with plain brown paper.

Hope these ideas help you get started on a special gift for the dads in your life. Feel free to browse our archives for more fun crafting inspiration. Have a wonderful Father’s Day!

Print
Posted by , on June 13th, 2013 at 5:27 pm. 1 Comment

Category: adults,Arts & Crafts,holiday,kids,Uncategorized Labels: , , DIY gifts, father's day, gifts for dad, ,


Scribble Artist Interview with Carly Kasner!

Scribble Town (ST): Carly Kasner shows us how animations bring to life more imagination than we could imagine.  It is easy to see in her artwork and her approach to creativity!

Carly Kasner (CK): Hello Scribblers, I come from Long Island and graduated from FIT, May 2012. I am a graphic designer with some essence of illustrator mixed in. From the time I was little till this very day, I have had a special connection with cartoons, which inspires and or impacts my work today.

Anime self portrait of Carly Kasner

Anime self portrait of Carly Kasner

ST: How are you spending your time these days?

CK: I am currently interning at The Jewish Board of Family and Children’s Services in New York City. It is a non-profit organization that provides mental health and social services. I design various flyers, books, and print/e-mail invitations there. In my spare time, I have been recently involved in t-shirt design contests between the websites threadless.com, and welovefine.com.

In addition to that, I occasionally create my own characters for fun. In recent years, I do consider my work to be more digital but I still highly respect the traditional methods as well as the digital I utilized InDesign, Photoshop and Illustrator as my main digital formats I use whatever tool(s) will get the job done in the best way for my idea/client.

Monster's Inc scribble shirt by Carly Kasner

Monster’s Inc scribble shirt by Carly Kasner

ST: Designing t-shirts sounds really fun and it must feel good when you see somebody wearing one of your ideas. When did you start illustrating / scribbling / being creative?  Was there somebody that encouraged you?

CK: The beginning of my creative era was around kindergarten I stumbled into my interest of drawing through the inspiration I got from cartoons and my love for doodling. I used to like to draw dogs. I feel that I was born with a love for drawing.

ST: Your love for dogs is seen in your North Shore Animal League Logo.  I really like how you’ve nested the dog and the cat together.  It’s as if they were hugging each other.  It’s a very clever design!  Where do you find yourself feeling really inspired to create?

North Shore Animal League logo by Carly Kasner

North Shore Animal League logo by Carly Kasner

CK: I think my inspiration can come from different sources and/or artists, but I think my, main root was the endless hours I spent in front of the TV growing up. I was a 90s child and some of my favorite cartoons were Courage the Cowardly Dog, Hey Arnold, the Rugrats, and The Angry Beavers. I was inspired not only by the characters image; I was inspired by the stories that molded the characters personalities. And as I got older, I became inspired by Japanese cartoons and comic books a.k.a. anime and manga.

ST: What other forms of art do you practice?

CK: In high school, I did some ceramics, collages, oil painting, and water colors in recent years, I am still partial to the sketchpad and pencil. I try to use that for my creativity as much as possible and even though I haven’t practiced it much lately I am also fascinated by watercolors.

ST: What is your favorite movie?

CK: My favorite movie is Hayo Miyazaki’s Spirited Away.

ST: I also really liked Miyazaki’s Howl’s Moving Castle.  The story and images are unforgettable!  Carly, please share any tips, advice, or ways of encouraging scribblers.

CK: I struggle sometimes with accepting mistakes but it is important to accept mistakes and to learn from them. Try not to let them discourage you. I try to look at mistakes as boundaries to define what not to do next time. Keep in mind that you can’t get something right unless you get it wrong.

ST: Thanks Carly! That’s great advice!  Making mistakes is a big part of life and making art.  At least we can say we tried :)

Sweet Bots by Carly Kasner

Sweet Bots by Carly Kasner

Print