


Cute Candy Corn
Now that October has arrived, Halloween is on the horizon. That means costume planning, spooky decorations, and of course… candy and treats! Since it’s only the beginning of the month, one way to slowly start gearing up for the holiday is to incorporate things that work for both fall and Halloween.
The perfect solution: a little candy corn décor! This quick and easy craft is perfect for setting the tone for October… plus it has pretty fall colors! Bonus: it’s simple and safe enough for kids to work on, as well.
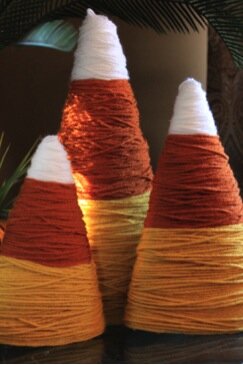
Photo via Danielle, My Life as I Pin It
You’ll need yarn (white, yellow, and orange), scissors, glue, and a foam cone (in a pinch, you can create your own cone with some poster board and tape).
Start at the bottom with your yellow yarn. Glue the end to the foam (you may also be able to just tuck it in the back… depends on your cone) and start wrapping! Once you’ve gotten about a third of the way up, cut the yarn and glue or tuck in the end. Next up: orange! Repeat the process with your orange yarn, and finally finish up with white to the top. Tada!

Photo via Sarah, Thrifty Décor Chick
These candy cuties add some festive fun to any room without going too overtly “Halloween” too soon. But as the month goes on… look out! More delightfully spooky projects to come.


 Three Machines (1963) by Wayne Thiebaud, Image:
 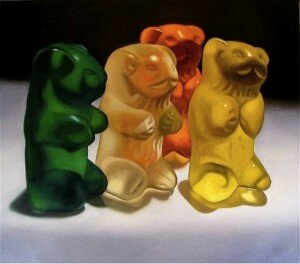 Gummi Bears (2008) by Margaret Morrison, Image: Art Fumes
 Image:
  The wreath is easy to make, and fairly inexpensive! Once finished, this is sure to be a favorite in the household as guests and your little ones can grab a tasty treat!
 - 3 14oz bags of wrapped candy (peppermints, strawberry suckers, butterscotch)
- Wire Wreath
-Ribbon
-Scissors
- 3 14oz bags of wrapped candy (peppermints, strawberry suckers, butterscotch)
- Wire Wreath
-Ribbon
-Scissors
 Continue to work your way around the wreath tying the candy pieces as close or as far apart as you like. Keep in mind, the closer the candy pieces, the more you will need.
 When you have completely covered the wire wreath with candy pieces, you can either leave the ribbon strands straight, or do as I did and curl the ribbon pieces using the flat edge of a scissor. To do this simply hold the ribbon taut between your thumb and the edge of the scissor and pull from the base of the ribbon the end. Viola- a perfect ribbon curl!
 Next, make a decorative bow using 2″ ribbon. Hang up, and enjoy!
