
Carol Heppner Queen of Cr8tivity
Scribble Town (ST): Carol Heppner will get your head spinning once you hear about all the amazing things she is up to. Around every creative corner, there she is!
Carol Heppner (CH): I am co-owner/founder and Editor in Chief of Bella Crafts Quarterly™, a craft magazine that is also available as a free digital download, and I own Carol Heppner LLC, a craft-industry design services company. I am a designer member of the Craft and Hobby Association (CHA) and serve on the Design Section Council. I am also on the Editorial-Advisory Board of Scrap and Stamp Arts Magazine, in which I have a column, Art Smarts!™.
I am an author, mixed-media artist, photographer and craft-industry consultant. My work and photographs have appeared in national art shows, galleries, magazines, books, products, trade show booths and advertisements.
As you can see, there is a lot to keep me busy.
ST: Yes, we can clearly see that! What are you not up to these days  ? With full speed ahead, what does a typical day with you look like? Even though you have so many different simultaneous projects going on which one are you putting most of your attention to these days?
CH: Every morning, I begin my day by going out for a walk. This helps me focus on nature so I can relax.
Did you know that craft designers are mostly working on projects that are six months ahead of the current season? Sometimes, we work a year in advance. So, while you are getting ready for Halloween, we are thinking about spring. Because craft-industry clients are publishers, editors and manufacturers, many times we cannot discuss what we are making because the project is being held for publication by the client. It’s like a top-secret mission! It’s the same with our magazine, Bella Crafts Quarterly™. Our fall issue came out on September 1 and we are now working on our upcoming issues. All columns and articles are always a secret until we publish them.
When I create a craft project, I then have to write step-by-step instructions and photograph the finished project. It may sound like a lot of work, but I really enjoy it.
ST: So long as you enjoy it then everything is ok. How did your ‘Queen of Creativity’ career begin? Were you always coming up with fun creations, even as a kid? What is something from your childhood that you used to love to create with?

Jewelry making with Carol Heppner LLC
CH: When I was in second grade, I won a regional drawing contest. I always loved being creative – it’s just the way my mind works. The more you create, the more creative you can become. Crayons were a passion of mine in my early years. Then, I discovered inks and later moved on to batiks. Maybe it’s really a passion for color!
ST: Your expertise on mediums run the gamut- from air-dried clay to wire! Perhaps you can share a bit about these and how you learned them. What was your motivation?
CH: My high-school art teacher told our class that if we wanted to be artists, we had to “eat, drink and sleep art”. He taught us about many different art mediums and the basics of fine art. He also taught us not to be afraid to explore and try new mediums.
Although I naturally understand how to work in many different mediums, there are some mediums I wanted to learn more about. I have taken photography classes and stained glass classes which helps me understand the basics on which I can build my knowledge.
My motivation is simple. I was born with a natural talent and drive. Having clients is also a major motivator. The more you know, the more you can bring to the table when working with a client.

Learn to create paste paper in the summer edition of Bella Crafts Quarterly
ST: Who encouraged you to be creative?
CH: My parents always encouraged me to be creative, as well as my art teacher. But, the friends I had throughout life were also encouraging – and still are.
One of the reasons I joined CHA was to be with other people like myself. I met so many wonderful craft designers, craft professionals, editors, publishers, manufacturers and the association’s staff. The four owners of Bella Crafts Quarterly™ are all CHA design members and that is how we met. If I never joined CHA, I would never own a craft magazine today.
ST: On top it all, you are also an author. Writing about art is so important for your own sake and for others. What are your writing outlets?
CH: As a professional craft designer, contributor to national craft magazines and editor of my own magazine, I am writing most of the day. Many times I am writing craft instructions for my clients, but I also write design-team or other craft-business related handbooks. I also write style guides for client manufacturers. These guides determine how other writers, who contribute their written work to my client manufacturers, will write their instructions.
Since I am the lead of the Standards Committee of the Design Section of CHA, I am acting as an editor to produce a Designer Handbook for our section. This project has been two years in the making and should be published soon. The handbook is only available to CHA Design Section members.
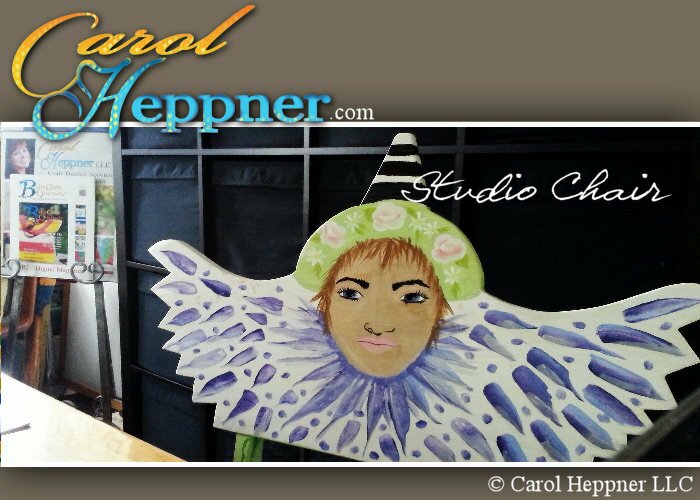
Studio chair by Carol Heppner LLC
You will read about my hobby later on in this interview. I record my findings in an entertaining, yet factual manner. This research is compiled into a book, which is then given to family members.
ST: When you develop an idea what is your creative process like? Do you try things out with all the different kinds of materials and techniques? What are some favorite tools you like to use when creating?
CH: The type of project I need to create usually dictates how I develop the design. The majority of the time, I “see” the final project in my mind, as well as the steps I need to take to create the project. I then just gather the materials and complete the project.

Carol Heppner’s
Clay Chic – Polymer Clay Necklace
Normally, my clients tell me what product they need to be used in a project. I will talk to them about the different ideas I have and they pick the project just from our conversation. They never see drawings or graphics of the project before it is completed. They trust my judgment.
Once or twice, I have had to draw a sketch for a client because they had to discuss it within the company, but that doesn’t happen often.
Because I work alone as a craft designer, I do not discuss my client’s projects with others. So, I am really working alone with my client. Now, once the project is published, then I help promote it on my social media platforms.
My favorite tool that I use is not made from plastic or metal. My favorite tool to use is my imagination. It is the most important tool when creating artwork for yourself and for others.
ST: What are some other hobbies or interests you like?
CH: You may think that with all that I do that I have no time for hobbies. But I research my family history. I have a cousin in Italy who is a historic architect and we have been working on our Lopetrone family history for years.
I was able to trace my Lopetrone branch back to the 1700s and then he was able to trace my branch back to the 1500s to the great grandfather of all Lopetrones. Once my family branch was connected to my great grandfather, I felt grounded. It was a wonderful feeling to know the names of everyone that came before me.
Because the Lopetrone family is such a small family, it is easier to trace our history than other family surnames. Some of us have come together to create a universal Lopetrone Family tree. All those with the Lopetrone name are cousins. We have our own Facebook group so we can connect with family who are living around the world.
ST: Wow! That is quite impressive that you have been able to trace your family heritage so far. How gratifying and special that is! What’s your choice of medium, at the moment? Hmm, I wonder why.
CH: I have a passion for batiks and photography. Nowadays, my focus is on jewelry making and accessories because I create those type of projects for Bella Crafts Quarterly™. I like making things that are useful.

Fabric painting and batik by Carol Heppner LLC
You didn’t ask, but you may be surprised to learn that I really don’t like using oil paints. Crazy, right? I will use them only when I have to use them. The reason why they are not my favorite is because the way they feel when I am using them. I cannot feel the resistance of the canvas, which for some reason, isn’t pleasing to me.
ST: It never would have crossed my mind that you don’t like using oil paints! Carol, you are full of surprises. What is your studio environment like?
CH: My studio is right across from my bedroom. And, yes. I do get dressed up when I go to work. It helps me feel professional. That is important when you are talking to a client.
I have a screen door on my studio so it can be closed but I can still feel as a part of my house. The studio is filled with products that manufacturers send to me to use. I have fabric boxes for each client manufacturer. That way, when I need their product, I know just where to grab it.
The chair at my desk is a fun project that my husband and I did a few years ago. I wanted something whimsical because I want to smile when I walk into my studio. He helped cut the wood for the back of the chair. I purchased the chair at a thrift store and it was in very bad condition. I painted the chair, changed the back and then upholstered the seat in faux leather.
I have some of my artwork around the room because it gives me a sense of accomplishment. In fact, I made this doll when I was very young. She sits in my studio and I can remember the very day I made her. I didn’t have many craft supplies when I was young, so she was made with a lot of imagination.

Primative doll by Carol Heppner LLC
ST: Thank you Carol for sharing so much with the Scribblers! Just keep on doing what you do! And we’ll leave the Scribblers with your inspirational creative thoughts.
Carol Heppner’s Creative Thoughts
When most people think of creativity, they think of arts or crafts. But I have always felt that creativity manifests itself in many different ways. It’s the way you comb your hair, the way you dress or arrange your room. It’s the way you teach and the way you inspire others.
The person who is writing code for a computer program is being creative and so is the person who is making dinner tonight. How much creativity you add to whatever you are doing is up to you. But remember, creativity is just like anything else. The more you use it, the better you get at it.
CHA’s foundation has a wonderful program that is reaching out and getting everyone interested in crafting. Make sure to check their website out at Cre8time.com. You will be inspired by all the great crafts you find there. You can also make your mark by uploading some of your work there as well.
Also, our goal at Bella Crafts Quarterly™ is to inspire others to create. In keeping with our goal, our digital copy of the magazine is free to download. There are many great projects for crafters and craft-business advice for craft professionals.
Thanks so much for asking me to be part of this Scribble Town interview!
Visit the Scribble Shop to get started on making your own crafts!


 by Georges Seurat") A Sunday Afternoon on the Island of La Grande Jatte (1884-86) by Georges Seurat
A Sunday Afternoon on the Island of La Grande Jatte (1884-86) by Georges Seurat by Paul Signac") The Papal Palace, Avignon (1900) by Paul Signac
The Papal Palace, Avignon (1900) by Paul Signac

 Photo:
  Photo:
  Photo:
  At first I simply started with the orange marker at the center and started to scribble on the paper. Before I knew it, I was drawing a rose!