Scribble Artist Interview with Sharron Parker!
Scribble Town (ST): When Andi, aka Chief Scribbler, met Sharron Parker at the recent Architectural Digest Home Design Show in New York City she was amazed at how felt could be manipulated in such amazing ways. We are lucky to have Sharron share with the Scribble Blog about her craft. Sharron, where are you and what are you up to these days?

Sharron Parker's display at Architectural Digest Home and Design Show NYC 2013
Sharron Parker (SP): I live and work in Wake Forest, North Carolina, in an old stone mill on the Neuse River. Since the mill was once a textile mill, I feel I am continuing that tradition with my textile studio there.
ST: Not only are you continuing the tradition, but to be surrounded by such beautiful nature explains how your fiberworks resemble your environment. When did you start creating with felt and what piqued your interest?
SP: After being a weaver and trying other textile techniques, I discovered handmade felt over 30 years ago, when I saw 2500-year-old pieces of felt that had been found in Siberian tombs. I learned that the technique is the oldest way to make cloth, dating to the Stone Age. Basically, you shrink and lock wool fibers by using moisture, heat, and pressure. Nomadic people did things like dragging the wool in a roll behind their horse, but I just press on the wool in hot water in my sink or bathtub.
ST: I’m so interested in your fiber technique! You explain it really well here, but we are eager to learn more.

Step 5 in Wet Felting by Sharron Parker
SP: This is called “wet felting” and is different from “needle felting” where you use barbed needles to tangle fibers – which I do occasionally. I work with dyed, unspun wool or roving since I like to work with color. It’s something like “painting” with wool: I comb and layer several background layers, and then arrange the dyed wool wherever I want, often in thin watercolor-like layers. Lines can be created by using wool yarns, and more texture can be achieved by using wool curls, etc. After making a piece of felt, I can stitch more onto the surface, sew pieces together, etc.

Raku Flight I for Merrimon by Sharron Parker
ST: On your website you have a picture of yourself and a tiger. Is that real?! It’s a beautiful picture and we’d like to know more about it.

Sharron Parker's Tiger friend
SP: The tiger photo in my artist profile was taken when I was a volunteer at a tiger rescue preserve; I had been bottle-feeding a baby tiger for several weeks. Maybe not surprisingly, tiger-like stripes appeared in my work after that (see Madagascar Moth detail).

Madagascar Moth detail by Sharron Parker
ST: Wow! With such adventures in life you are sure to find inspiration around every corner. Is there a particular place or environment you find yourself feeling really inspired to create? The categories on your site are Earth, Light, Living Things, and Color. Perhaps these are a window to your points of inspiration.
SP: Ideas come from lots that I see in the world around me – rocks, shells, bird wings (see Raku Flight), flowers (see Rose Petal Screen), sunsets, and more. And, of course, the river and rapids right outside my windows. The view of trees outside my window, and the river mists behind them, can be seen in the triptych Intertwined.

Sharron Parker's intertwined felt
SP: For those who want to try wet felting, there are a number of books available. Or my specific techniques can be seen on a DVD called Teach + Learn, Volume 2, available through the Surface Design Association. My website “News” also lists workshops I will be teaching.
ST: Thank you Sharron! Nature in itself is a point of inspiration and your artwork add to the cycle. To get started with your own felting supplies please go to Scribble Shop.

Rose Petal Screen by Sharron Parker


 Photo:
  Photo: Cupcakes and Cashmere
 Photo:

 Next, use the sequin pins to pin the sequins to the ball. To do this, simply push the pin through the center hole in the sequin.
 Alternate colors of the sequins as you go around the ball.
 Continue working your way around the ball until it is completely covered in sequins. Tie the wire ribbon to the pipe cleaner letting the ends fall to either side. Using Puffy Paint, write “Happy New Year” and “2012″ on the Ribbon ends.
 Twist the top of the pipe cleaner to make a loop.
 Hang up and enjoy!
 To start, all you will need is a piece of paper and a pair of scissors.
 First, fold the corner of the paper into an isosceles triangle (two equal sides).
 Cut the remaining rectagluar piece off so that you have a square piece left over when you open up the triangle.
 Refold the square into a triangle.
 Fold in half again to make another triangle.
 Imagining that your triangle is split in thirds, fold the first third over towards the center.
 Next fold the opposite third over so that the points overlap.
 Cut off the top (the points) at an angle, making sure to cut it so that all the layers are equal.
 Cut into the folded sides to begin making your snowflake.
 Get creative- cut out different shapes of different sizes and angles. Hint: For more intricate cutting, use cuticle nippers to make a more precise cut.
 Unfold your finished snowflake to admire your work. You can glue your snowflake to a piece of colorful paper or string onto monofiliment and hang up near a window.
 Enjoy!
 These cut-out pieces make great confetti!
 The wreath is easy to make, and fairly inexpensive! Once finished, this is sure to be a favorite in the household as guests and your little ones can grab a tasty treat!
 - 3 14oz bags of wrapped candy (peppermints, strawberry suckers, butterscotch)
- Wire Wreath
-Ribbon
-Scissors
 Continue to work your way around the wreath tying the candy pieces as close or as far apart as you like. Keep in mind, the closer the candy pieces, the more you will need.
 When you have completely covered the wire wreath with candy pieces, you can either leave the ribbon strands straight, or do as I did and curl the ribbon pieces using the flat edge of a scissor. To do this simply hold the ribbon taut between your thumb and the edge of the scissor and pull from the base of the ribbon the end. Viola- a perfect ribbon curl!
 Next, make a decorative bow using 2″ ribbon. Hang up, and enjoy!
 This craft is so cute to see in the home! To get this activity sheet, just click on the image, download and print!
 This craft was fun to make and it will be an easy activity to do with your kids!
 While the beans dry onto the plate, make leaf rubbings with your leaves and paper by following the instructions found in our Fall Family Tree craft.
 Glue “leaves” onto the green stick.
 Display somewhere festive for all to enjoy!
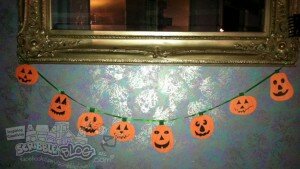
 This Pumpkin Garland is easy to make, super cute and leaves plenty of room for your little ones to get creative with the Pumpkin faces.