Search This Blog!


Email

Scribblin’Spiration

As the new school year settles in and everyone begins to adjust to their routines, it seems like a good time for a dose of creative stimulation. With the loss of summer’s freedom, it can be tough to find time for scribbling, but fear not! Your next scribblin’spiration is here and this time it is… autumn leaves!


What better time to embrace the change in seasons and use them for our artistic gain? The beautiful changing foliage is all around you, providing inspiration each day. You might take this inspiration literally and focus on drawing trees and leaves. Go to a local park or look in your backyard for a great landscape sketch. Collect leaves to study, press, or trace. Or use them as a starting point to create something different, abstract, or even unrelated.

Colors of Autumn

photo by Pantone, via Plenty of Colour


The beauty of inspiration is that it can take you anywhere—different qualities of the leaves can stimulate your mind, perhaps even an image or association you have with them may arise.


There are so many elements within changing foliage to find inspiration; one of the most noticeable is certainly color. The rich greens, golds, reds, and oranges create a glowingly warm palette for the season. Try using these hues as a jumping off point for your project or picture.

 Autumn Trees

photo by Corbis, via The Guardian


Another interesting quality of leaves is their shape—each type of tree’s leaves boasts a different figure and you can find all shapes and sizes on the ground. Experiment with the scale and design of leaves to inspire your creation. Also consider large-scale shapes, such as whole trees or forests. How are trees’ shapes affected as the leaves begin to fall?

  Different Autumn Leaves

photo via Fermilab Today


Finally, don’t overlook texture. The green leaves emerge from summer smooth and supple. As autumn advances, those leaves become dry, brittle, and crunchy. Play with surface and touch in your work to explore this element.


What images or ideas to changing leaves bring for you? See how they influence your art all season long. All you have to do is peek outside your window for a dose of inspiration!


Print

Scribble Artist Interview with Xavi Carbonell!

Scribble Town (ST): Stories come alive in your imagination when you look at the paintings of Xavi Carbonell, an artist from Spain.  Let’s meet Xavi and learn how he creates these beautiful story builders!
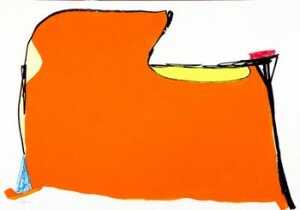
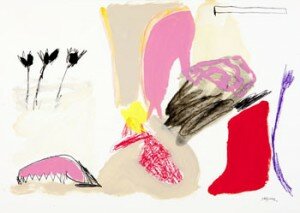
Untitled, 2012 Mixed media on paper 26 x 40 in (70 x 100 cm) XC1361

Untitled, 2012
Mixed media on paper
26 x 40 in (70 x 100 cm)
XC1361

Xavi Carbonell (XC): Hi my name is Xavi Carbonell, I am 42 years old, live in Alcoi, Spain with my wife and two daughters.  I am a full time artist. have exhibited in various countries in Europe, Africa and the United States and my work is in many international collections.   I am often described as an Abstract Expressionist, and infantile painter.  Infantile is a genre not well known in the US, but it means my work reminds the viewer of a child’s work, but remember making something look simple is usually the most complicated task!

ST: Where are you and what are you up to these days?

XC: I am currently in New York City, painting and preparing for an art fair with my gallerist later this summer.
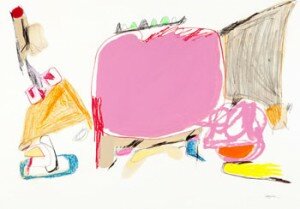
Untitled, 2012 Mixed media on paper 26 x 40 in (70 x 100 cm) XC1404

Untitled, 2012
Mixed media on paper
26 x 40 in (70 x 100 cm)
XC1404

ST: That’s exciting!  Your days are spent with filling canvases with color.  Sounds like a wonderful summer, but I’m sure it’s quite a lot of work too.  When did you start painting?

XC: I started painting when I was 20 and was inspired after seeing works by the Spanish Artist, Antonio Saura in a museum exhibition.  At that moment I realized I wanted to paint and create my own path.

ST: It’s pretty remarkable how those unforeseen moments in life realize the paths we take.  Similar to you stumbling upon Antonio Saura, is there a way that you run into inspiration?  Where do you find your spirit to create?

XC: I am most inspired to create in NYC, the city has such a powerful energy.  The process of creativity is difficult to describe, but I find it’s often a result of new experiences, travel, meeting new people, but at the same time when I am in front of a blank canvas it just guides me.
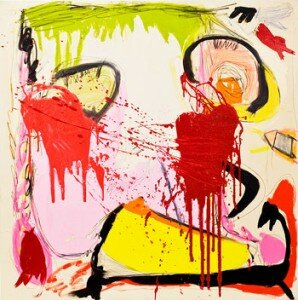
Untitled, 2013 Mixed media on canvas 48x 48 in (120 x 120 cm) XC2403

Untitled, 2013
Mixed media on canvas
48x 48 in (120 x 120 cm)
XC2403

ST: Since your paintings are so narrative for me- I start to hear a soundtrack that goes along with the picture.  Do you ever listen to music when you paint?

XC: There was a period when I exclusively listened to classical music, then it was Jazz, and lately I don’t listen to much music while painting.

ST: Your paintings are so vibrant and strong from your choice of shapes and colors that I make up my own story when I see them.  My imagination just takes off!  Is there a story you are building in your head as you paint?  Is that why you title your pieces Untitled- as to keep the mystery and openness available for all viewers?

XC: Yes, there’s a story in my head and that’s exactly why all my pieces are untitled.  If I use a title, the viewer is pre-conditioned to see something.  I prefer the viewer to create their own story, as I think that’s more fun and I want each person to see what they want to see in my work.

ST: It’d be interesting if you had a book next to your paintings and you could have the viewer write down the story that comes to mind when they see your paintings.  You’ll get loads of different responses!  That leads me to other mediums- what are some other forms of art you practice? Do you ever mix other mediums with your oil pastels?

XC: I have worked in the performance genre, and I love to cook which is a creative outlet.  My concept of mixed media is based on oils but I also include, magic markers, chalk, colored pencils, oil sticks and charcoal.
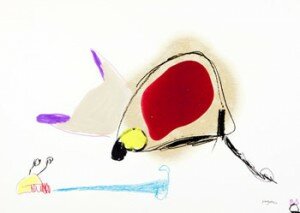
Untitled, 2012 Mixed media on paper 19.75 x 27.5 in (50 x 70 cm) XC1441

Untitled, 2012
Mixed media on paper
19.75 x 27.5 in (50 x 70 cm)
XC1441

ST: Painter Joel Garten mentioned to me that you had once said your work is influenced by childrens art.  I am interested to know more about his comment.

XC: I am very inspired by the imagination of children and how they execute the concept on paper.  I am always fascinated by how you can have a conversation with a child on paper with out actually using words.  The innocence of children is the most exciting as adults unfortunately rarely preserve that quality.  It’s something most of us sadly just lose along the way.

Kids, never lose your innocence.  Adults, if you feel like you have lost it, try hard to find it in yourself as it’s the best part of each of us.

ST: With that said let’s try Xavi’s drawing exercise.

XC: One exercise is to draw with your eyes closed.  For instance draw a landscape from memory, but remember to keep your eyes closed!  You’ll be amazed with what you can create.

ST: Scribblers, send in your drawings to and we can post them on the Scribble Blog.  Thanks Xavi for sharing so much with us!  To see more of Xavi’s work you can go to http://www.artangler.com/Carbonell.html.

Untitled, 2012 Mixed media on paper 19.75 x 27.5 in (50 x 70 cm) XC1463

Untitled, 2012
Mixed media on paper
19.75 x 27.5 in (50 x 70 cm)
XC1463

Print

Scribblin’Spiration

Yesterday, I went to the movies and saw To The Wonder, directed by Terrence Malick (Tree of Life, Days of Heaven). Malick is probably best known for his gorgeous cinematic poetry. He uses beautiful camerawork to showcase the natural beauty of our world (and sometimes our destruction of it). One element of nature that he seemed to really focus on in this movie was water. Oceans, puddles, rivers, indoor pools—this film was swimming in shots of water, each more beautiful than the last.

Still from To the Wonder (2012)To the Wonder (2012) – photo still

As I watched this visual theme develop, I started thinking about taking it beyond the theater with me, which makes it our new Scribblin’spiration! Water can take on so many forms and appearances. Sometimes it looks blue or green or gray… other times it’s clear. From far away, it seems opaque, while up close it’s transparent and can distort whatever you’re seeing through it. It can be in a natural body, like an ocean or river, or it can be in a pool. It could be running from a faucet or waterfall, or just sitting in a glass. Sometimes it’s still and tranquil while other times it’s rough and choppy. And that’s just in its liquid state! Don’t forget ice, steam, and fog! But for now, let’s focus on liquid. While seeing water is a pretty common occurrence, it still makes a fascinating subject for art.


Now it’s your turn. Try out your own artistic interpretations of water by observing a couple different examples. Go out to nearby river or pond. Take along a sketchbook on a trip to the beach. Check out some puddles after a rainstorm or just fill up a glass of water. Try working with pencil, pastels, paint, and watercolors. See how each medium changes the way the water looks and the mood of your picture.


Here are some artists’ own interpretations to give you an idea of how different water can look from one painting to the next. Have fun experimenting and don’t forget to share a link to your work with us!

Starry Night Over the Rhone (1888), Vincent Van GoghStarry Night Over the Rhone (1888), Vincent Van Gogh

Portrait of Artist (Pool with Two Figures) (1971), David HockneyPortrait of Artist (Pool with Two Figures) (1971), David Hockney

Lemon Water (2010), Debbie Becks CooperLemon Water (2010), Debbie Becks Cooper


Print
Posted by , on May 4th, 2013 at 2:31 pm. No Comments

Category: adults,kids Labels: , , , , ,


(Extra)ordinary

Call me crazy, but lately it seems like Q-tips and flowers are a crafting match made in heaven. Q-tips make a great, inexpensive alternative to paintbrushes, especially for little hands and their texture is perfect for creating beautiful dandelion paintings. They also present the perfect opportunity to show how what’s ordinary or even a nuisance to some can be beautiful to others.

Take dandelions—technically, they’re considered weeds, but both species (the yellow florets and the white seed heads) are so pretty. And how fun is it to make a wish on the white seed heads and blow on them so the little white fibers sail off into the wind? Well, when you do that, you’re actually just helping to spread the seeds and grow more weeds! But what’s pesky to some is beauty to others.

Q-tips don’t get a great wrap either. They’re a bathroom accessory that’s mostly used for make up or nail polish cleanup.  Q-tips aren’t often given much thought and are usually hidden in a drawer or dressed up in a glass dish. But these little guys can also make a great art tools. And when you combine them with dandelions, these two outcasts can make a beautiful painting.

To create your own dandelion painting, grab some Q-tips and white paint. Now, there’s a lot of room for interpretation here. You can either start with a blue piece of paper or take white paper or a canvas and paint it blue. You could paint a scene, such as grass or a field, or leave it plain. If you painted, wait for the background to dry thoroughly. Next grab a Q-tip and dip it in white paint. For a simpler interpretation, just start making dots. Create a cluster of dots for the flower’s base and then trail your dots off to represent the seedlings blowing away. Finally, add a black or green stem with paint, charcoal, or crayon… whatever you prefer. If you want to get a little bit fancier, you can use lines and dots to create your dandelions. Draw lines coming out of a central point to create a sphere and then add the dots to the end of your lines. This will give your dandelions a full, round look.

Photo: “Fly Away Dandelions,” Artsonia

There are no mistakes here. Experiment in making your dandelions however you like. As long as you have a Q-tip with white paint and a surface to paint it on, you’re over halfway there. It’s important to remember that the ordinary can be extraordinary and you have the power to make that transformation every day!

Photo: “Light Blue Wishes,” SVPPLY

Happy crafting and have a creative day!

Print
Posted by , on April 25th, 2013 at 4:05 pm. No Comments

Category: Arts & Crafts,Found Art,kids Labels: , , , , , , ,


Dot Dot Dot

Pointillism is a real nifty painting style for any budding art lover to acquaint him or herself with. Not only is it an interesting moment in art history, but it’s also a great technique to play with and explore in one’s own work. In this project, we’ll make our very own creations comprised of dots. It’s a wonderful way to explore texture and color. This project is suited for anyone and is a perfect mix of fun and education for kids. If working with little ones, supervision or assistance is strongly recommended since there is a flame involved (see below).


First, a little background: Pointillism is a painting technique pioneered by artists like Georges Seurat and Paul Signac towards the end of the Impressionist movement (late 1800s). The artist uses dots of color to create a larger whole picture. The connection our eyes make between each dot can create the impression of different colors and specific images. Pretty neat, huh? It’s similar to Impressionism in that the brushstrokes are visible and central to the aesthetic of the painting, but pointillism is more precise and controlled—you can see each dot. You may have seen these famous pointillist paintings:

A Sunday Afternoon on the Island of La Grande Jatte (1884-86) by Georges SeuratA Sunday Afternoon on the Island of La Grande Jatte (1884-86) by Georges Seurat

 The Papal Palace, Avignon (1900) by Paul SignacThe Papal Palace, Avignon (1900) by Paul Signac

It may look super complicated, but don’t let that stop you! You too can create your very own pointillist masterpiece! You’ll need: a canvas or sturdy piece of paper, a pencil, wax crayons (with the paper wrappers removed), and tea light candles. Ideally, you’ll want a lot of crayons—a couple shades for each color to add depth and make the dots stand out. For example, if you’re creating a blue sky, try using a dark, medium, and light blue.


Okay, let’s get started! First, take your pencil and lightly outline the picture you want to create—just big, general shapes… nothing too detailed. When you’re ready to start filling the picture in with dots, start with the background and work your way up to the foreground. Take a crayon and hold it about an inch over the candle flame.  Once it starts to melt, but before it drips, start dotting the desired section of the canvas. Leave some spaces so you can go back with another shade of the color. Repeat this process until you’ve worked through the section, then start with your next shade. The process is time-consuming, but I actually find it strangely soothing. The relaxed repetition of creating dots and seeing them slowly build a picture can be both calming and fulfilling. Also, don’t feel obligated to finish your whole picture in one sitting. Sometimes it’s better to take a break or even work on it over a few days.


Here are some great examples of homemade pointillist projects (click links for each blogger’s tutorial):

Pointillism Rainbow

Pointillist trees


Photo: Intellidance                                      Photo: Helping Little Hands


One good alternative to melted crayons is using acrylic paints and unused pencil erasers (the pencil acts as a great brush handle and the round eraser makes perfect dots). This creates a similar look, but avoids using a flame.

Pointillist person (pencil alternative)Photo: Classic Play

Once you have a feel for the general method, feel free to make it your own. Art is a wonderful combination of understanding established techniques and experimenting to make them your own. Happy dotting!

Print
Posted by , on April 18th, 2013 at 7:52 pm. 1 Comment

Category: adults,Arts & Crafts,kids Labels: , , , , , , , , ,


Secret Spy Art Supply

Did you know you could use art to be a secret agent? Well you can! With the right combination of supplies, you can make hidden messages and codes. You don’t need any training or fancy gadgets or powerful connections. All you need is white paper, a white crayon, and watercolor paints. Sounds pretty easy, huh?


Take your white crayon and write a secret message or draw a picture on the paper. Make sure to press firmly or go over it so that it really stands out. Can’t see it on the white paper, can you? Good. Now grab your watercolor paints and a brush and paint over your words or drawing. You can paint a picture, or one solid color, or a lovely abstract design. See how the crayon shows through the paint? Your hidden message is now visible… and beautiful, might I add!


Now, if you’re not in the mood to be a super secret spy but like the technique of using white crayon and watercolors, just make a pretty drawing or design for the fun of it! This simple trick creates a beautiful and unexpected look for a greeting card, wall art, or sketchbook page.


Never underestimate how far you can go with your basic art supplies. Many people find the white crayon to be useless, but these fun creations wouldn’t be possible without it! Give it a whirl and see what exciting pictures you come up with.

Hidden message with white crayonPhoto: A Little Artsy

White Crayon and Watercolor DrawingPhoto: Alisa Burke

Print
Posted by , on April 4th, 2013 at 6:04 pm. No Comments

Category: adults,Arts & Crafts,kids Labels: , , , , ,


The New Paintbrushes

When you’re in the mood to paint, what tool do you like to paint with?


Odds are you first thought of a paintbrush. I did, too. It’s certainly the easiest.


But sometimes a great way to stretch your imagination is to use other utensils, unlikely ones even, to get the paint on the paper (or canvas or cardboard).


Here’s a fun challenge for your next painting session: collect a whole bunch of household items (things you can get paint on, obviously) and make them your new set of brushes for the day.


Try things like: bubble wrap, Q-tips, yarn, plastic or old silverware, paper towel rolls, cotton balls, tin foil or saran wrap, and anything else you can think of!


Then have some fun! The freedom of working with tools that you can’t control as perfectly will result in wonderful, lively, imperfect designs. Enjoy the process of creating. See the different textures you can make. Try layering a little. See what happens!


But make sure you lay out some tarp or newspaper because there’s a good chance things could get a little messy. That’s part of the fun though, right?

Paper Towel PaintingPhoto: Casa Maria’s Creative Learning Zone

Bubble Wrap Painting Photo: Alisa Burke

Q-Tip Painting Photo: Make and Takes

Print
Posted by , on January 7th, 2013 at 4:44 am. No Comments

Category: Arts & Crafts,kids Labels: , , , , ,


Did you hear the big news?

Hi Scribblers!

I just wanted to make sure you hear the news- Scribble Shop has officially launched! Love to shop and save? Scribble Shop is your one stop shop for creative supplies! Take a look around- you’ll find everything from buttons to baking supplies, painting books to polymer clay and much, much, more!

Shop & Save today with promotional code: SHOP1211

Check us out to see what special discounts we have for you!


Print
Posted by , on December 1st, 2011 at 10:56 pm. No Comments

Category: adults,Arts & Crafts Labels: art supplies, craft supplies, discounts, , , polymer, sale, ,